

A class group is a bookable set of places inside one of your class types, for example Monday 4pm under Pre School. You can add groups quickly in the Setup Wizard, then fine-tune each group’s settings in Class Management.
Part A: Add a group in the Setup Wizard #
Step 1: Open the Class Groups step (0:00) #
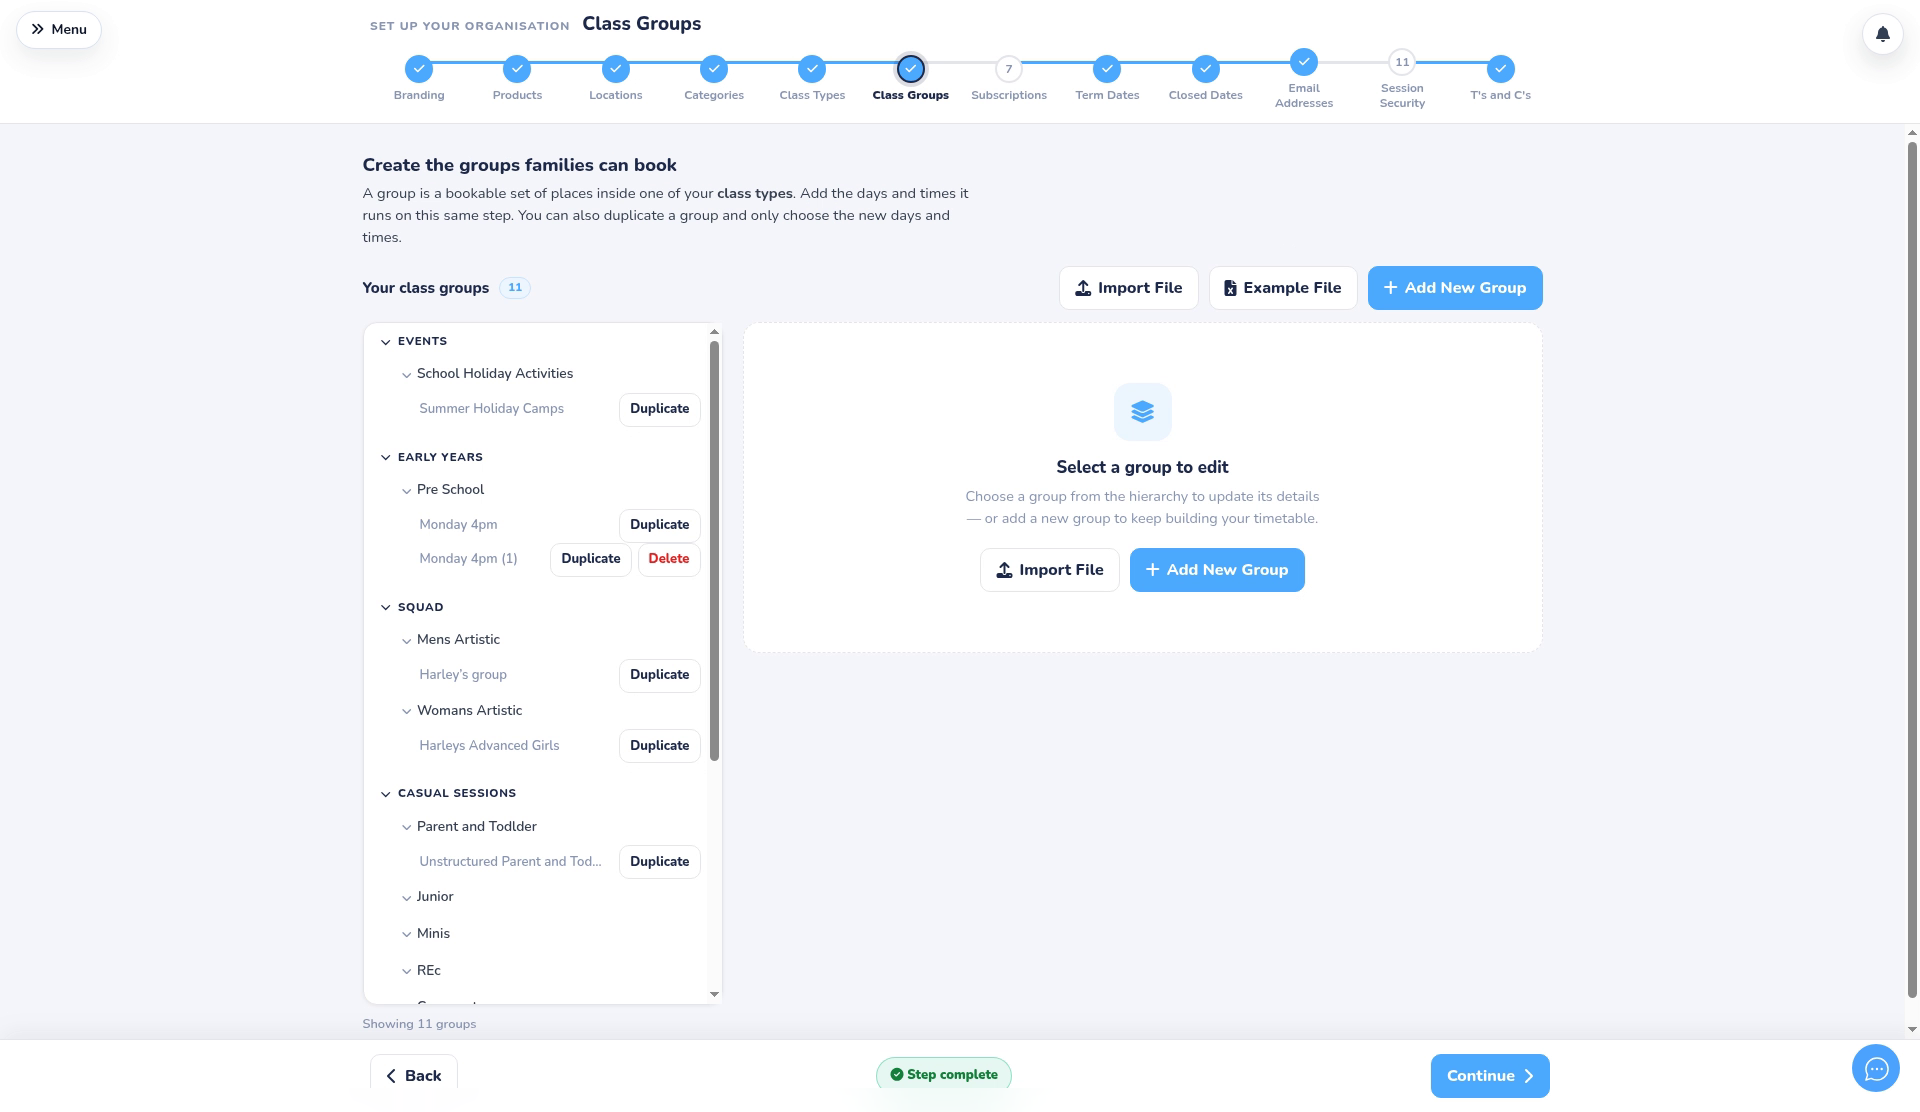
- Open the Setup Wizard and go to step 6, Class Groups. Your groups are listed under each class type.
- Click Add New Group.
- To add lots of groups at once, click Example File to download a spreadsheet to fill in, then upload it with Import File. Use Duplicate next to a group to copy it to new days and times.
Step 2: Choose the class type and payment (0:12) #
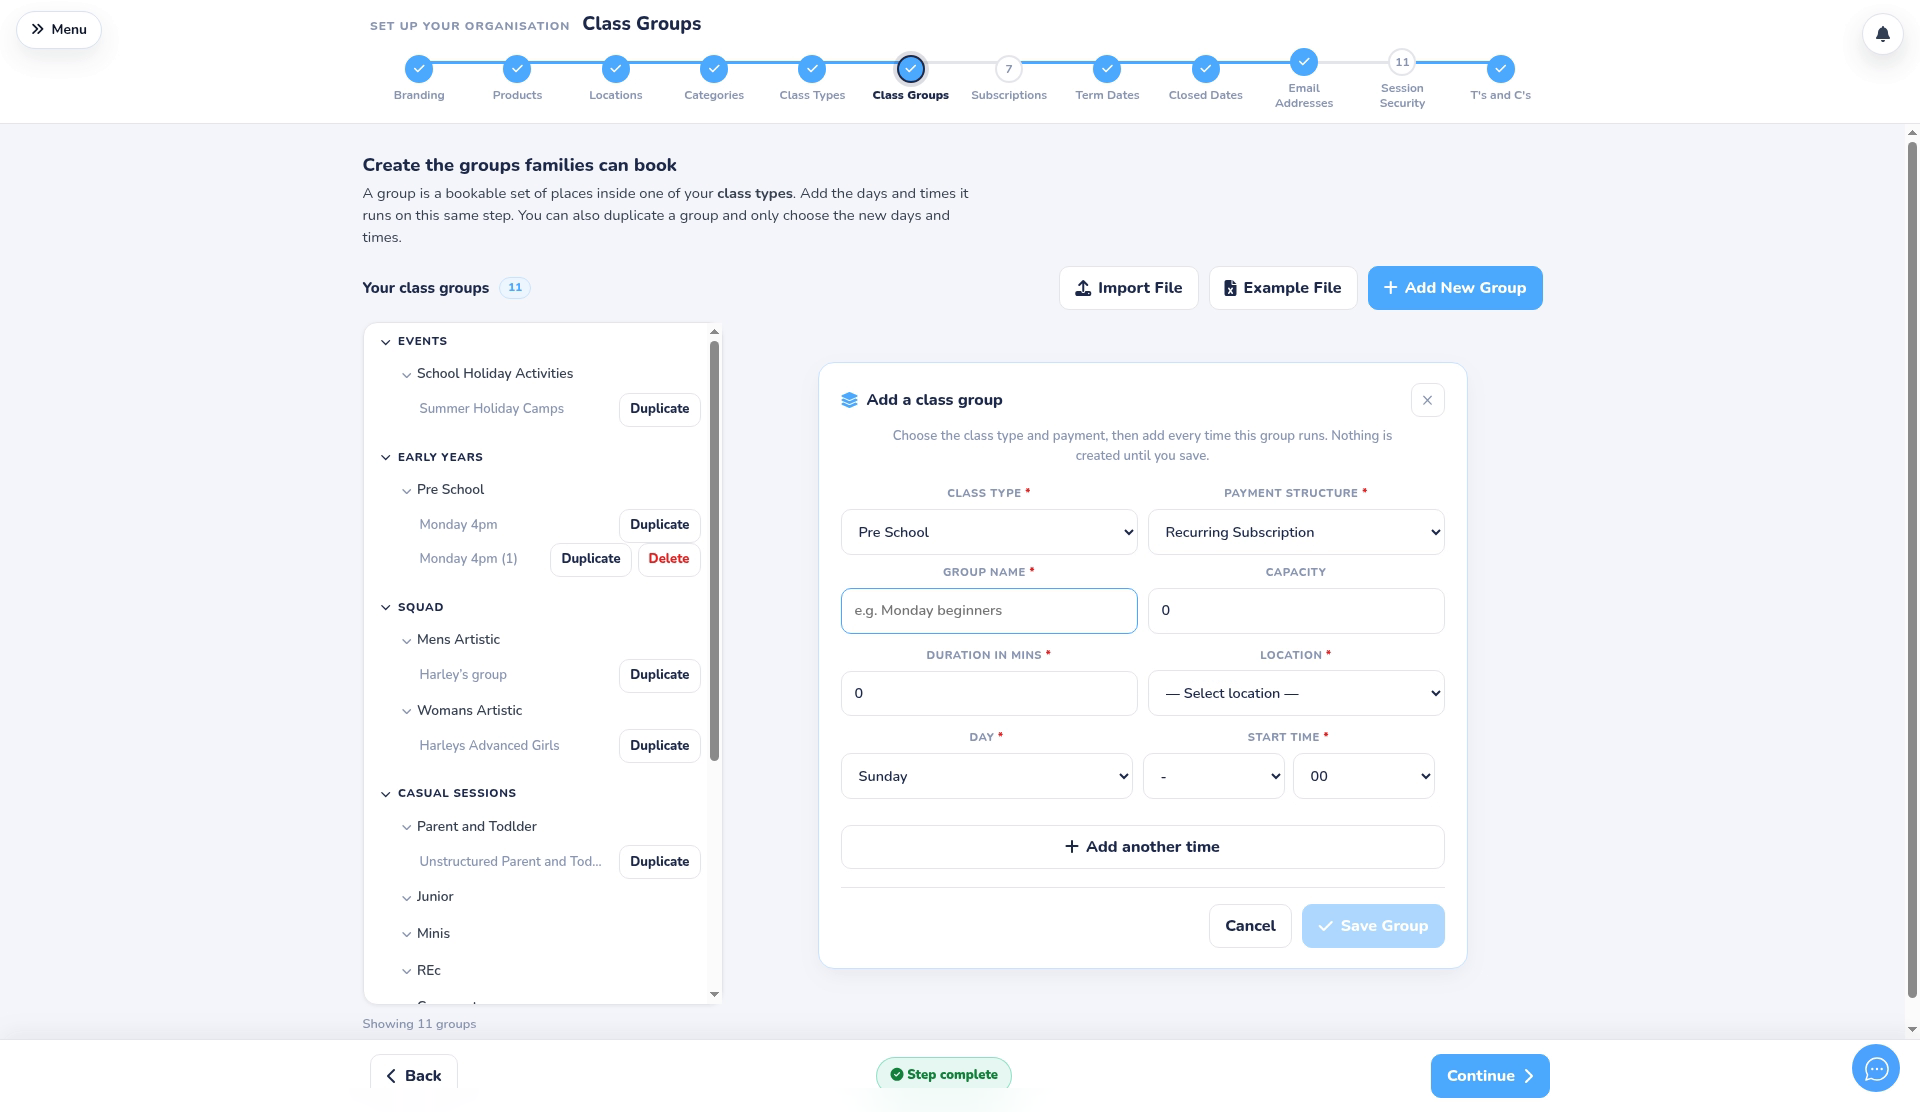
- Choose the Class type the group belongs to.
- Choose the Payment structure: Recurring Subscription, Term, Recurring PAYG or Multi Event.
Step 3: Name the group and add its times (0:35) #
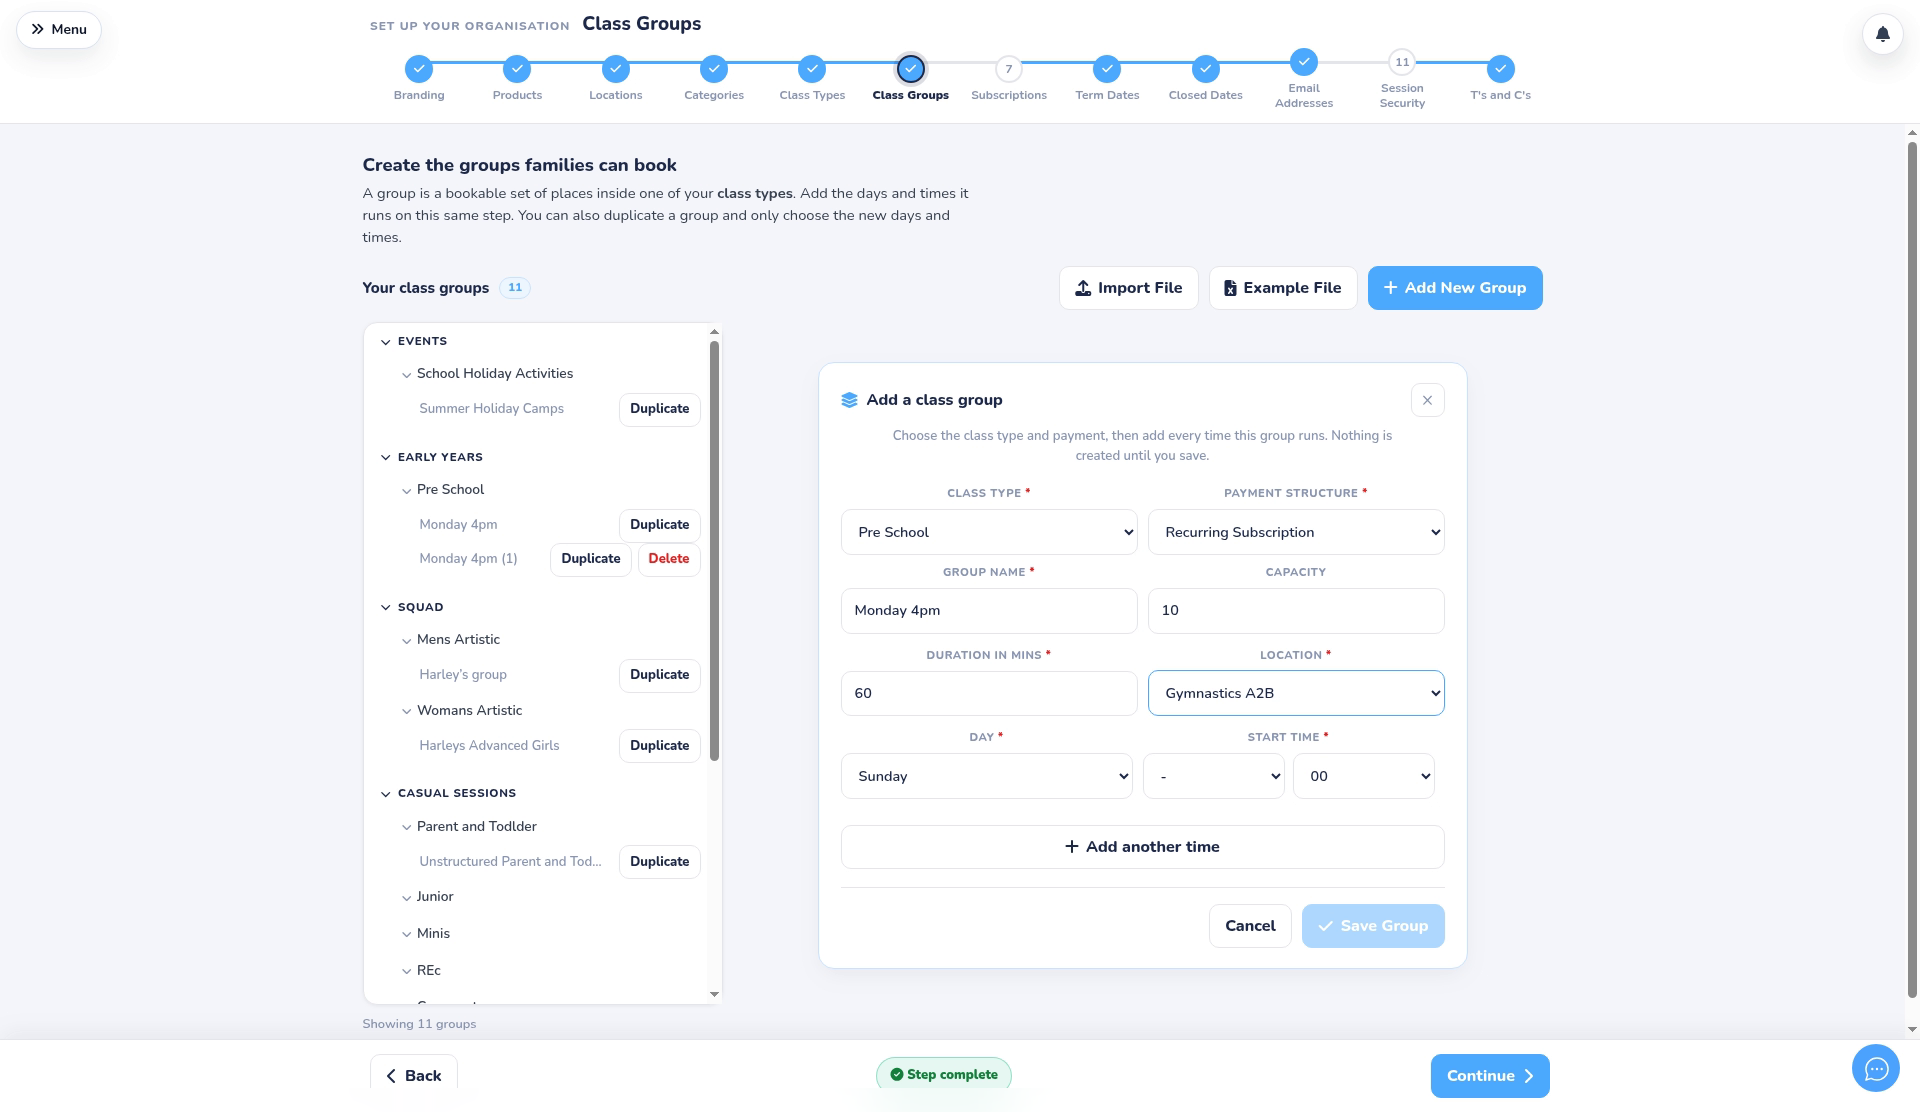
- Enter a Group name, such as Monday 4pm.
- Enter the Capacity (for subscription and term groups), the Duration in mins and the Location.
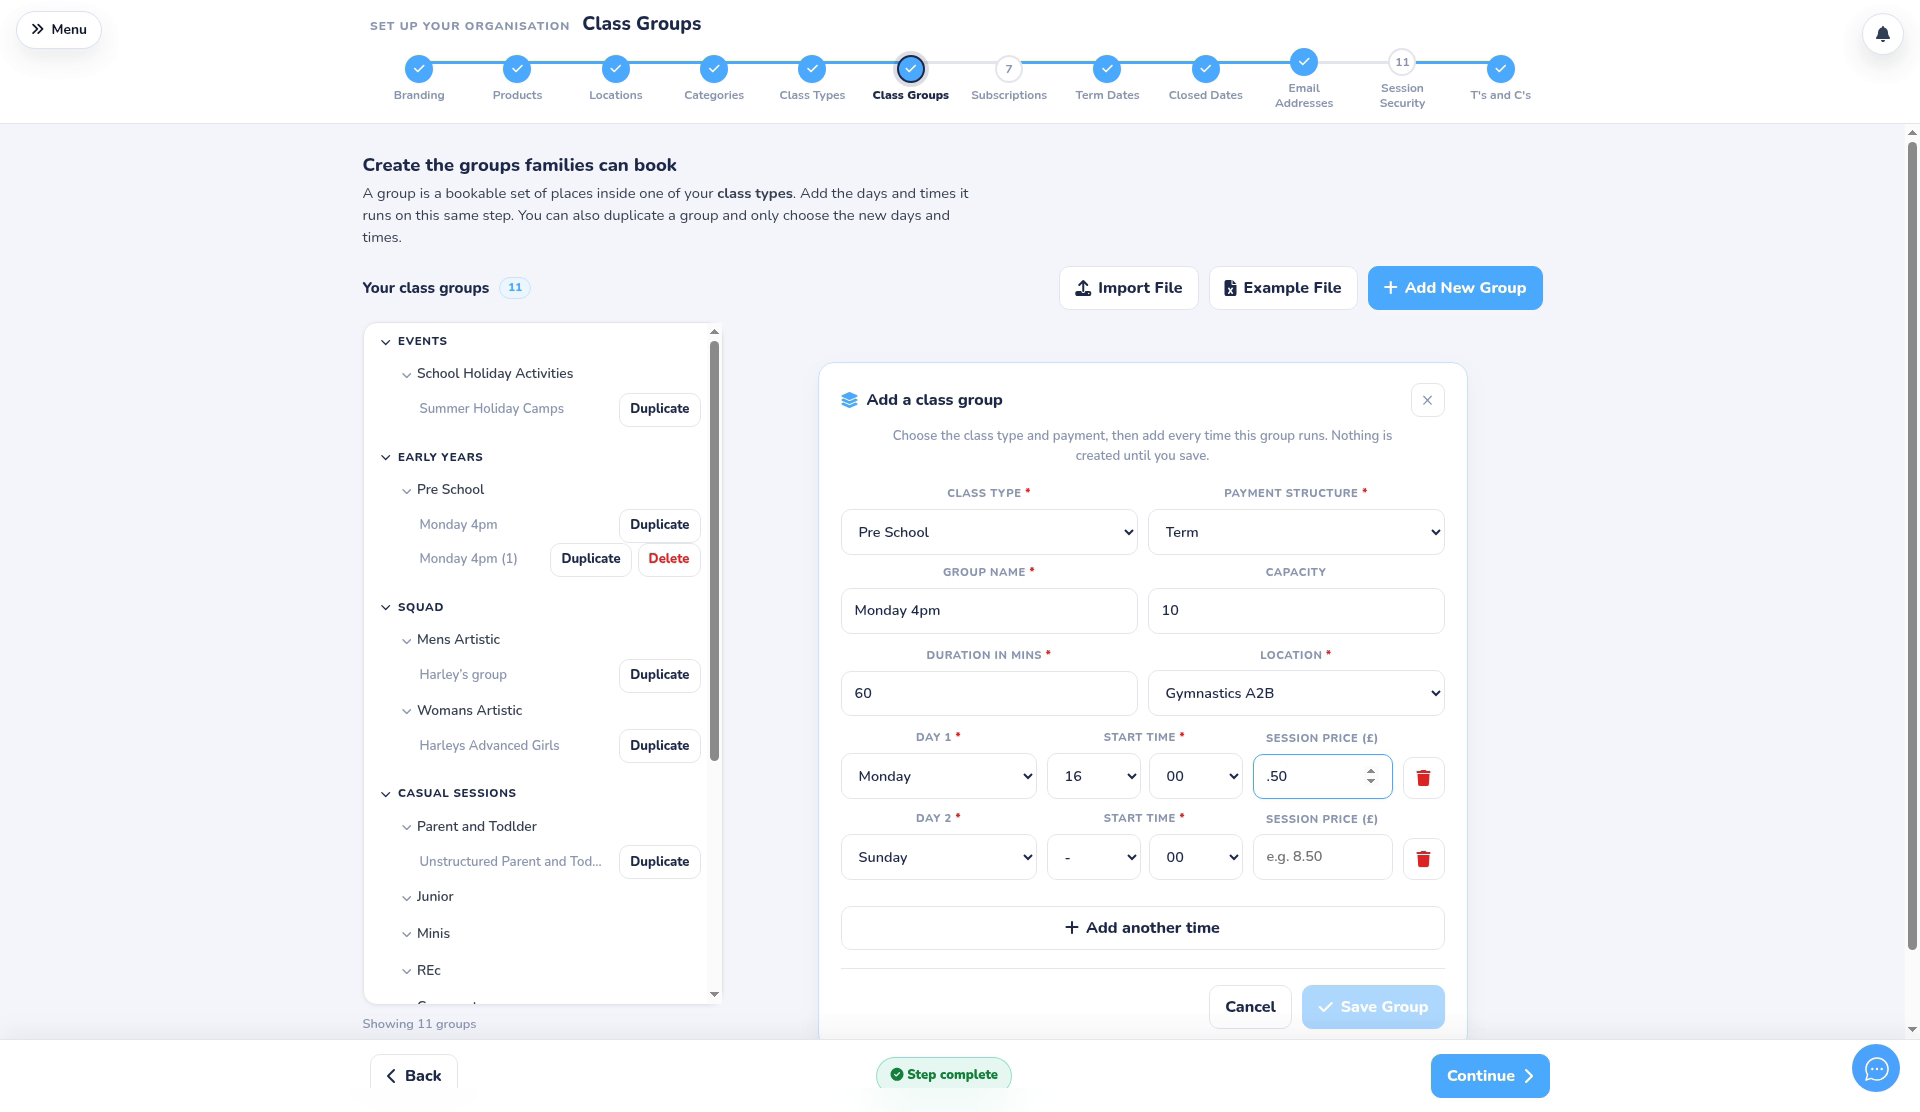
- Choose the Day and Start time. For Multi Event groups you choose a date instead. Click Add another time if the group runs more than once.
Step 4: Add prices and save (1:56) #
- For Term, Recurring PAYG and Multi Event groups, enter the price per session.
- Click Save Group. Nothing is created until you save. Click Cancel to close without saving.
Part B: More group settings #
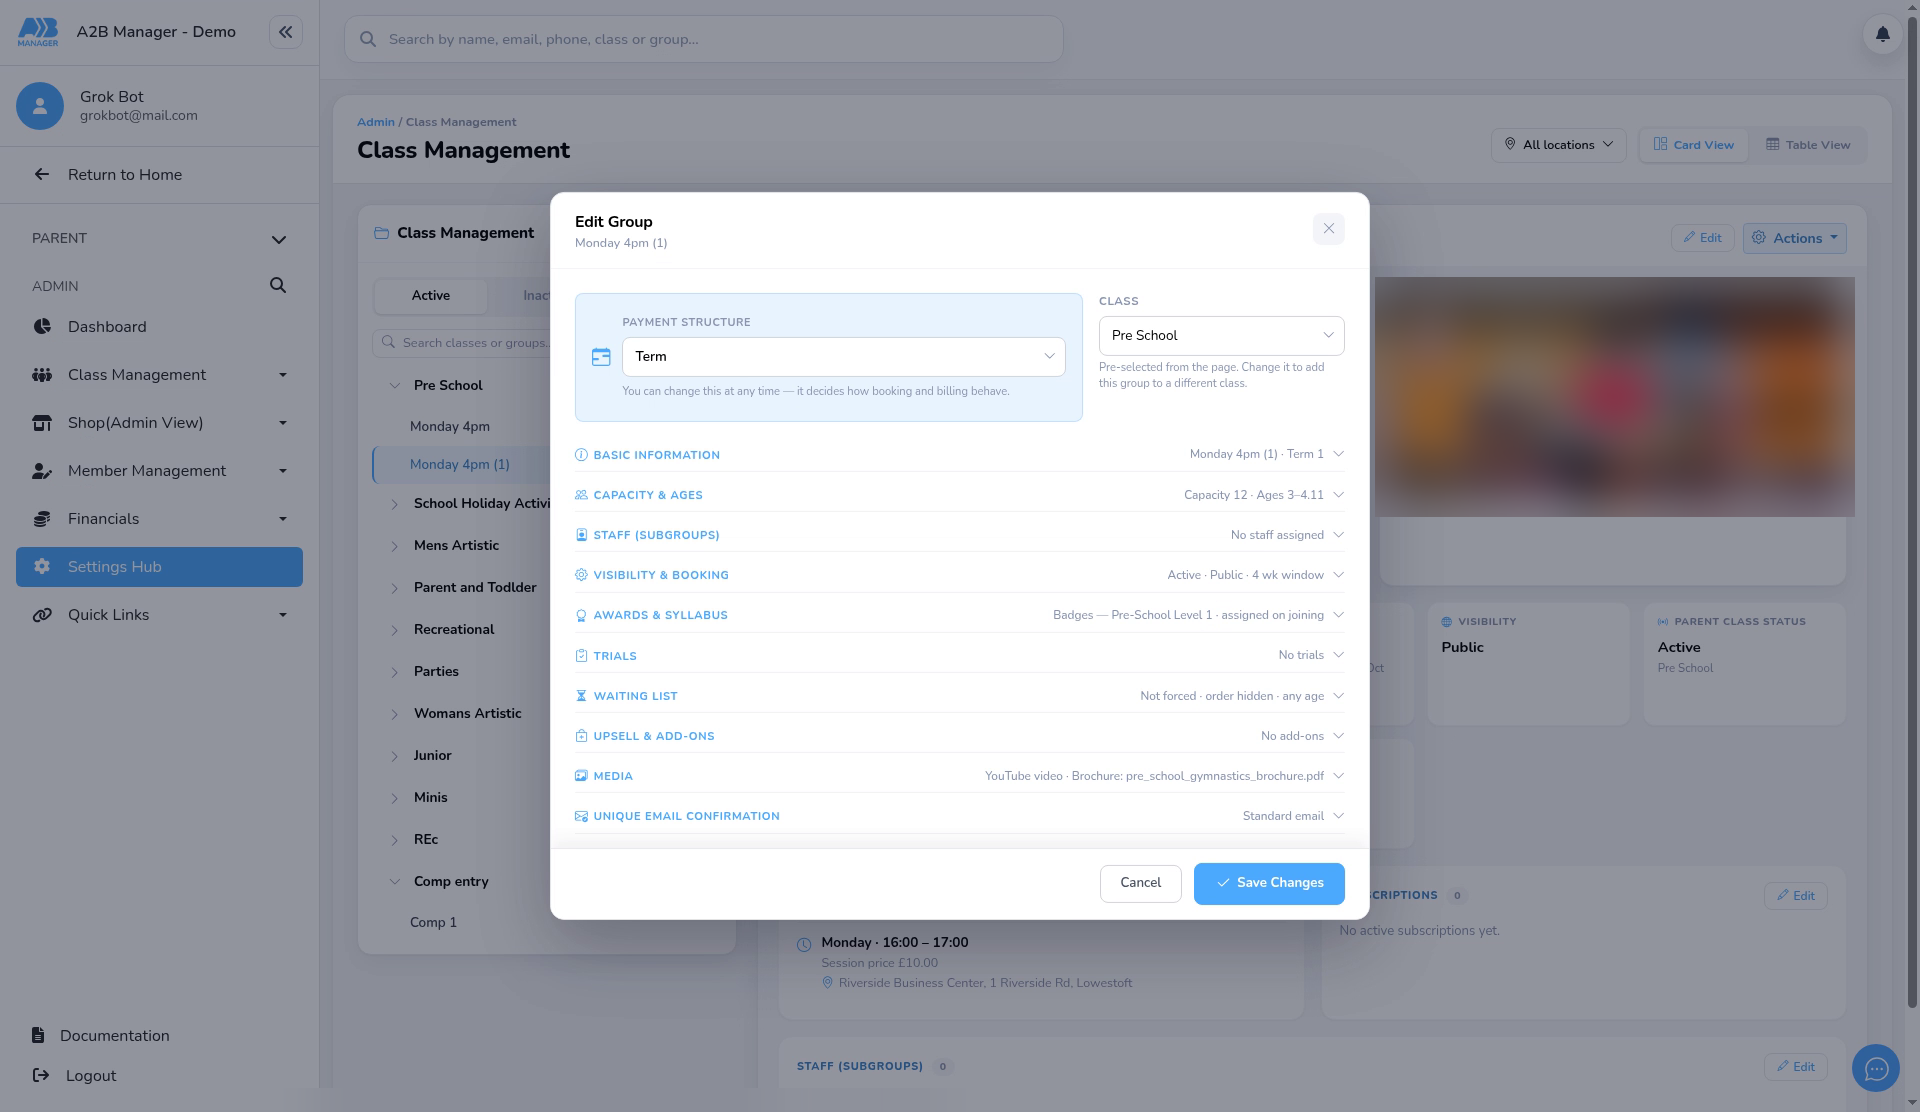
Step 5: Open the full group settings (2:22) #
- Go to Class Management > Classes, open the group and click Edit group.
- Choose the group in the list and click Edit.
- At the top you can change the payment structure, the class, the group name and the long description.
Step 6: Capacity and ages (3:22) #
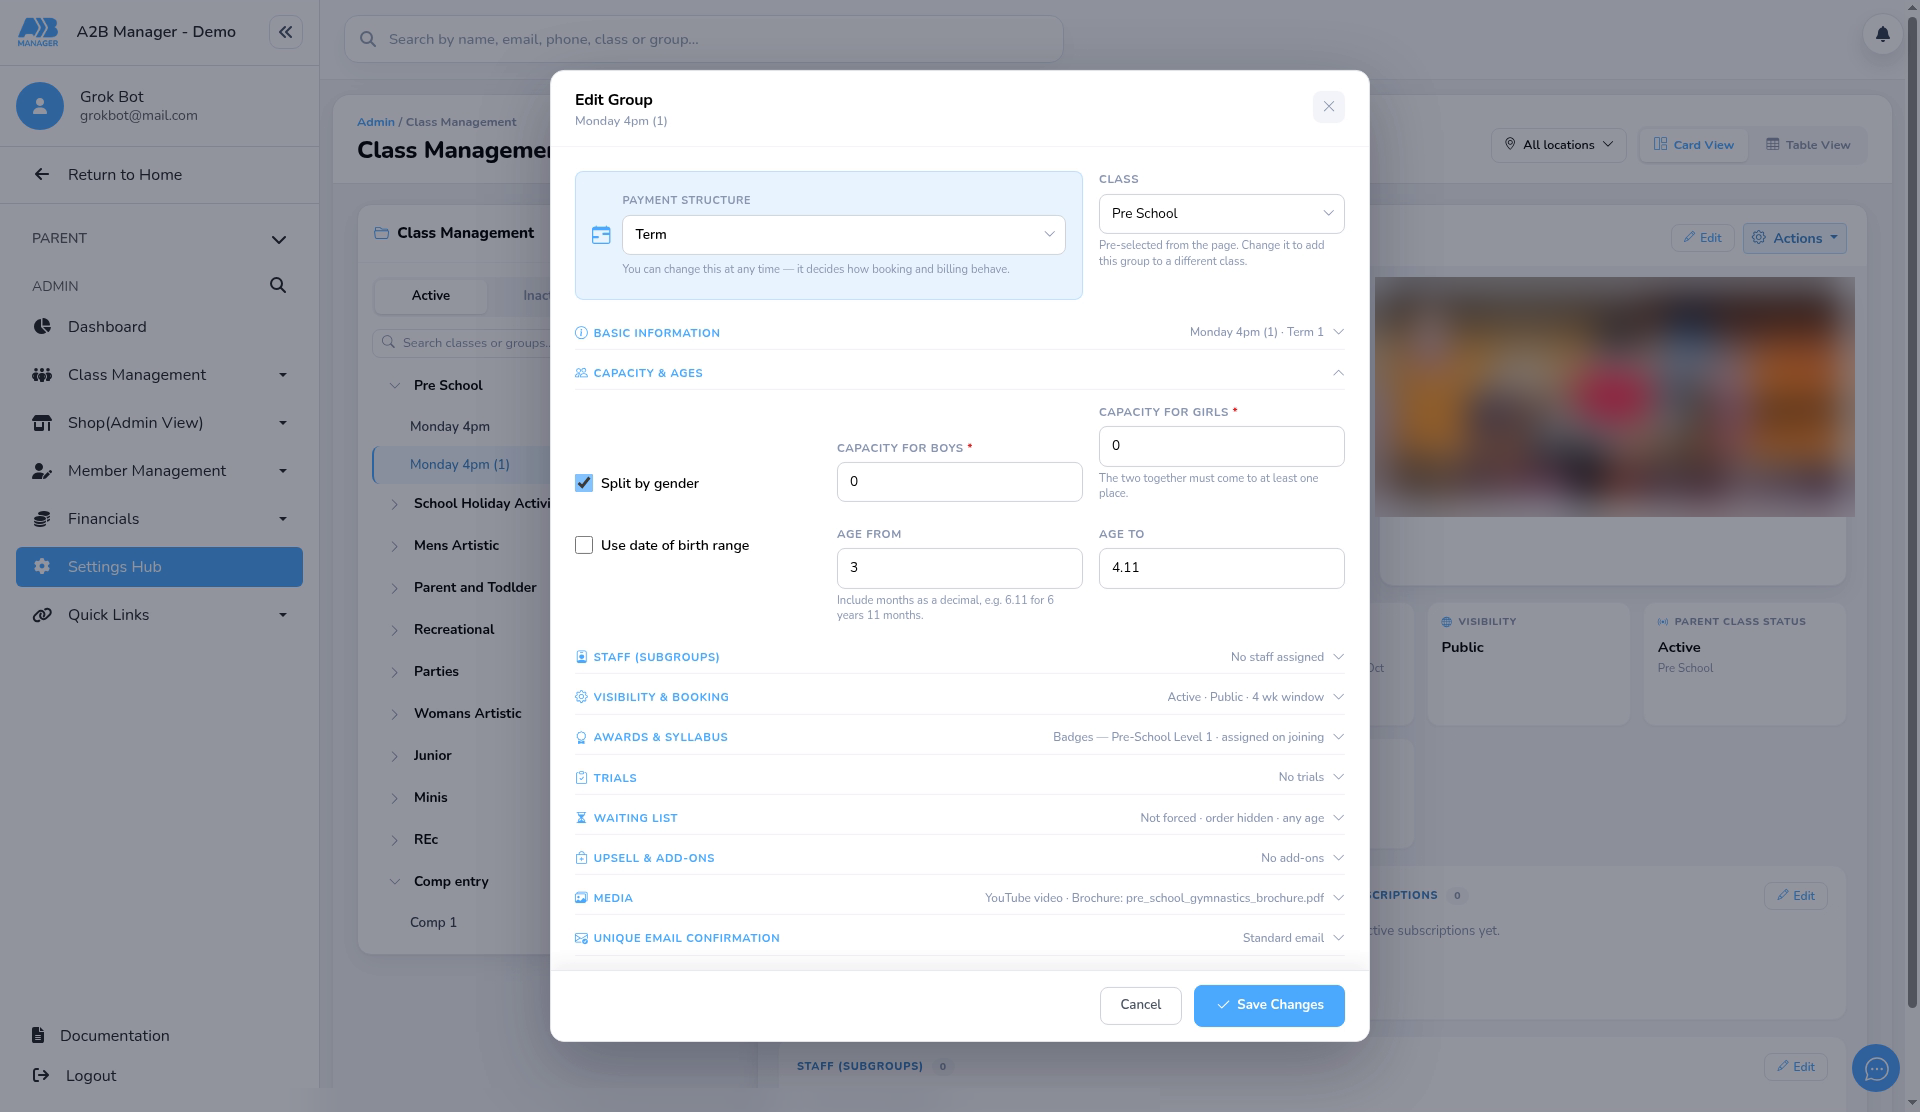
- Open Capacity & Ages. Tick Split by gender to set separate places for boys and girls.
- Set Age From and Age To, or tick Use date of birth range. Children outside the range can’t book.
Step 7: Visibility, booking and trials (4:10) #
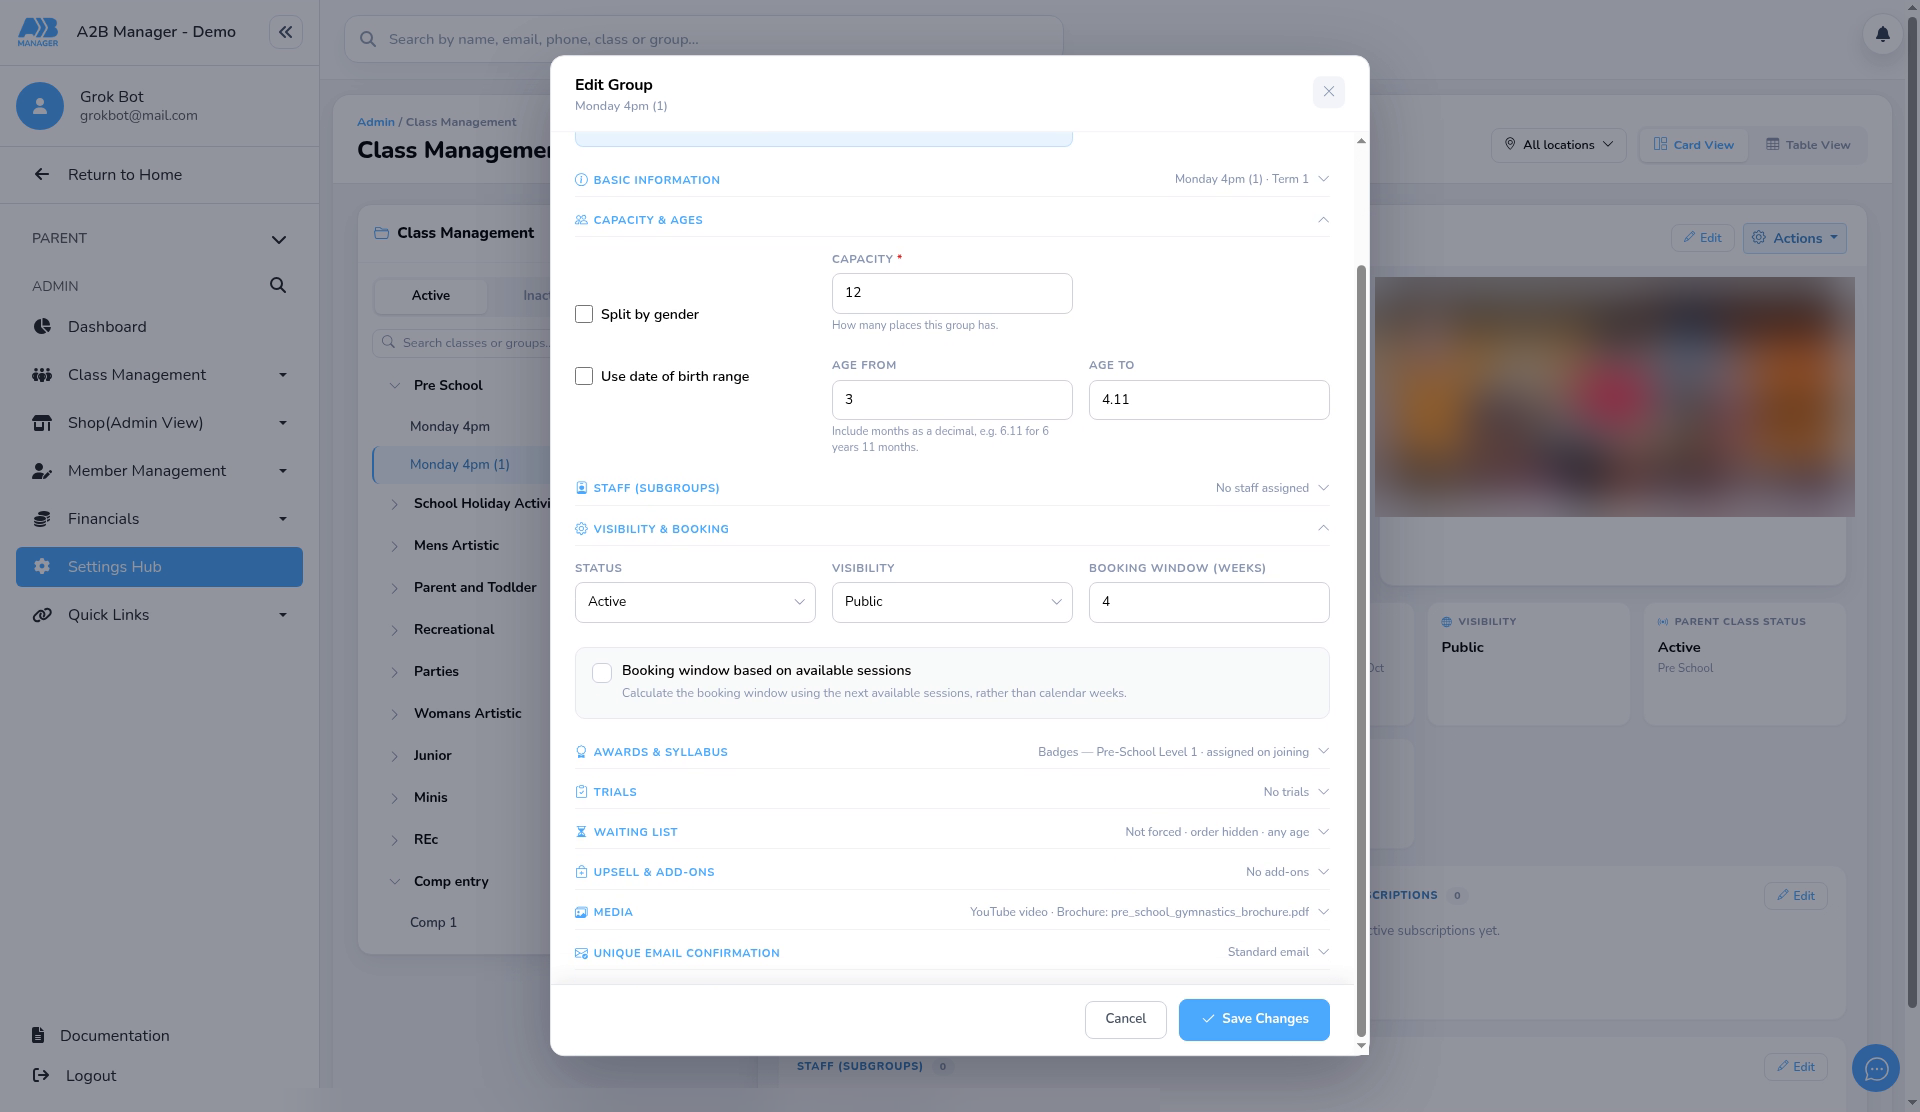
- Under Visibility & Booking, choose Active or Inactive, Public or Private, and the Booking Window (weeks), which limits how far ahead parents can book.
- Under Trials, choose whether you offer trials and enter the Trial Cost. Enter 0 for free trials.
Step 8: Waiting list, add-ons and media (4:46) #
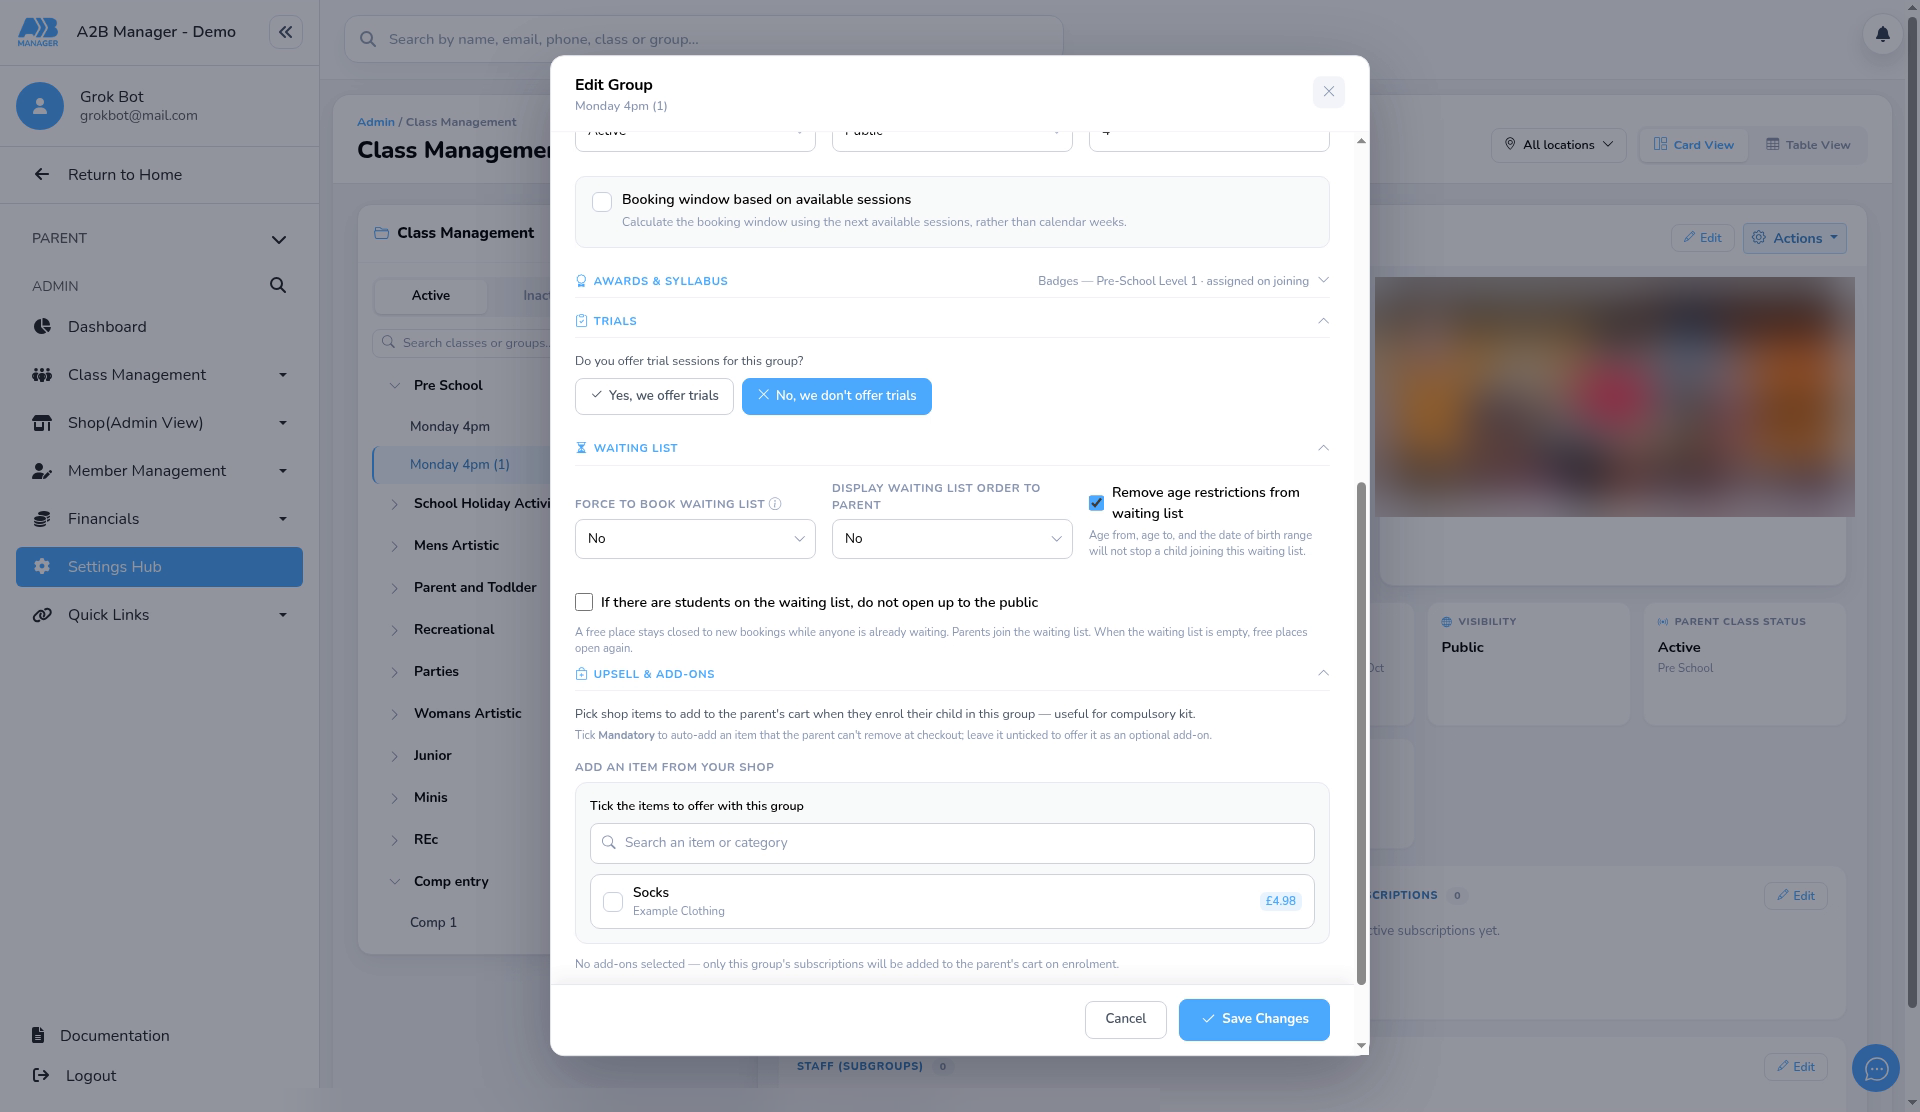
- Under Waiting List, set Force to book waiting list to Yes to make parents join the waiting list first.
- Under Upsell & Add-ons, pick items from your shop, such as a T-shirt or leotard, to offer with the group.
- Under Media, add an image or a YouTube video, and a brochure (PDF). You can use the image for all groups in the class.
- Click Save Changes to keep your changes, or Cancel to close without saving.
Good to know #
- Force Trials: parents must book a trial first, then a subscription or term.
- Staff (subgroups): assign coaches to the group.
- Awards & Syllabus: give new members awards when they join, or require awards to join.
- More waiting list options: show parents their place in the queue, ignore age limits for the waiting list, and keep free places closed while anyone is waiting.
- Recurring PAYG groups can use a date selector, for example for birthday parties.
- Once a group is saved, you can give it its own booking confirmation email under Unique email confirmation.


