

Table of Contents
Use this when a parent asks to cancel but you, or they, decide not to go ahead. The child stays in the class and the parent is emailed.
Rejecting a cancellation #
Step 1: Open the pending requests (0:00) #
- Go to Member Management > Cancellations and choose Pending.
- Each request shows the child and parent, class and group, reason, rating and comments.
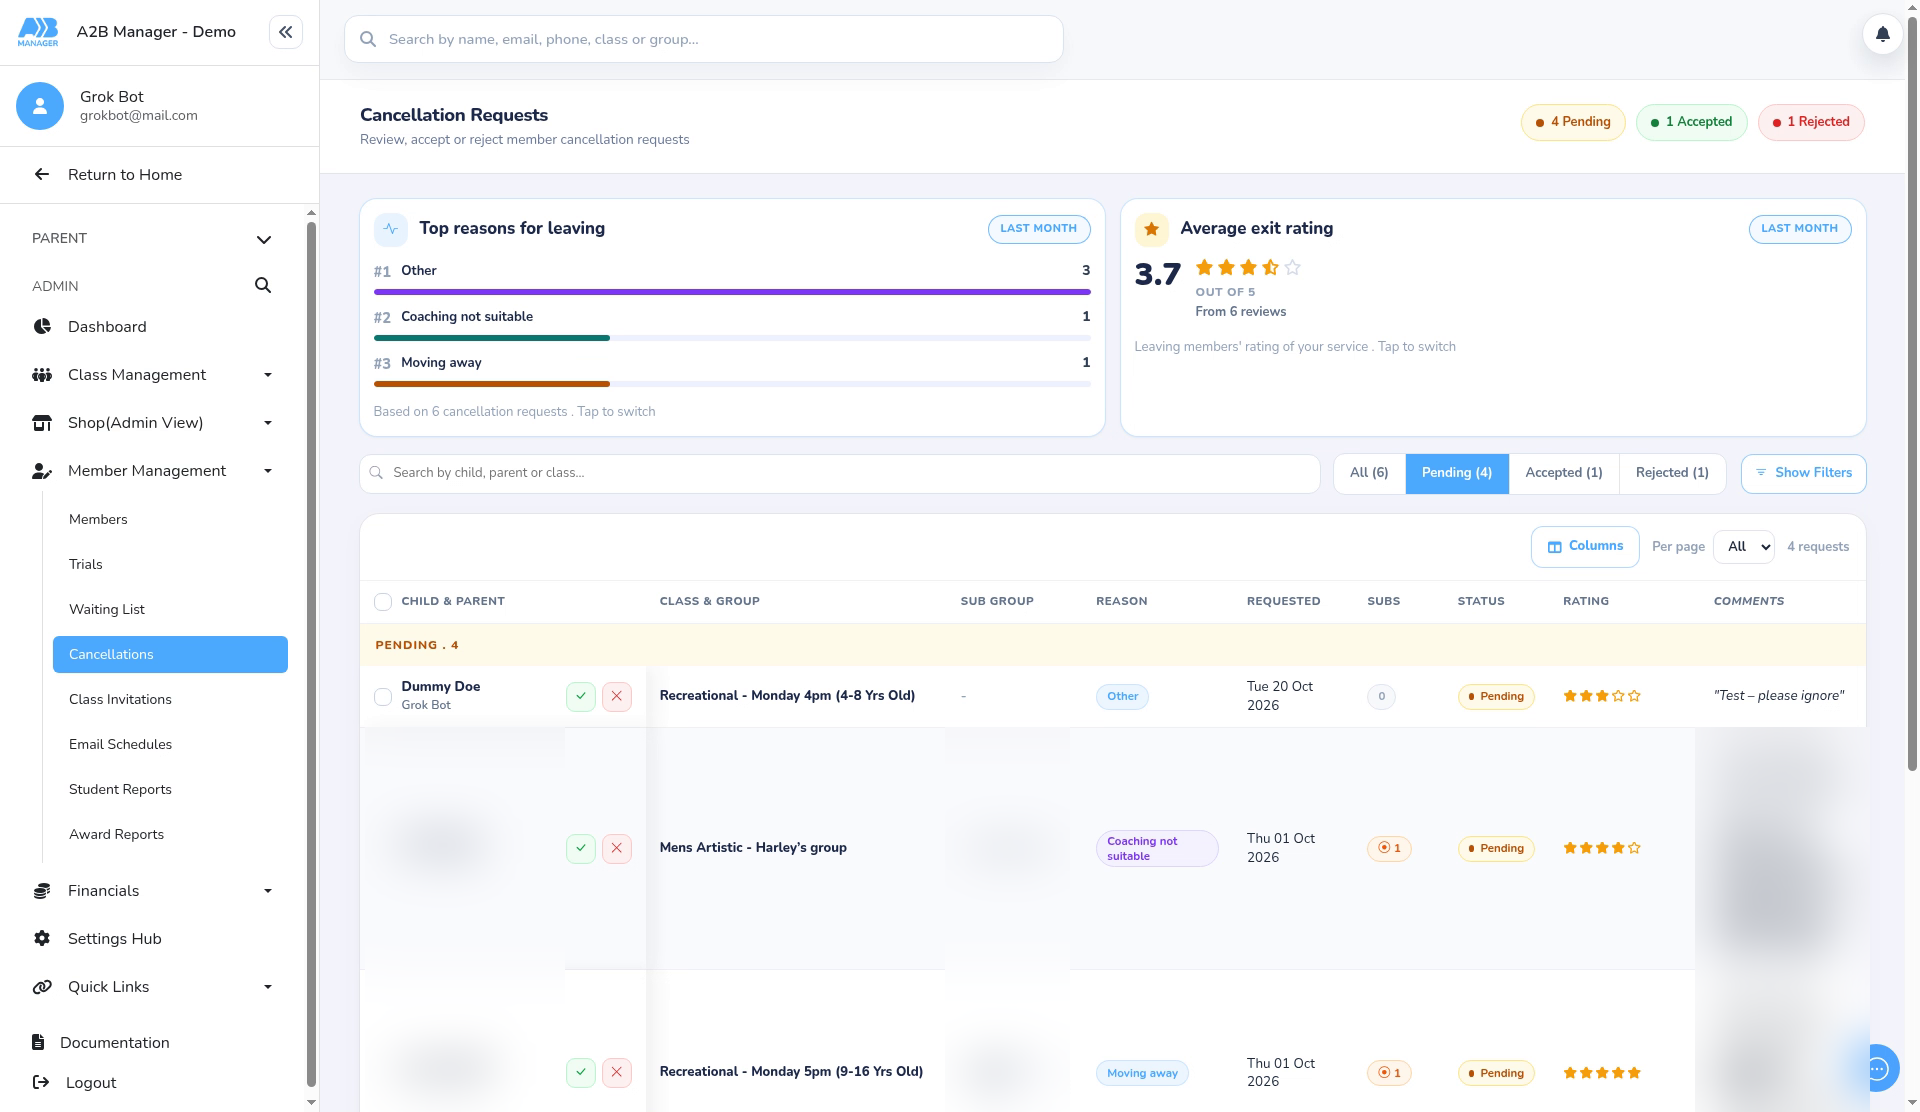
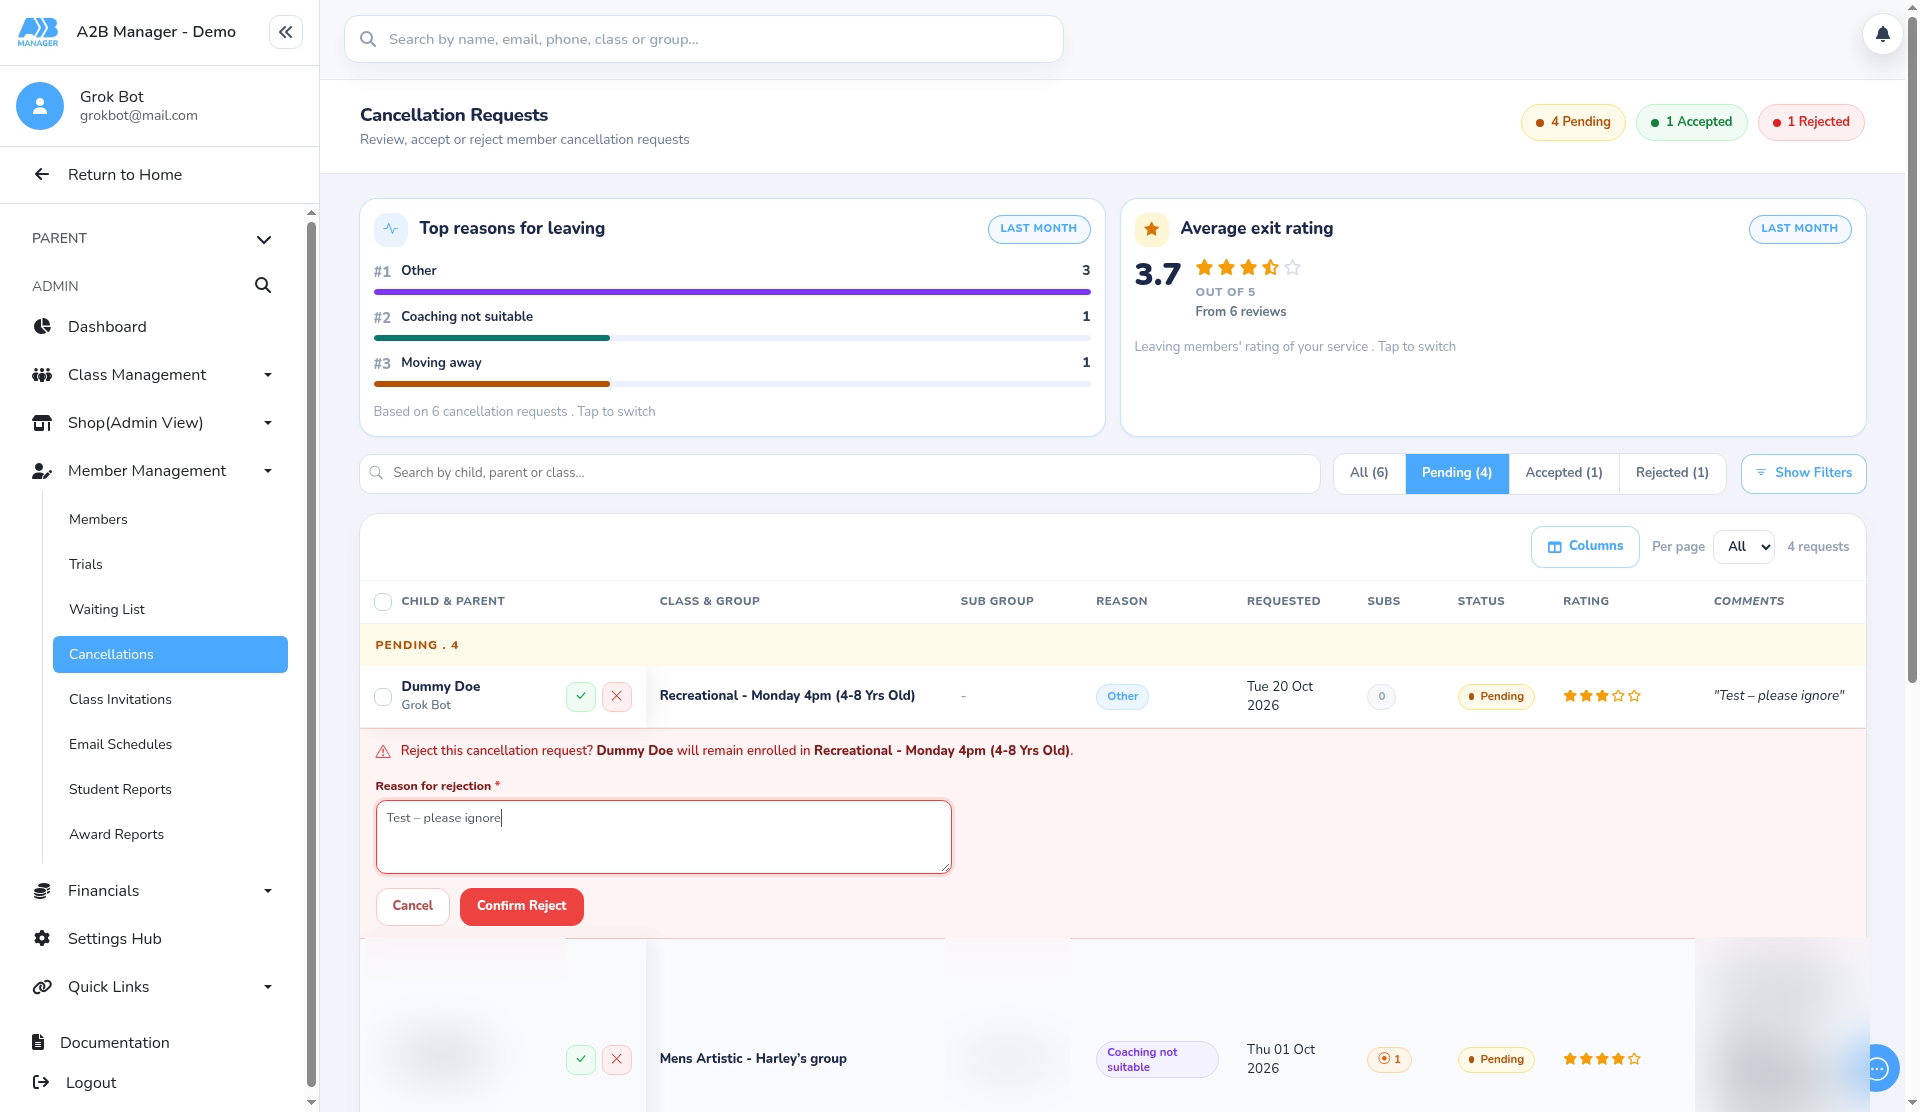
Step 2: Reject the request (0:10) #
- Click the ✕ next to the child.
- The panel confirms the child will remain enrolled. Enter a Reason for rejection (required).
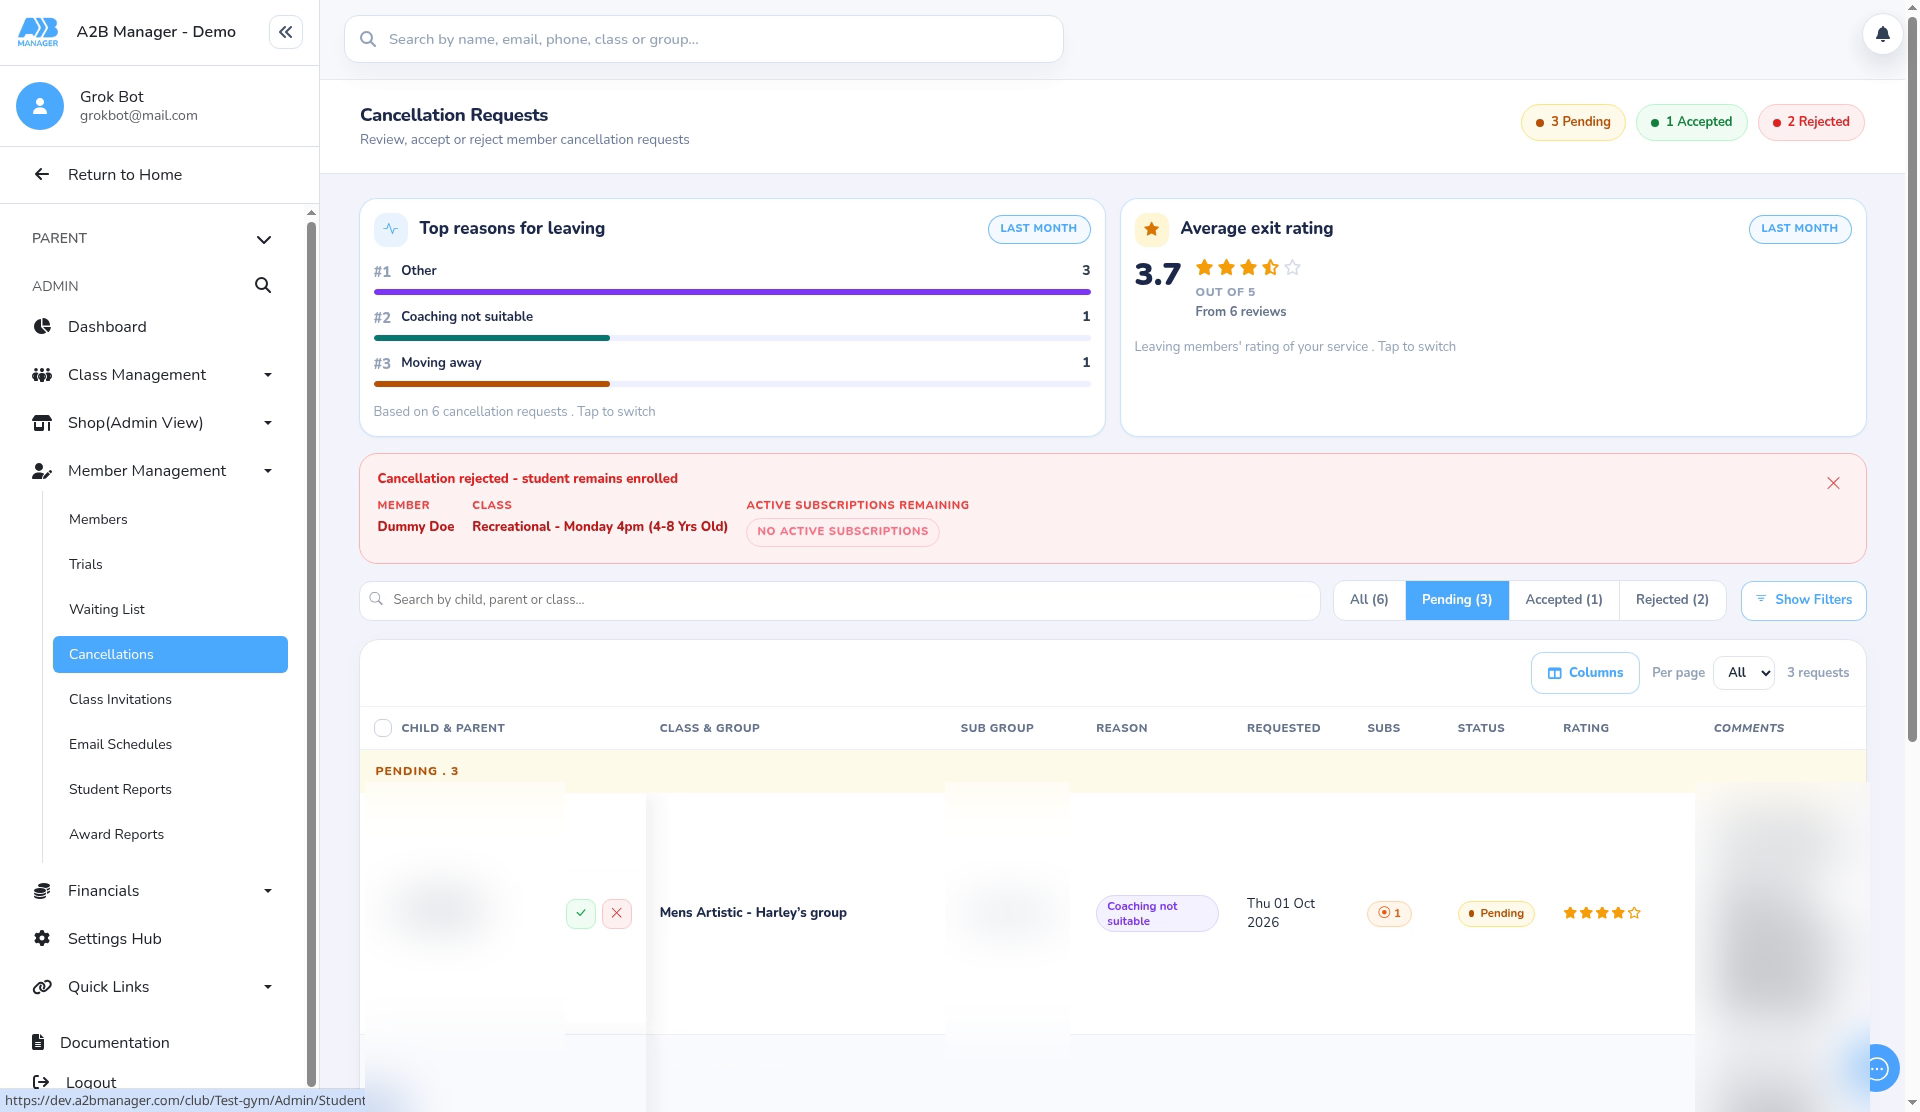
Step 3: Confirm (0:26) #
- Click Confirm Reject. The banner reads Cancellation rejected – student remains enrolled.
- The parent gets the Cancellation Rejection email straight away.
What the parent sees #
- On their dashboard, the class card shows Cancellation outcome: Rejected with the date and your reason.
- The Request Cancellation link comes back, so they can ask again later.
The Cancellation Rejection email #
- Find it under Settings Hub > Email Templates > Cancellation Rejection. Term groups use Term Cancellation Rejection.
- The default message only says Dear {StudentFirstName}, so write the rest yourself, for example: Your cancellation has not been processed and {StudentFirstName} remains in the class. Thanks for staying with us.


