
Table of Contents
Brothers and sisters show together on a profile only when they’re on the same parent account. If they were signed up under different parent accounts, you can’t move a child from one account to the other, and there’s no “family card” to link them. Instead, you add the child again on the right account with Add Sibling, add them to their classes, and take the old record out of its classes.
Before you start #
- A child can’t be moved from one parent account to another. There’s no move, link or merge option on the profile or in Manage Parents.
- The email on the Parent card belongs to the parent’s login. Children don’t have an email address of their own, and each login email must be unique.
- Have the child’s details to hand: name, gender, date of birth, consents, medical conditions and the answers to your club’s registration questions. Nothing is copied from the old record.
- Steps 1 to 3 show what happens if you try to change the email. To go straight to the fix, start at Step 4.
Why a Child Can’t Be Moved to Another Parent Account #
Step 1: Siblings show together only on the same parent account (0:00) #
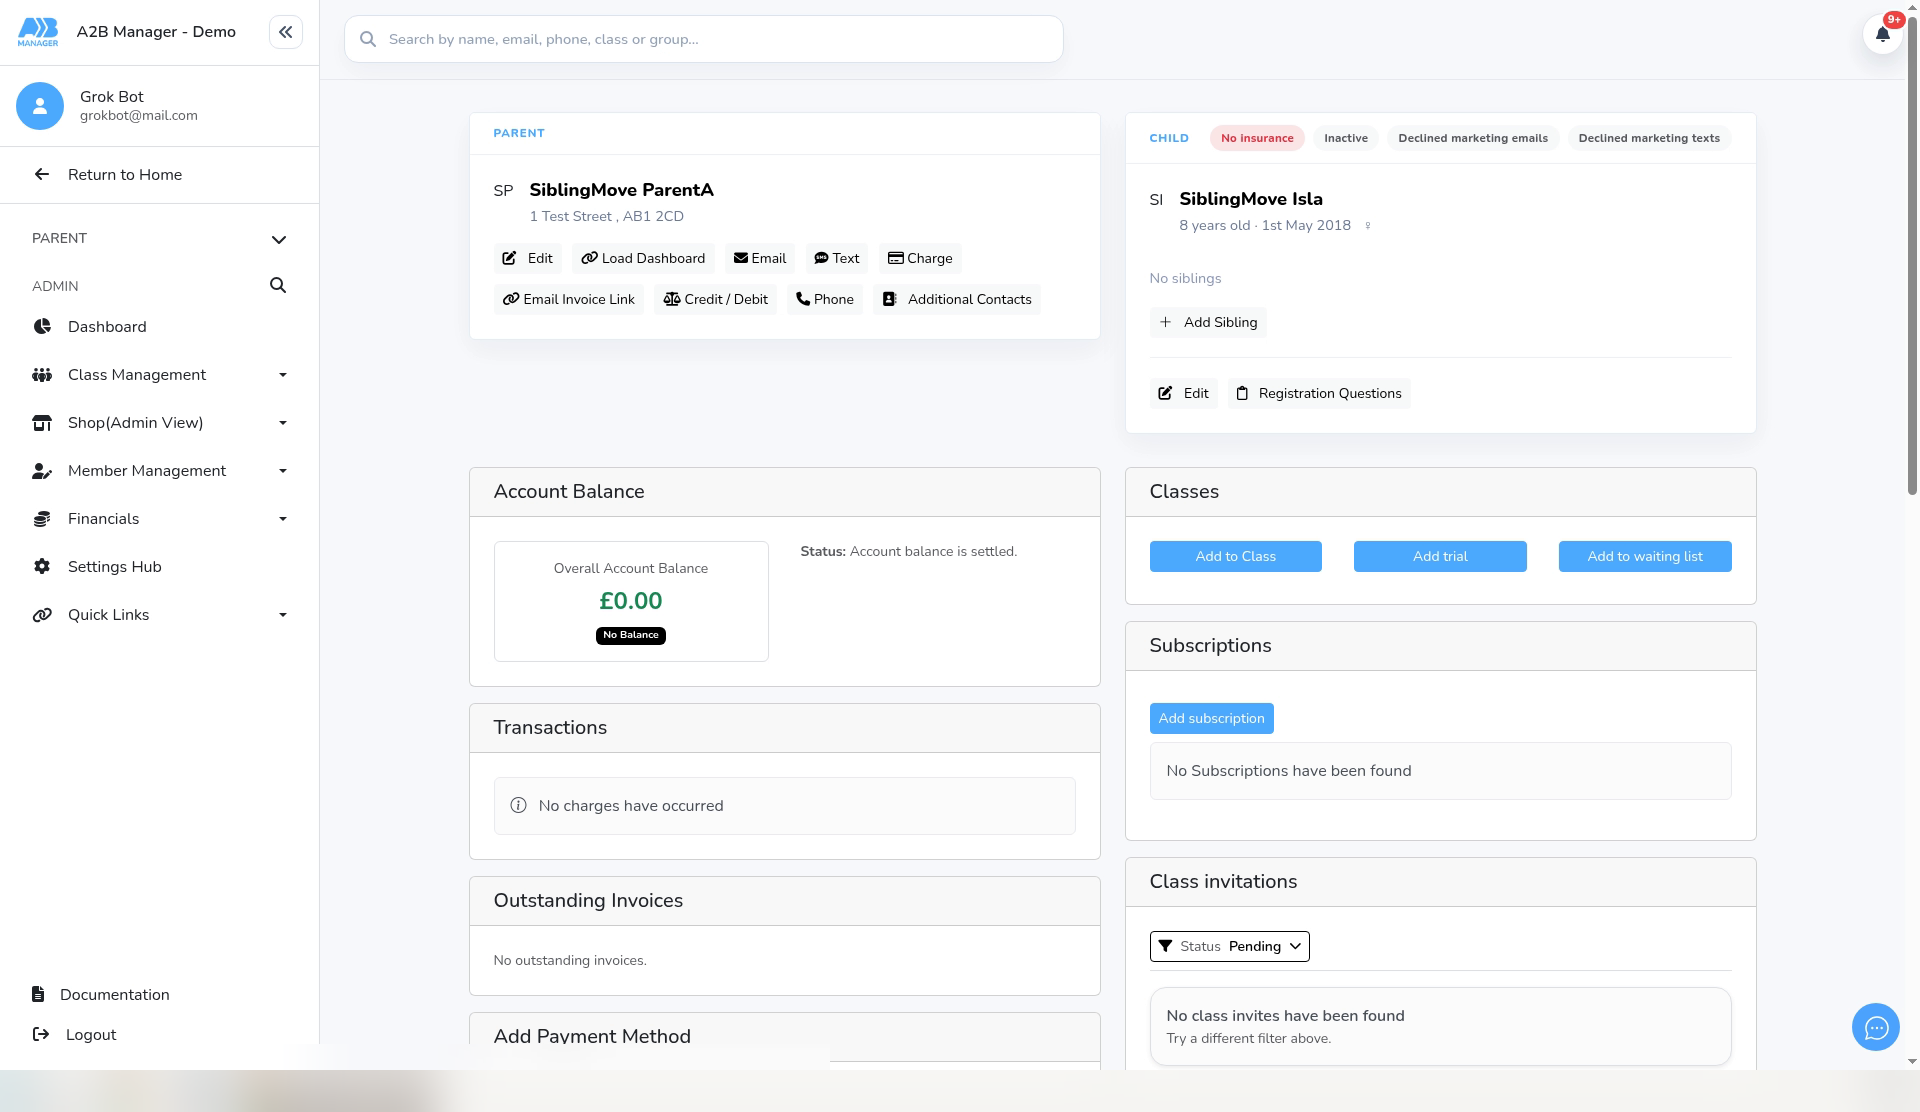
- Open the child’s profile. In this example, SiblingMove Isla is on SiblingMove ParentA, and her brother is on a different parent account.
- Her Child card says No siblings. The Siblings list only shows children on the same parent account.
- There’s no family card, and neither card has an option to move, link or merge a child. The Parent card has Edit, Load Dashboard, Email, Text, Charge, Email Invoice Link, Credit / Debit, Phone and Additional Contacts. The Child card has Add Sibling, Edit and Registration Questions.
Step 2: Changing the parent’s email doesn’t move the child (0:15) #
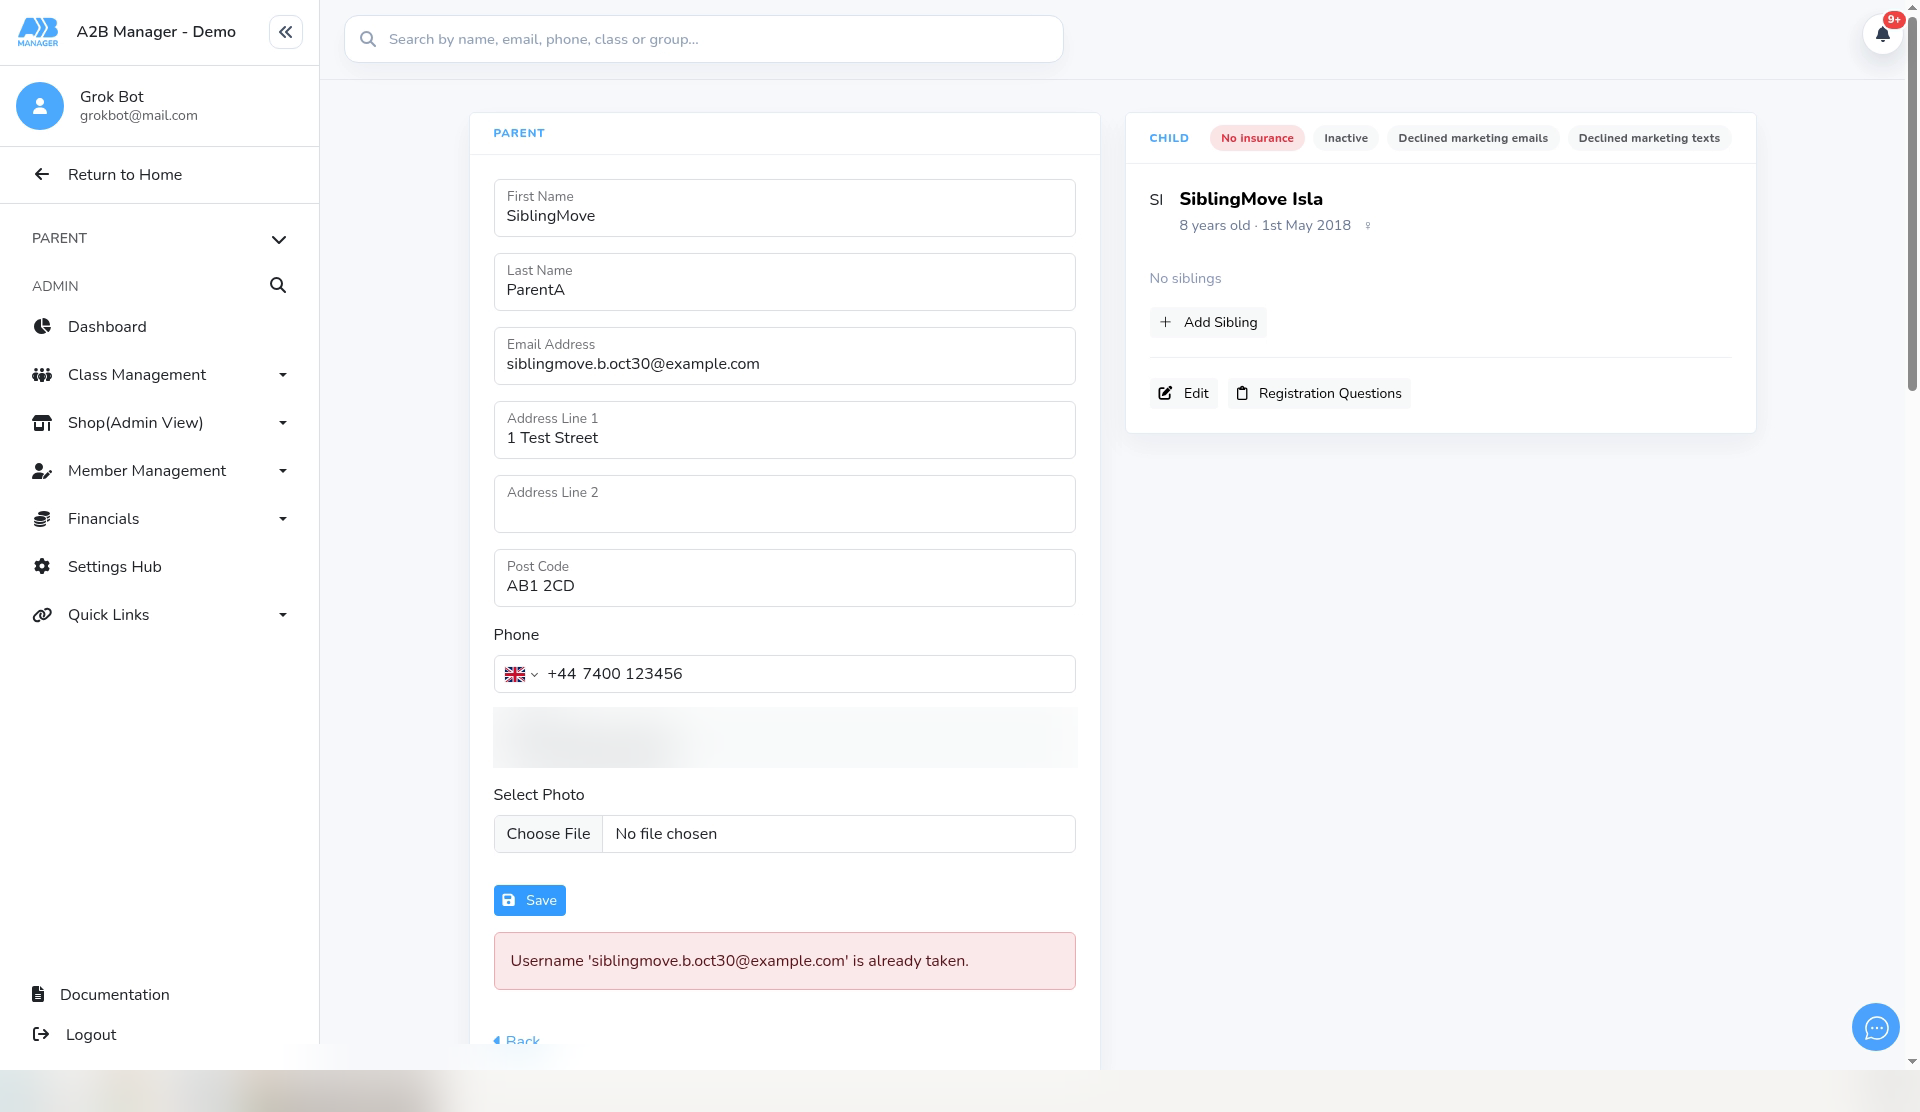
- On the Parent card, click Edit. The Email Address here is the parent’s login email. Children don’t have an email address of their own.
- Each login email must be unique. If you enter an address another parent already uses and click Save, you’ll see “Username 'siblingmove.b.oct30@example.com' is already taken.” Nothing is saved.
- To change a parent’s login email, see How to Change a Parent’s Login Email.
Step 3: Manage Parents gives the same answer (0:36) #
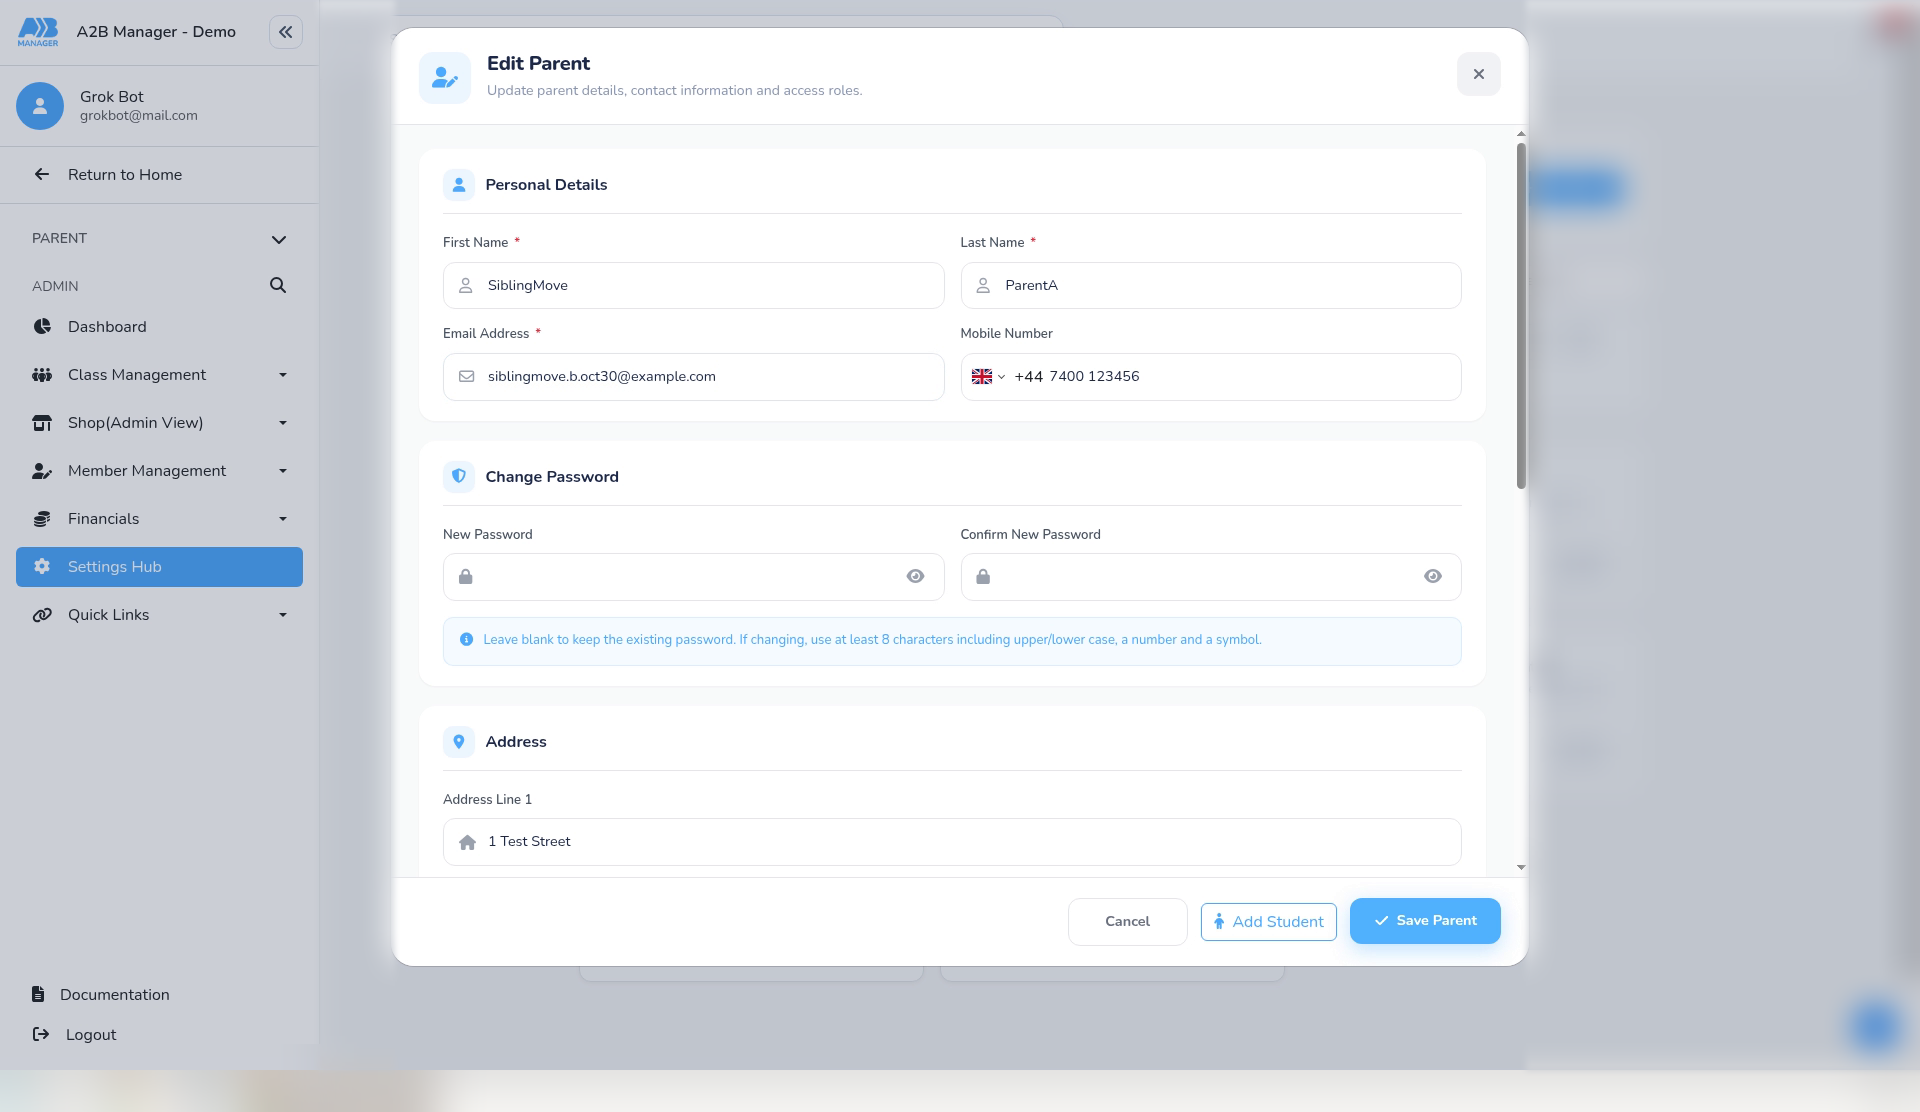
- Go to Settings Hub > Manage Parents, find the parent and click Edit.
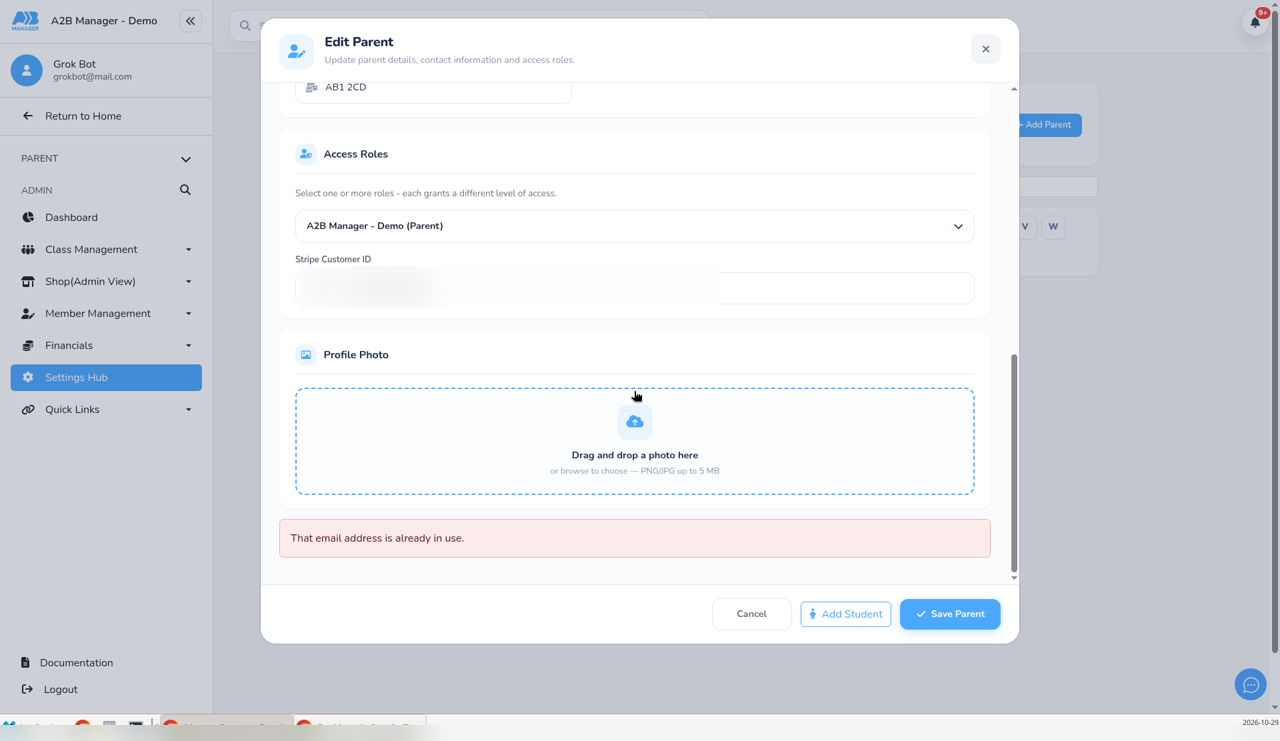
- In the Edit Parent pop-up, enter the other parent’s email in Email Address and click Save Parent.
- An alert at the bottom of the form reads “That email address is already in use.” Nothing is saved. Click Cancel.
How to Put Siblings on One Parent Account #
Step 4: Open the sibling who’s already on the right account (0:52) #
- Instead of moving the child, you add them again on the right parent account.
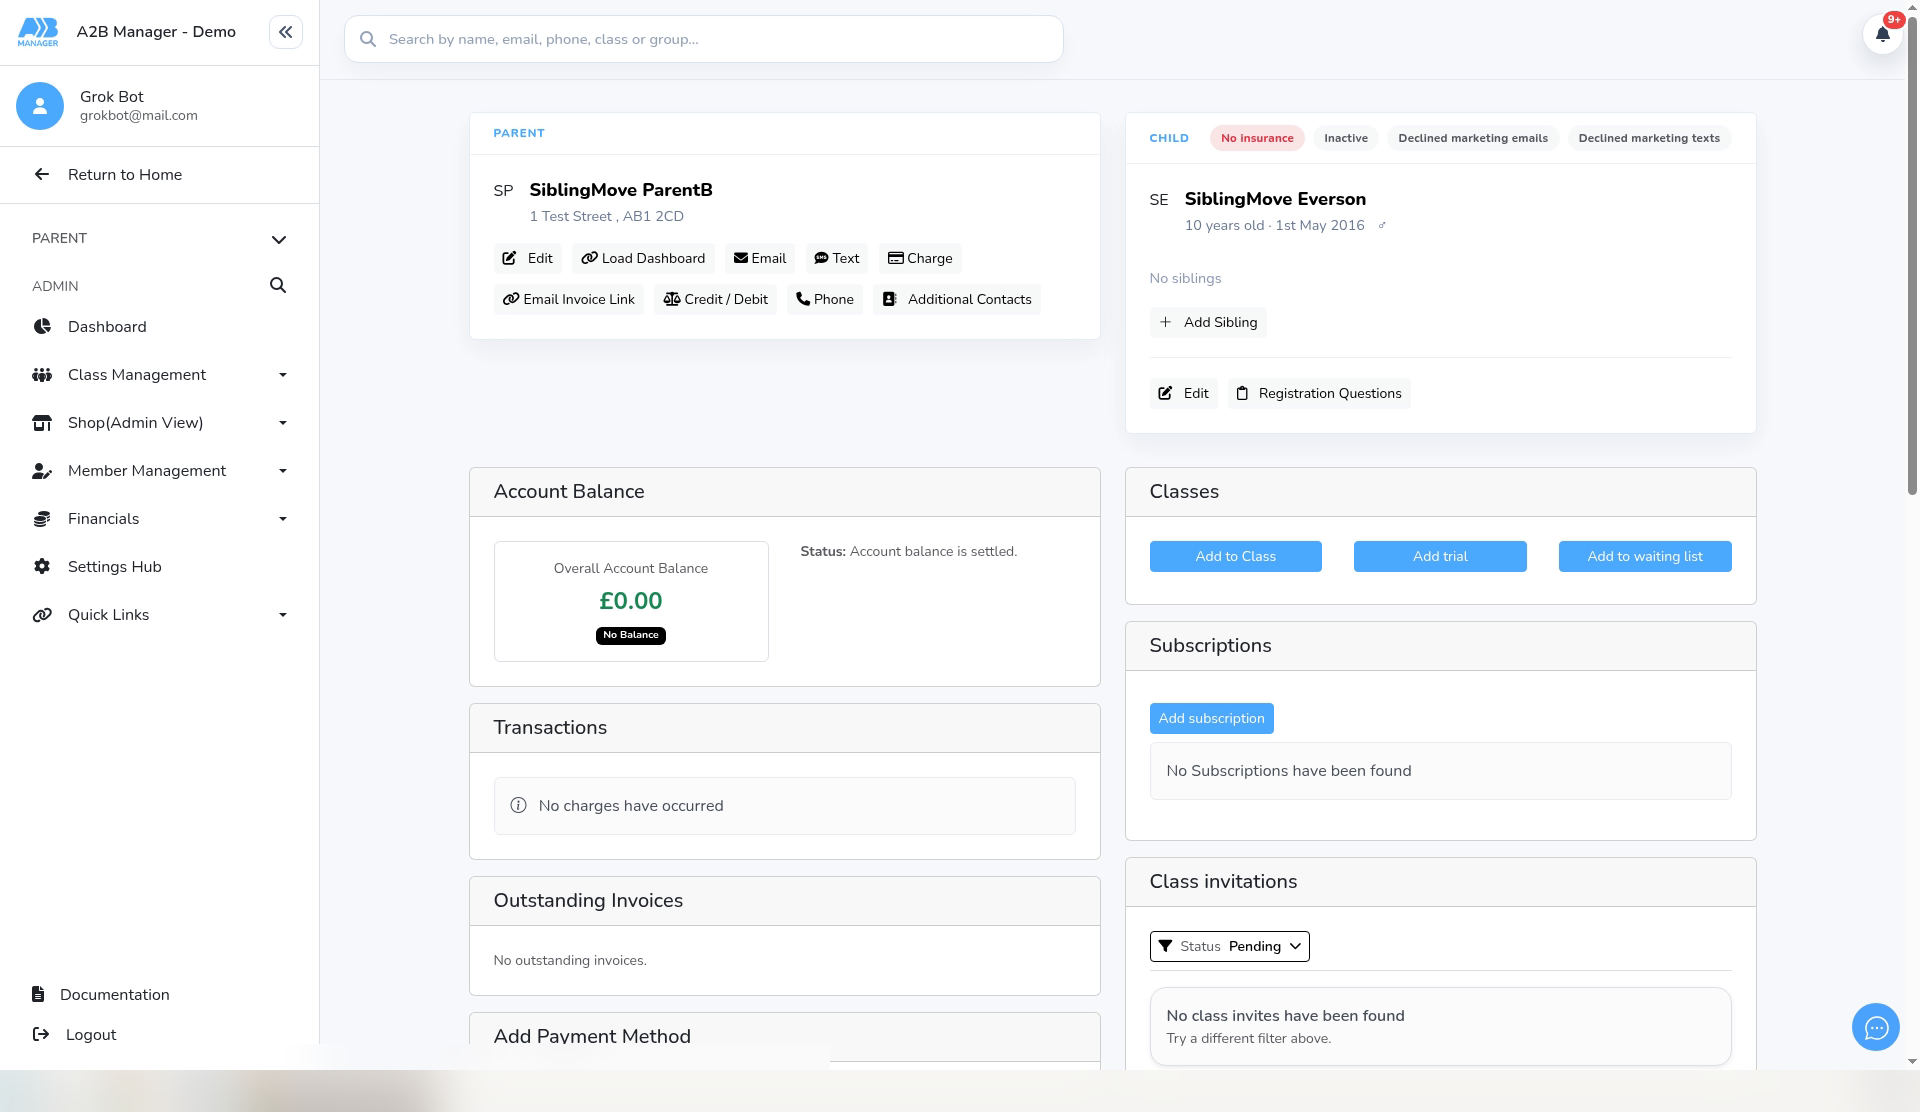
- Open the profile of the brother or sister who’s already on the parent account you want to use. Here, that’s SiblingMove Everson, on SiblingMove ParentB.
- Check the Parent card shows the right parent.
Step 5: Click Add Sibling (1:04) #
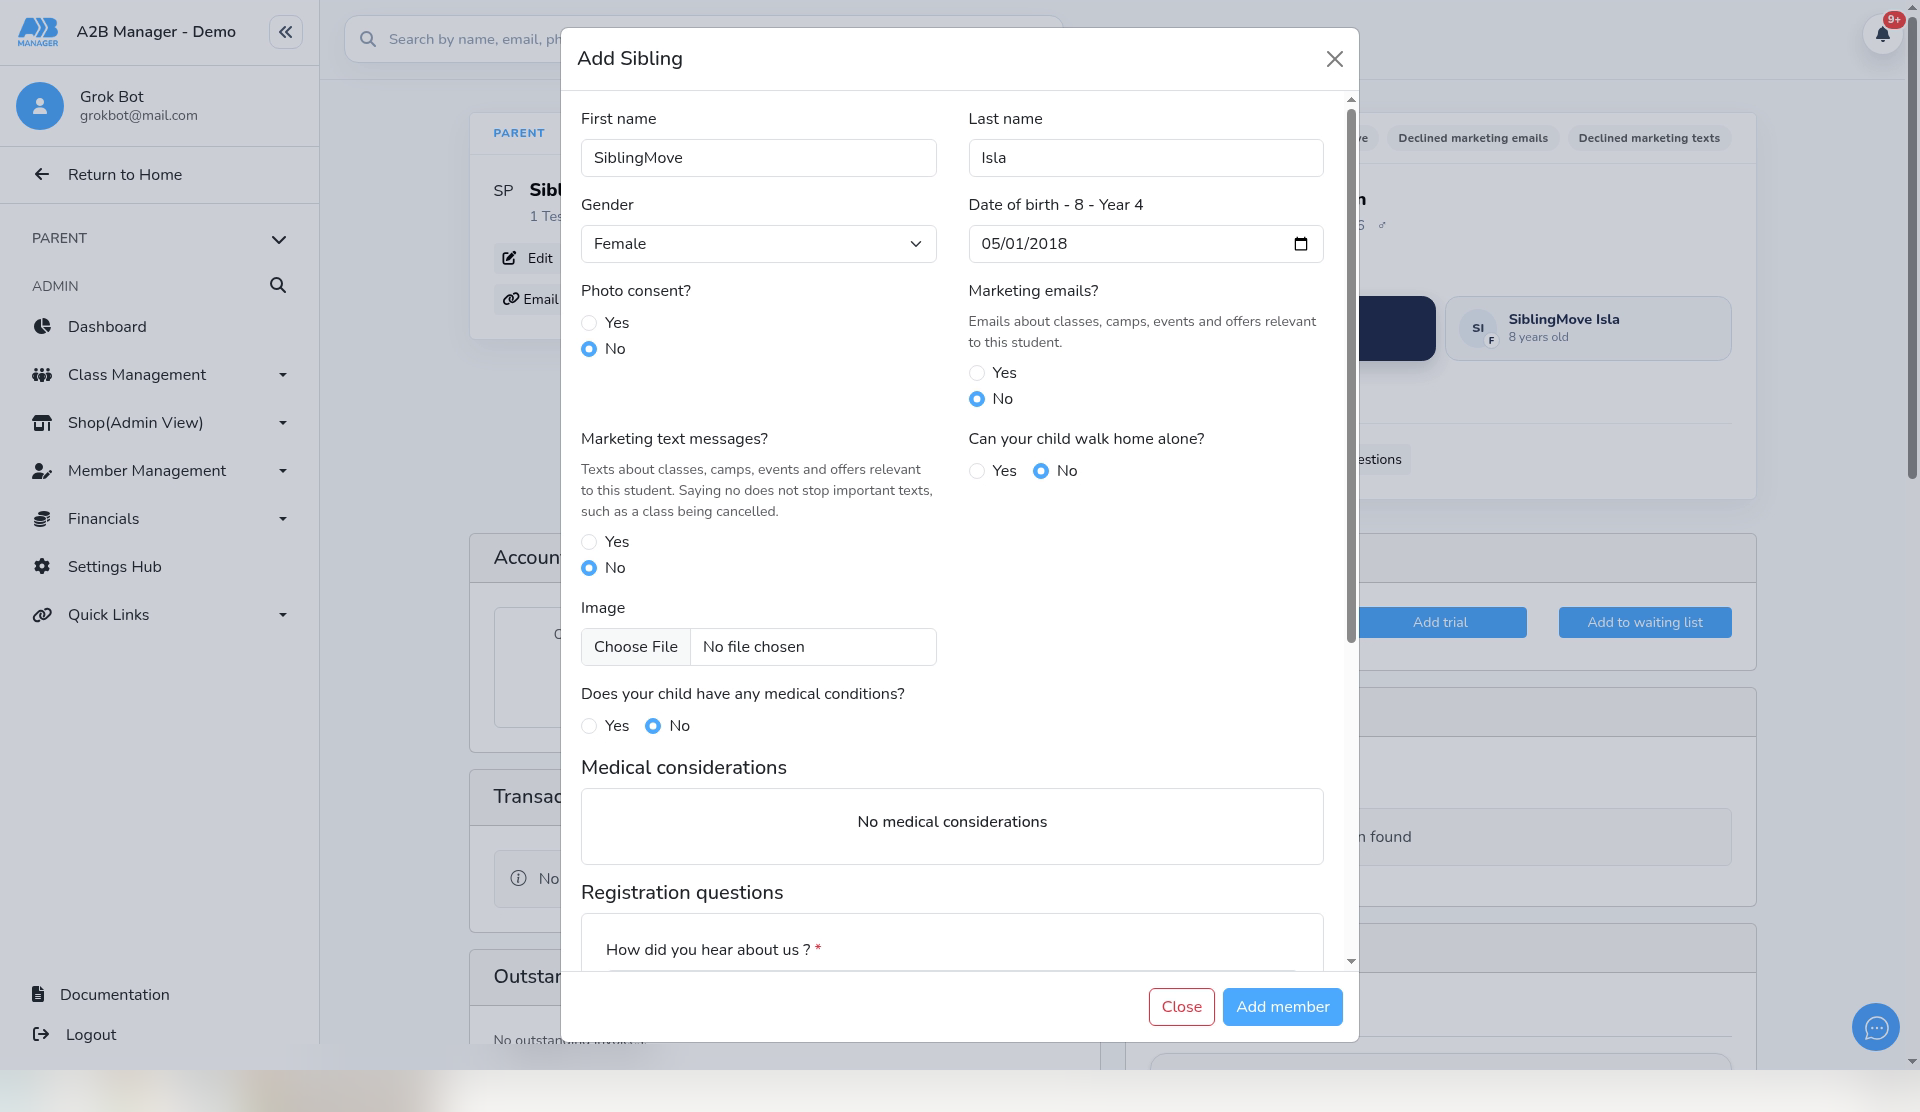
- On the Child card, click Add Sibling. The Add Sibling form opens. It adds a new child to this parent account.
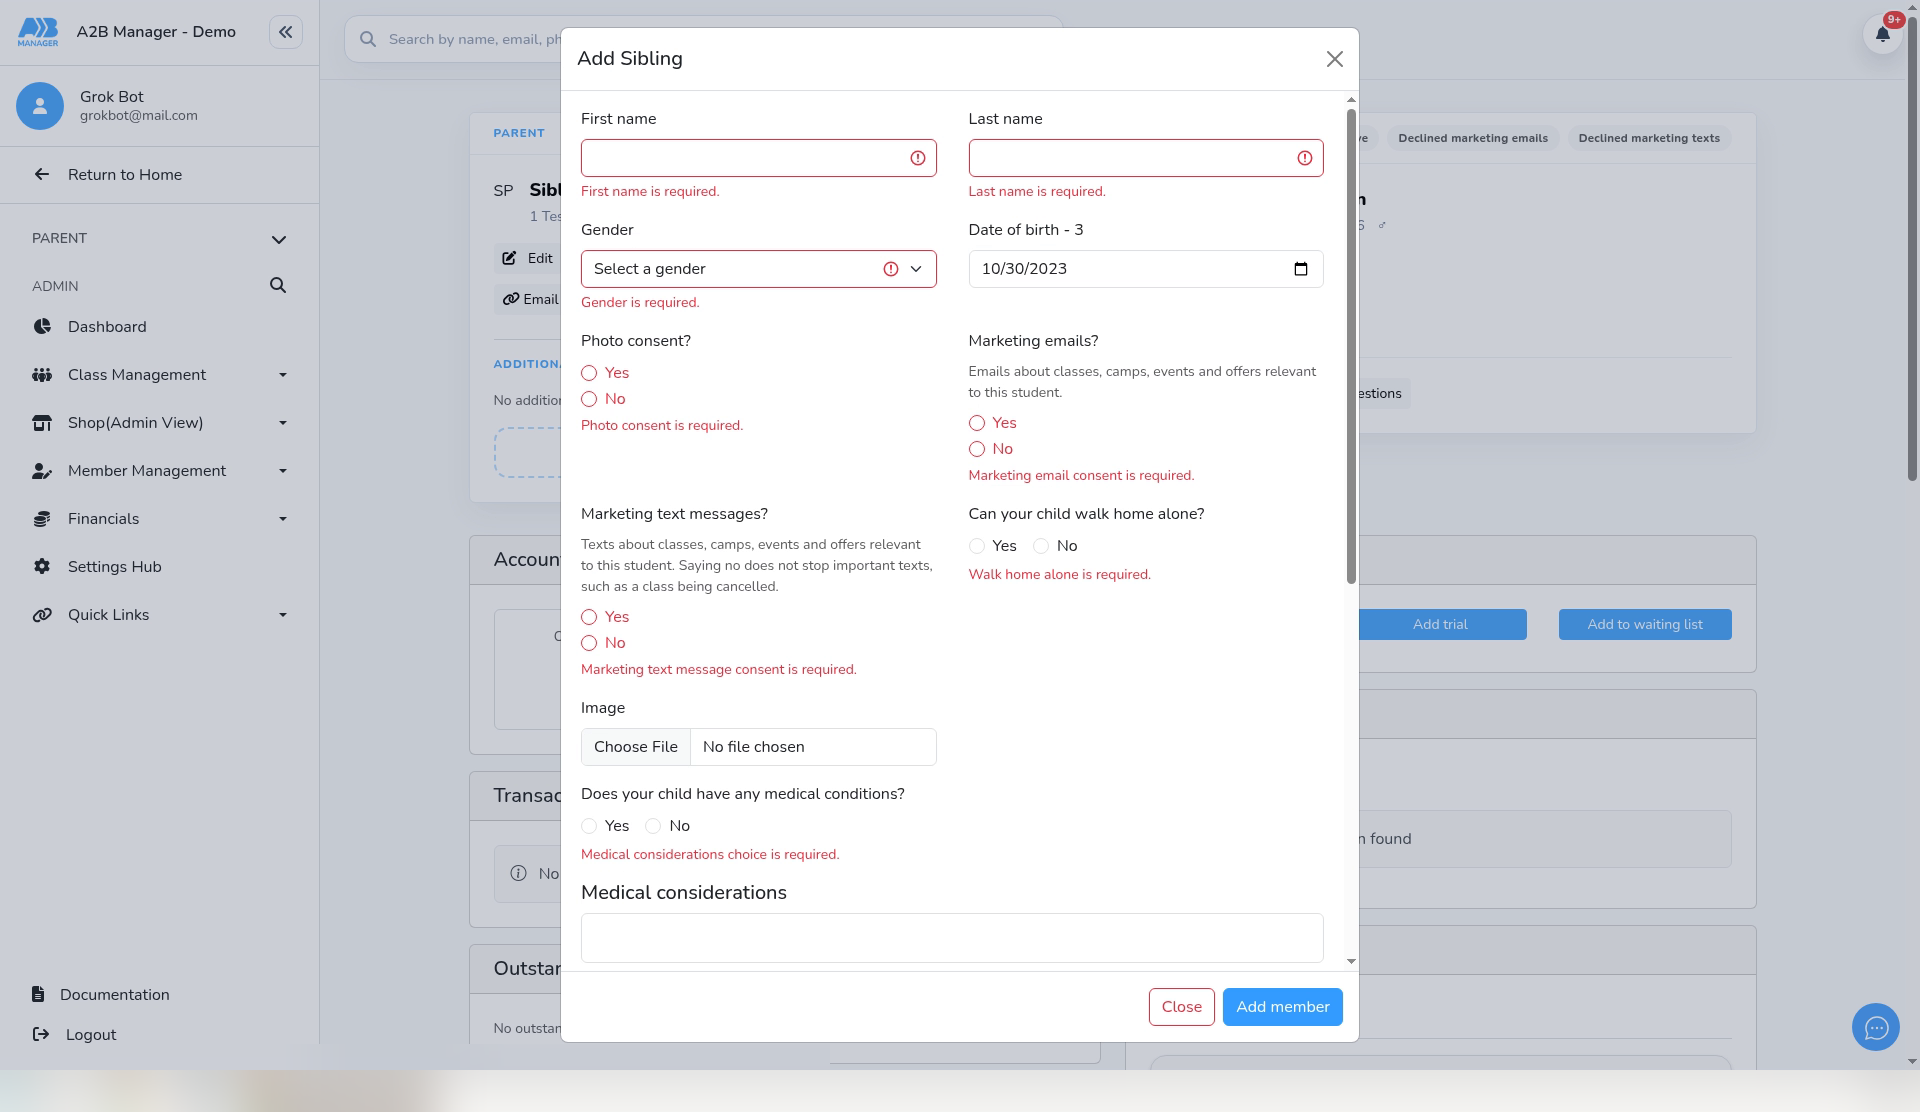
- If you click Add member before filling it in, the form shows what’s needed: “First name is required.”, “Last name is required.”, “Gender is required.”, “Photo consent is required.”, “Marketing email consent is required.”, “Marketing text message consent is required.”, “Walk home alone is required.” and “Medical considerations choice is required.”
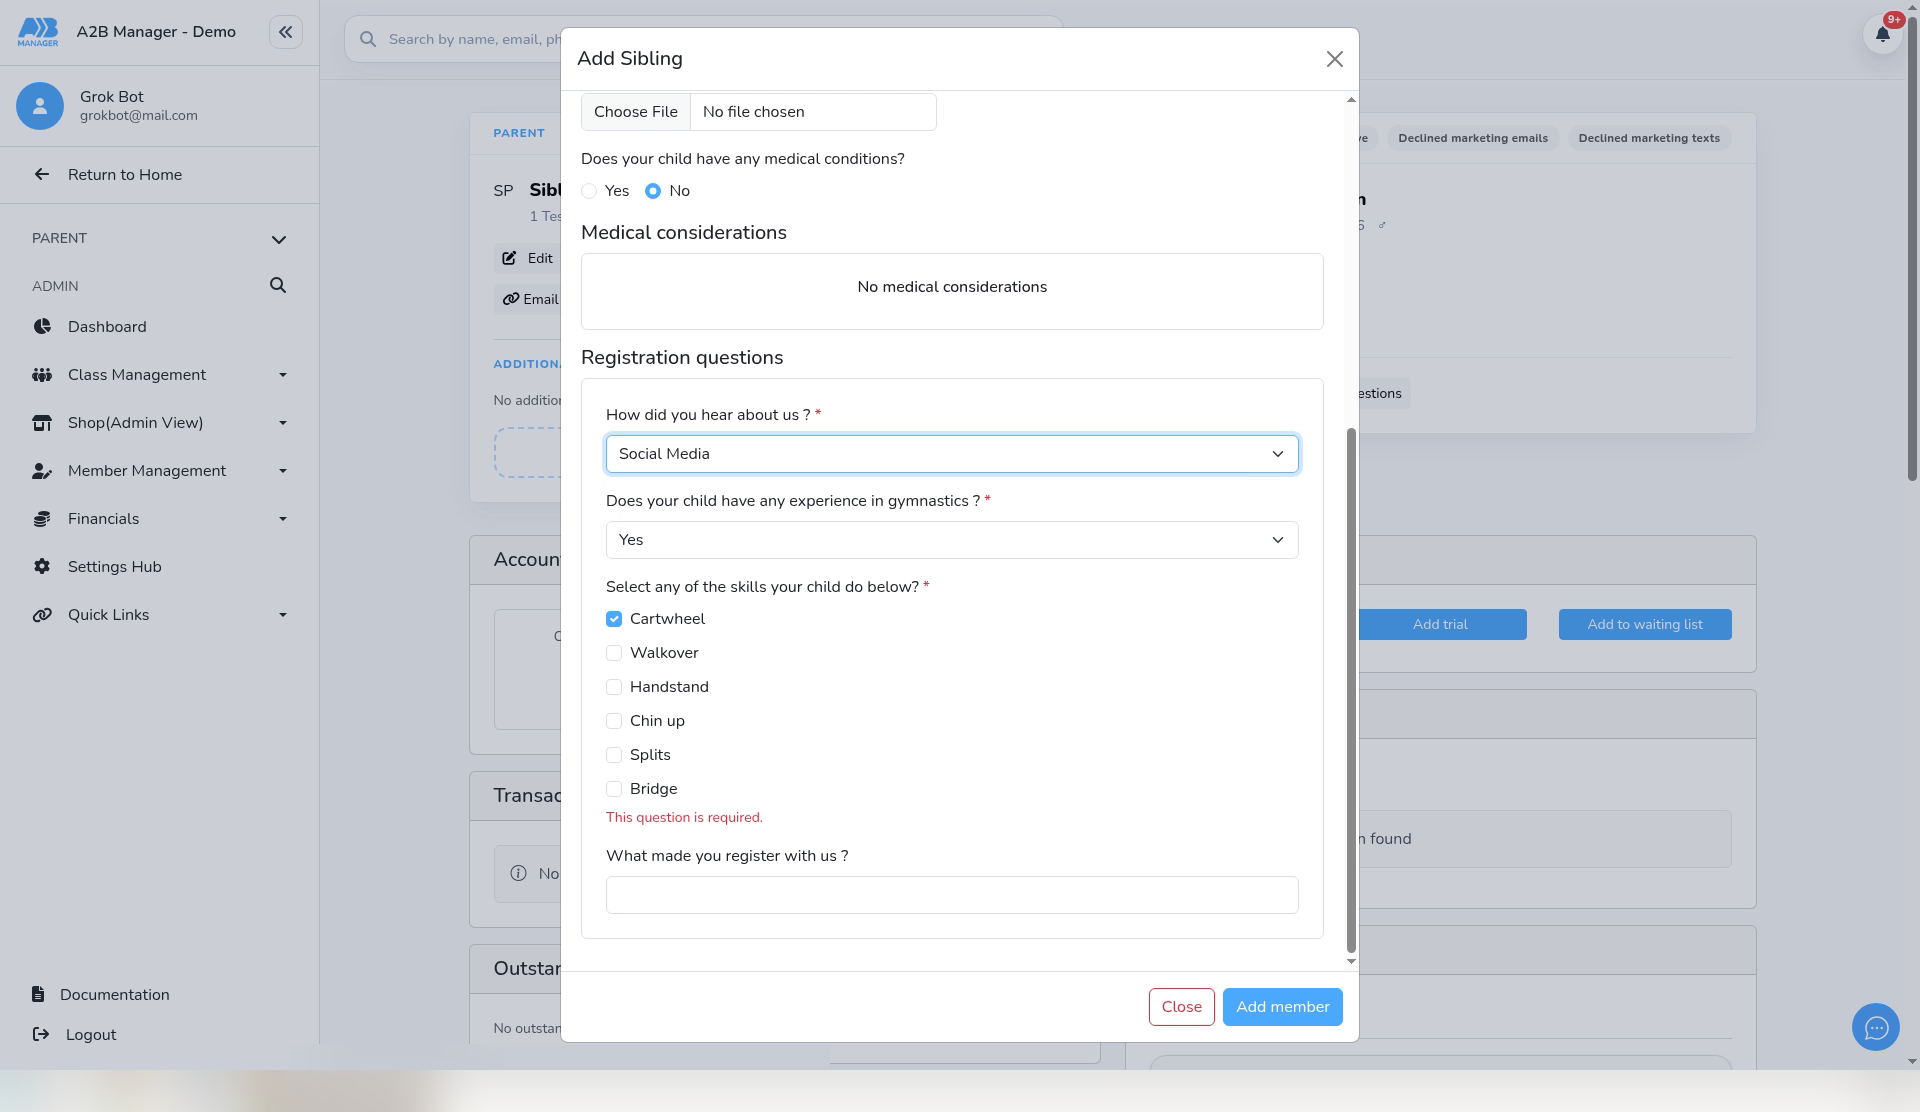
- Each required registration question shows “This question is required.”
Step 6: Fill in the child’s details and click Add member (1:19) #
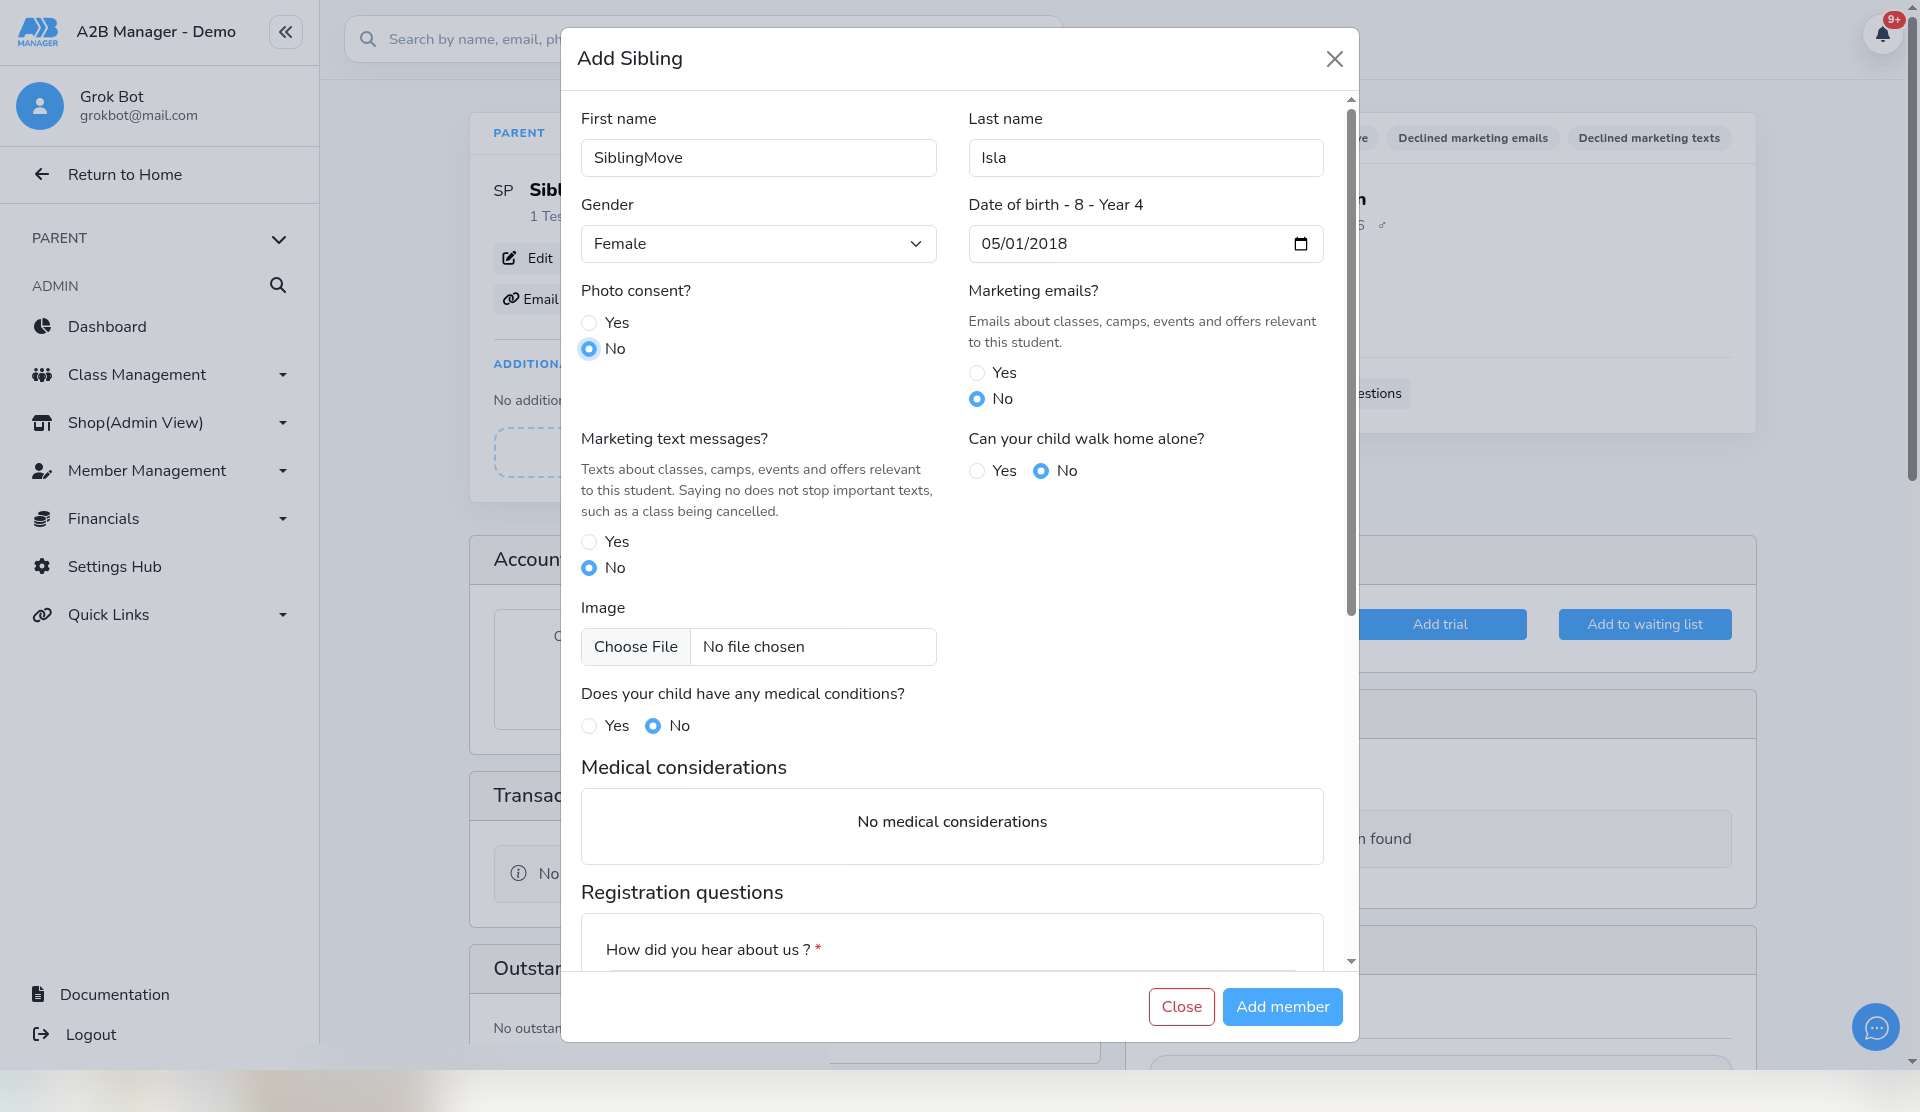
- Enter the First name, Last name, Gender and Date of birth.
- Answer Photo consent?, Marketing emails?, Marketing text messages?, Can your child walk home alone? and Does your child have any medical conditions?
- Answer your club’s Registration questions.
- In this example: SiblingMove Isla, Female, born 01/05/2018, No to each consent, walking home and medical question, and Social Media, Yes and Cartwheel for the registration questions.
- Click Add member. The form closes, and the Siblings strip now shows both children.
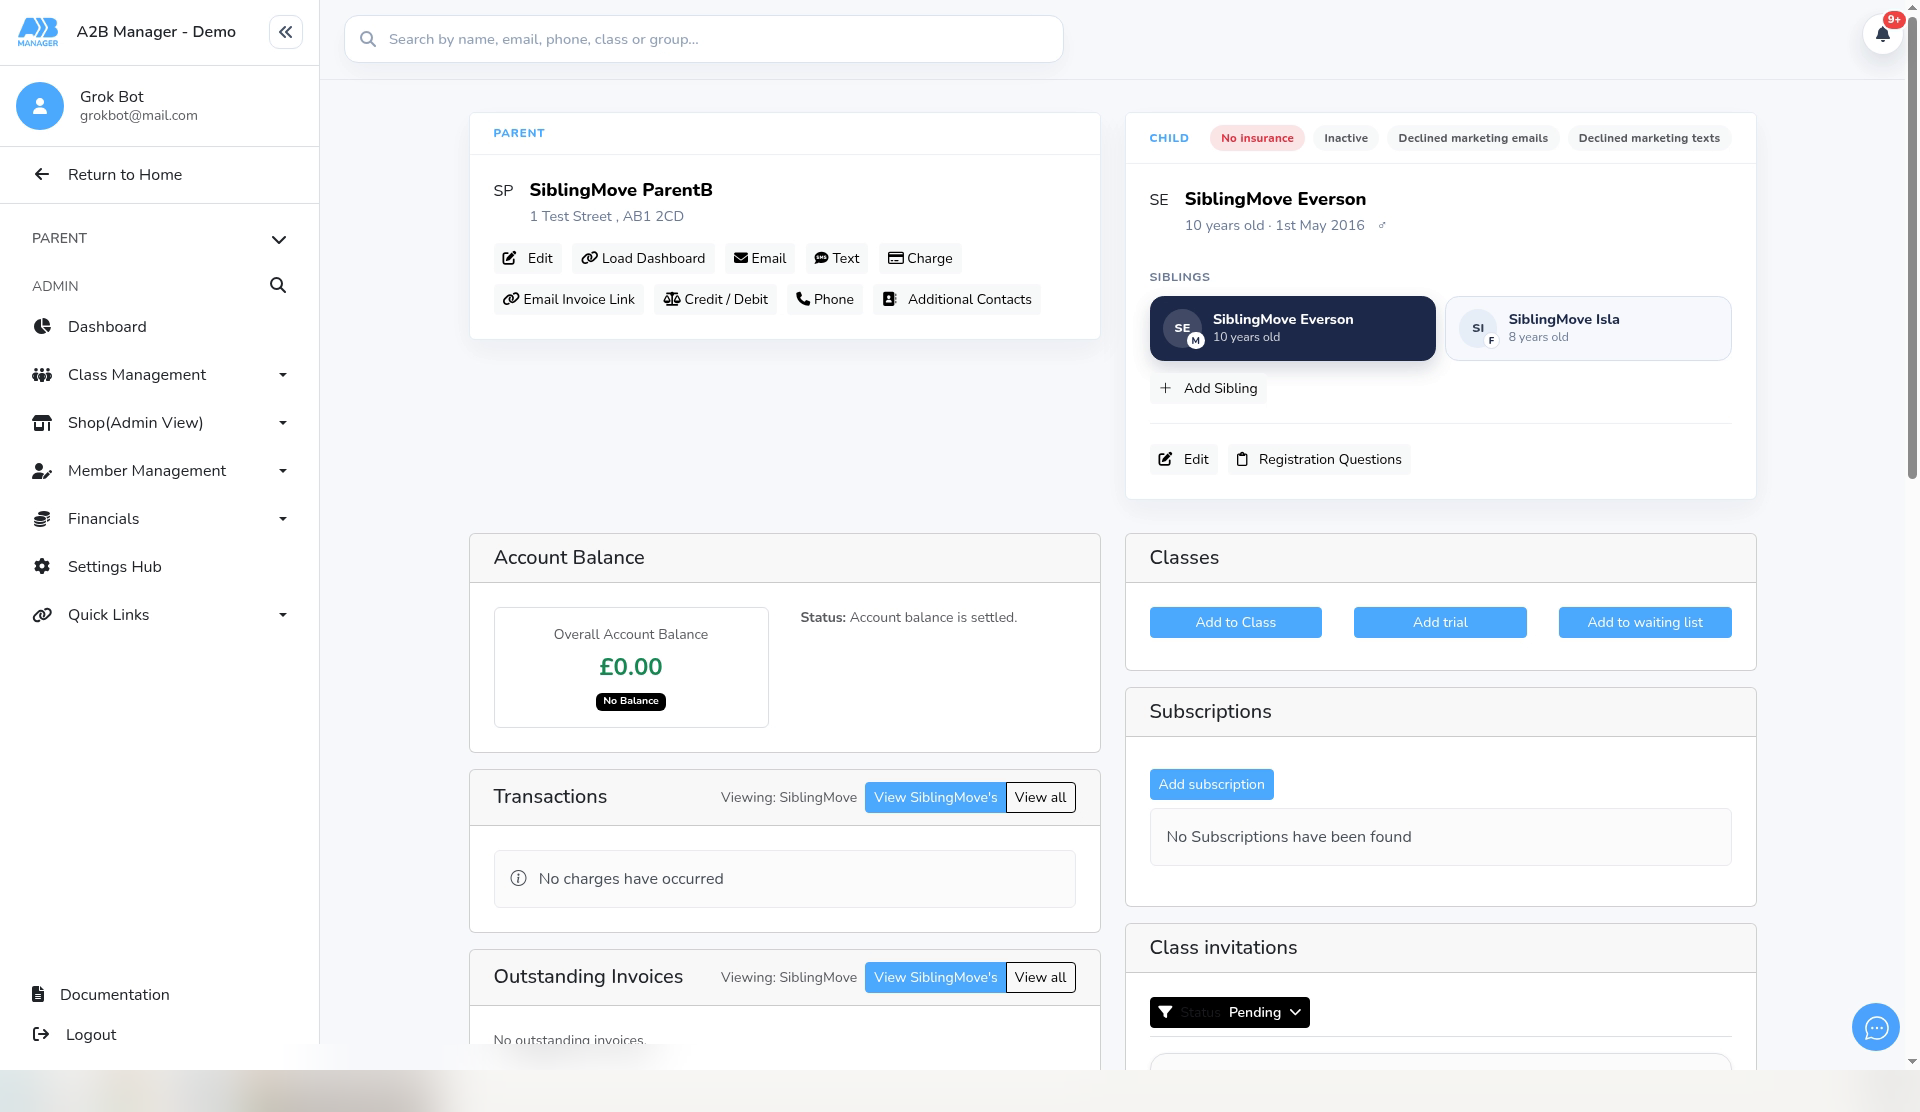
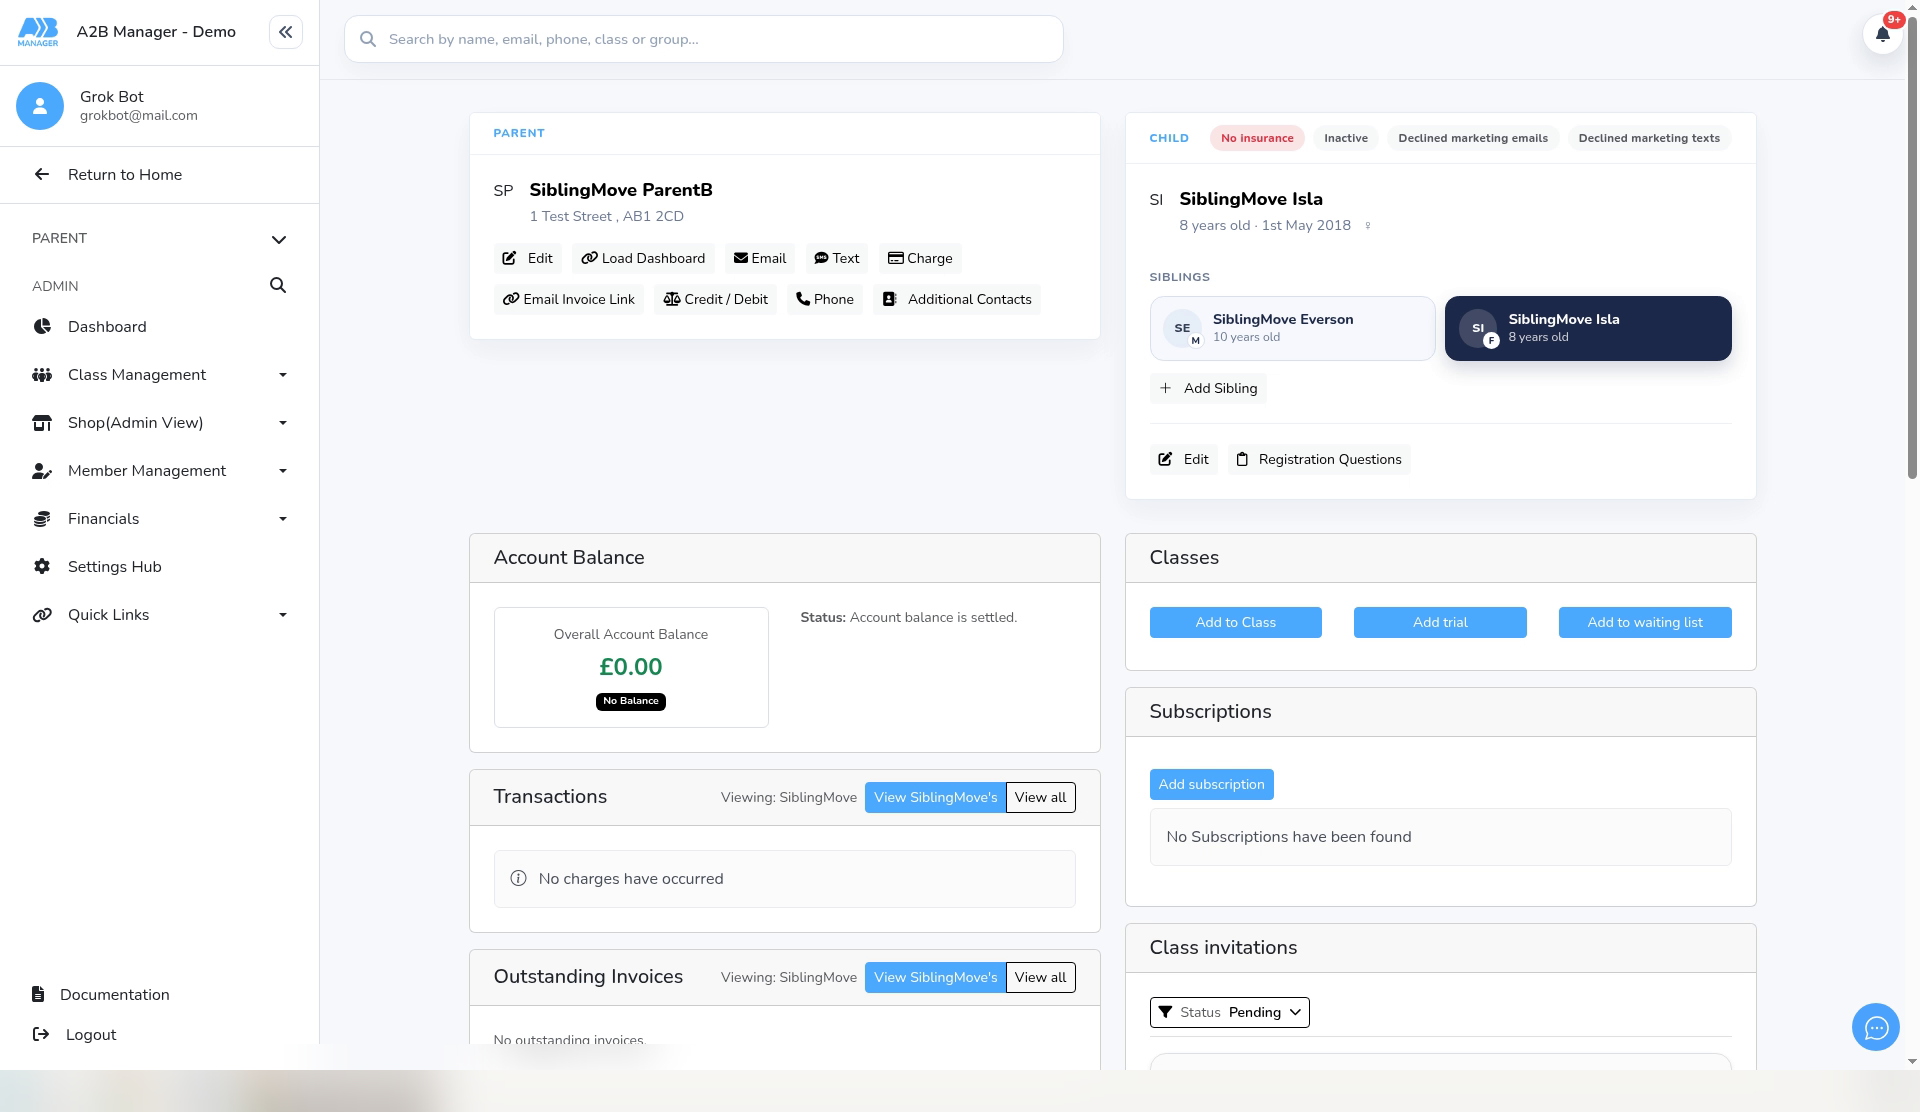
Step 7: Check the new record (2:01) #
- Click the new child in the Siblings strip to open their profile.
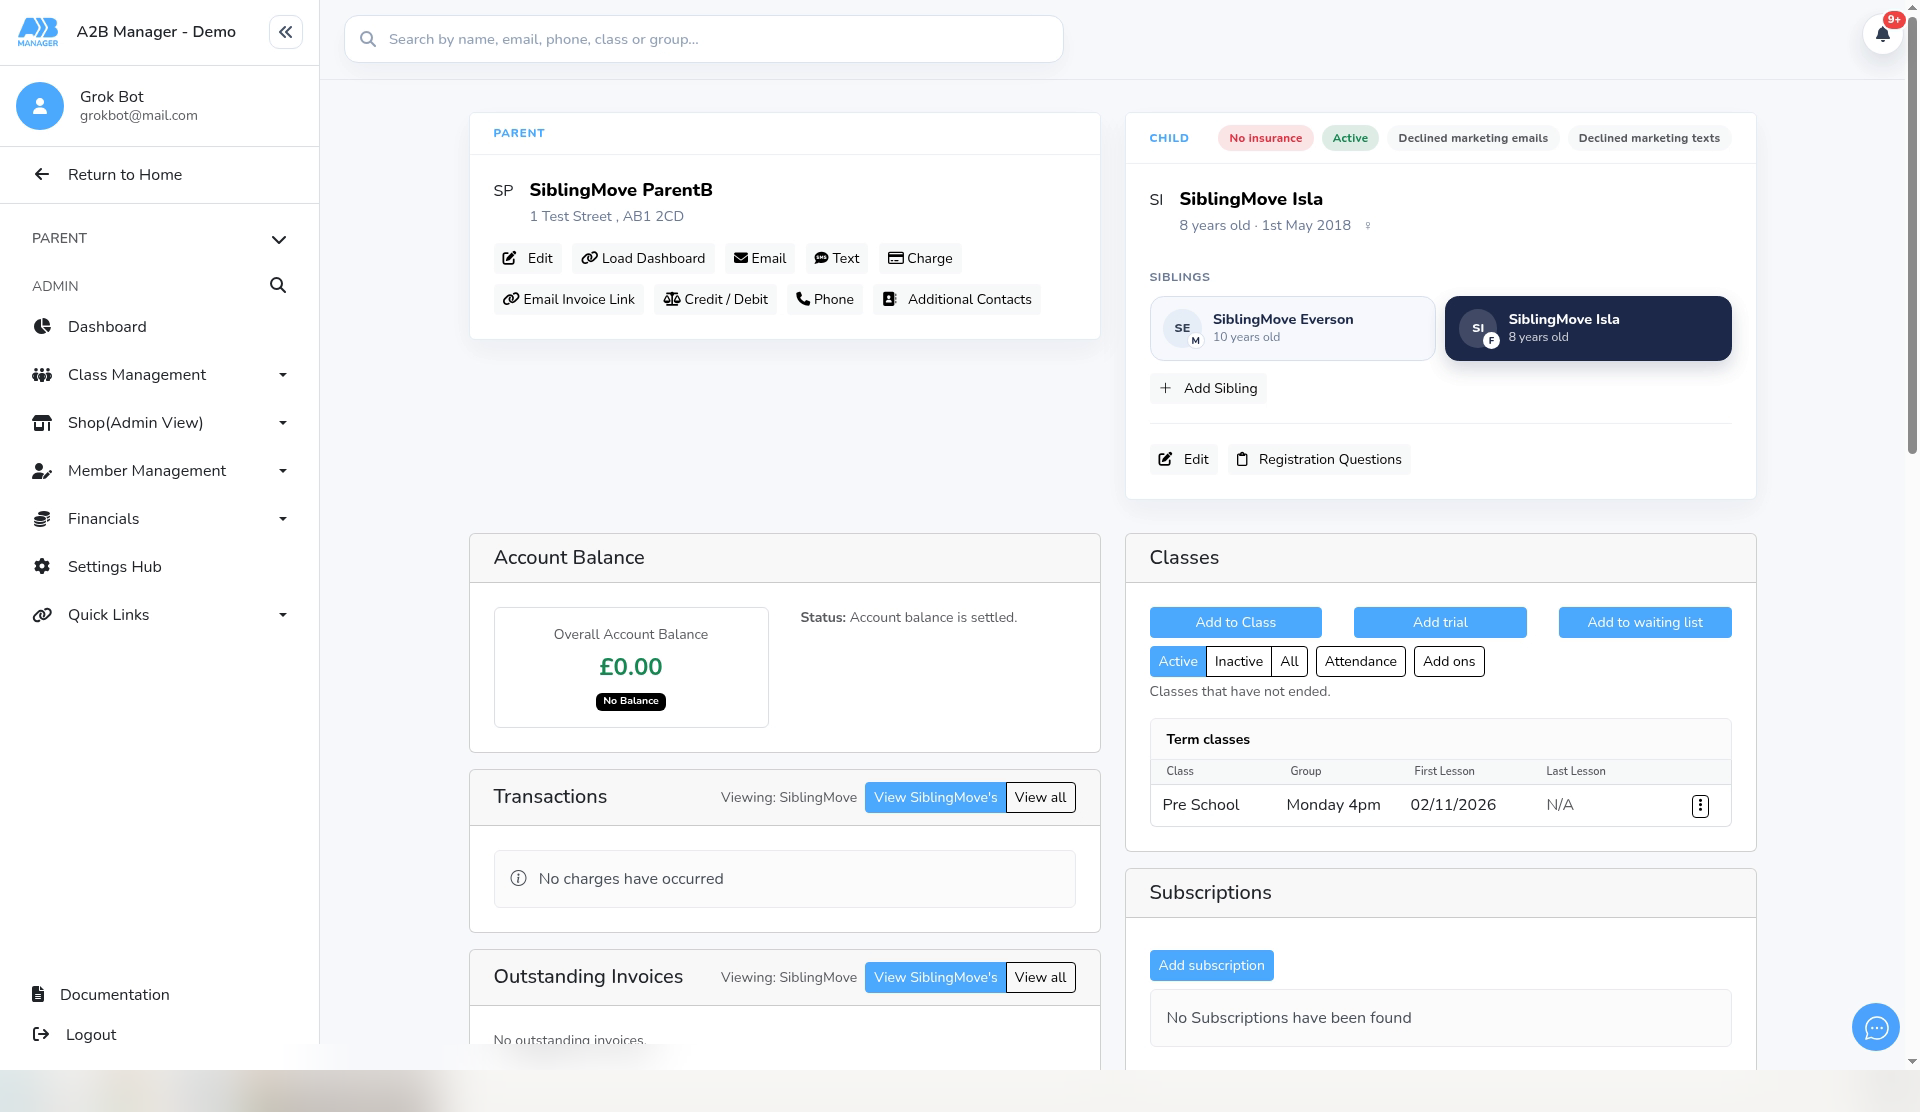
- The Parent card shows the right parent, here SiblingMove ParentB.
- The new record starts as Inactive.
Step 8: Add the new record to their class (2:09) #
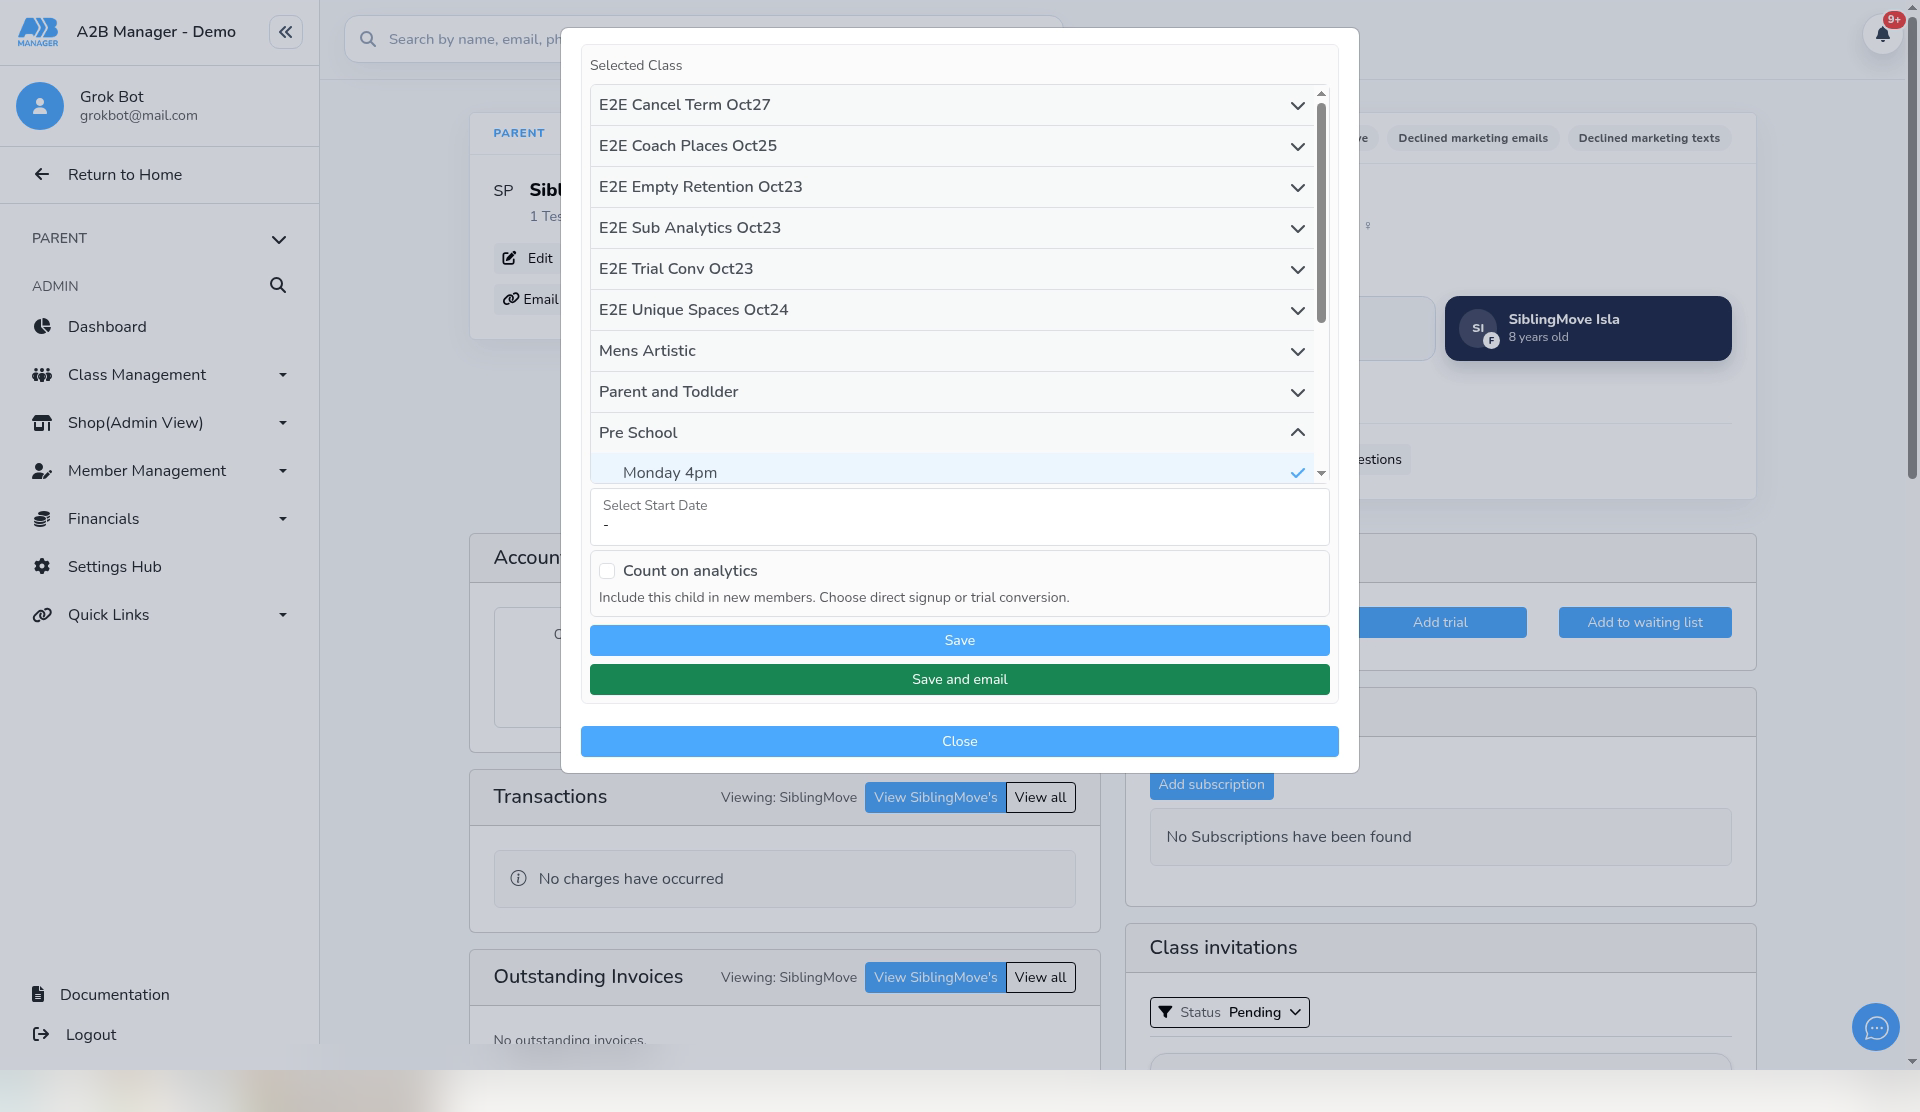
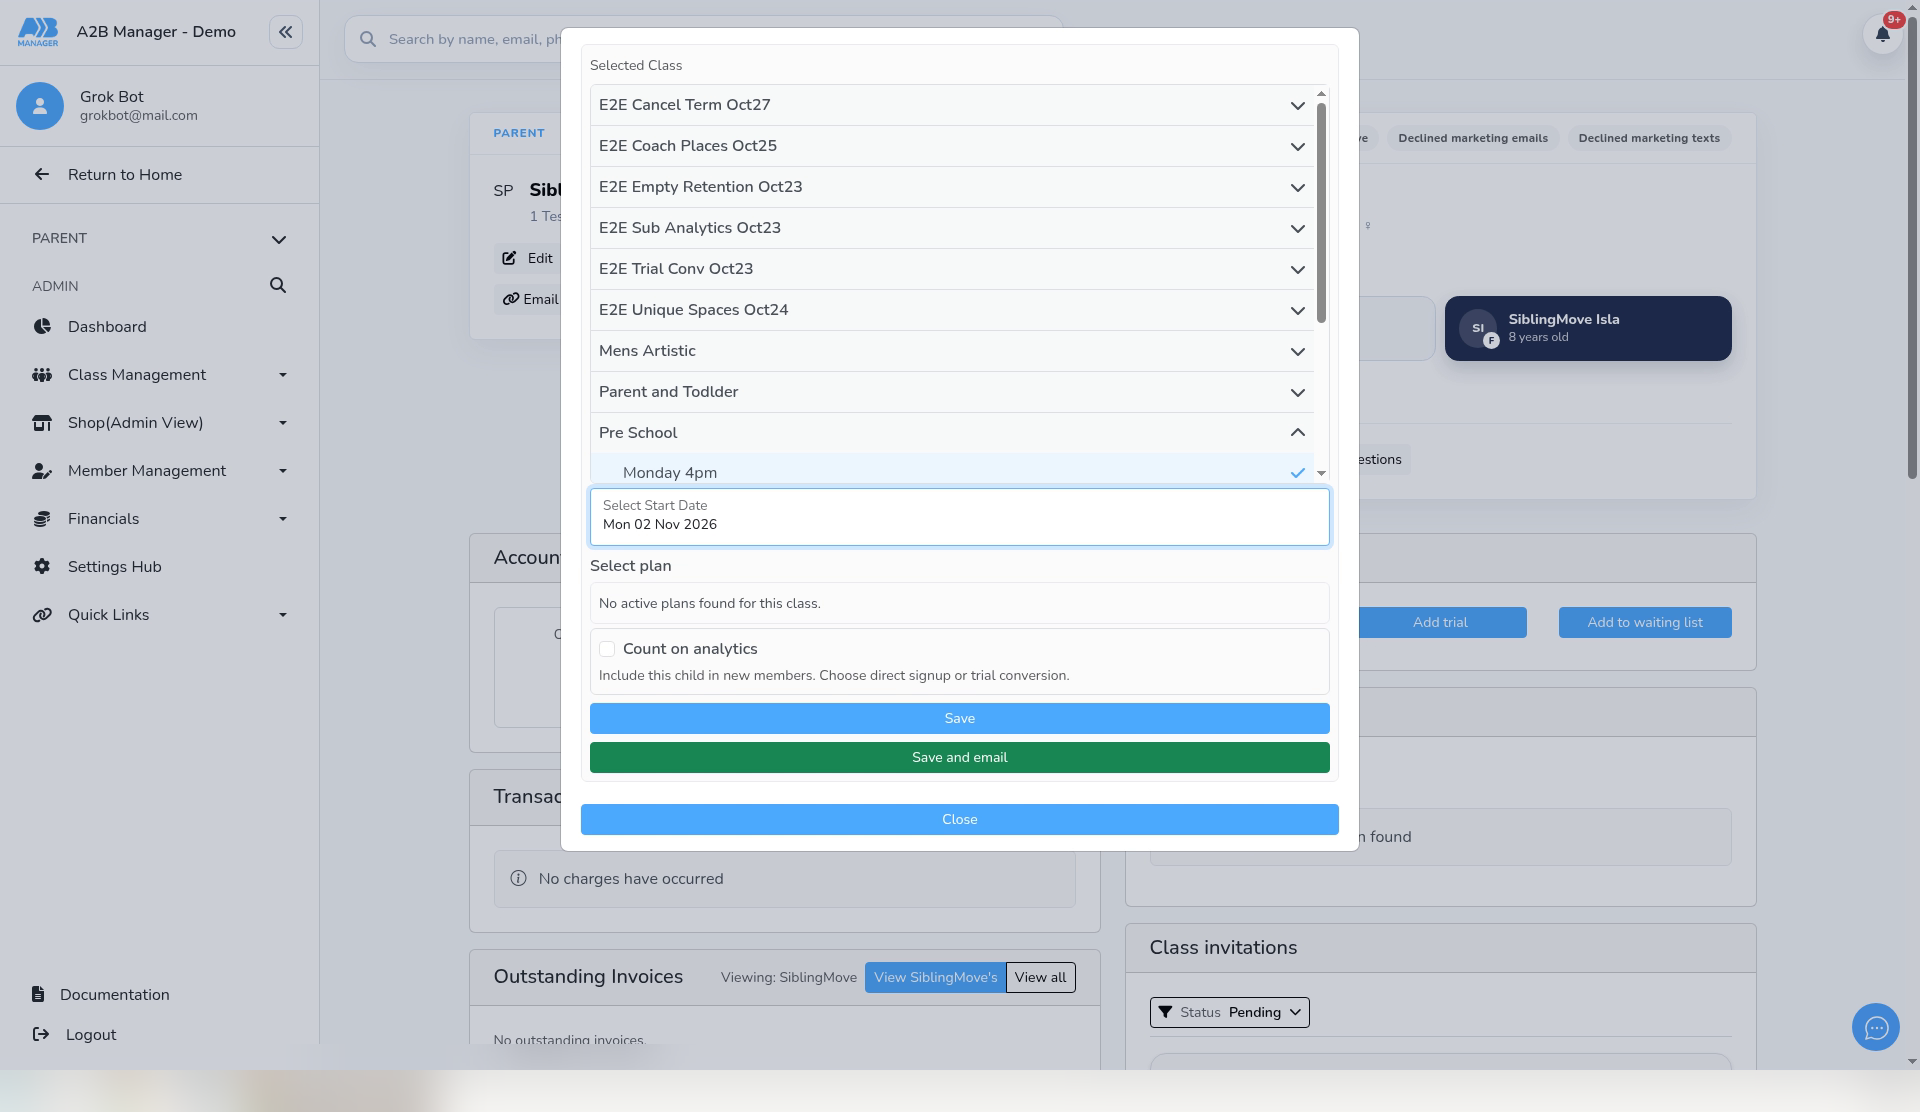
- Under Classes, click Add to Class. Open the class (here Pre School), choose the group (Monday 4pm) and pick a start date (Mon 02 Nov 2026).
- Under Select plan, this class showed “No active plans found for this class.”
- Click Save. In our test, the confirmation read “Added to class group Monday 4pm. Lessons to start from 02/11/2026.” The class shows in the Classes table, and the child is now Active.
- Repeat for each class the child goes to. For more on adding a class, see Add a Member to a Class from the Profile Page.
Step 9: Take the old record out of its classes (2:50) #
- Open the old record’s profile, on the other parent account.
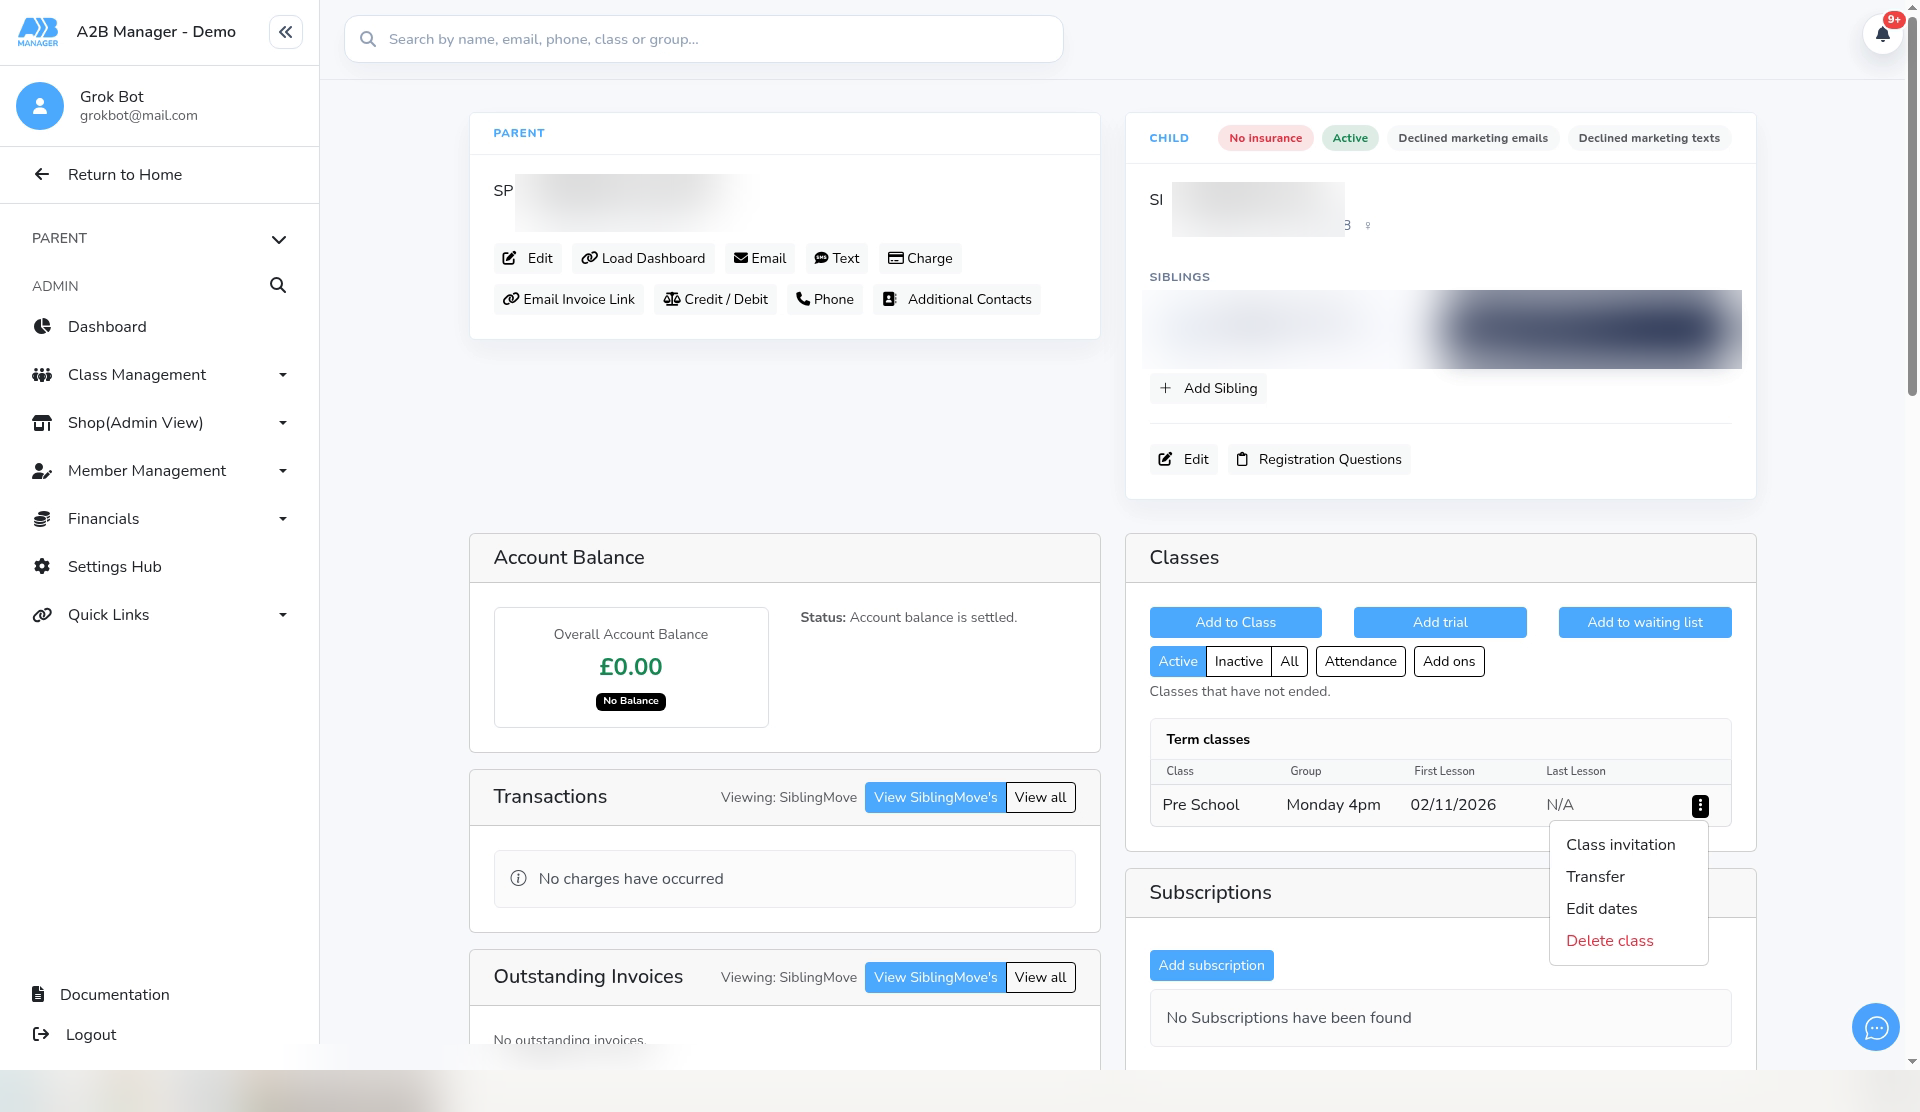
- Under Classes, click the menu at the end of the class row. It offers Class invitation, Transfer, Edit dates and Delete class. Click Delete class.
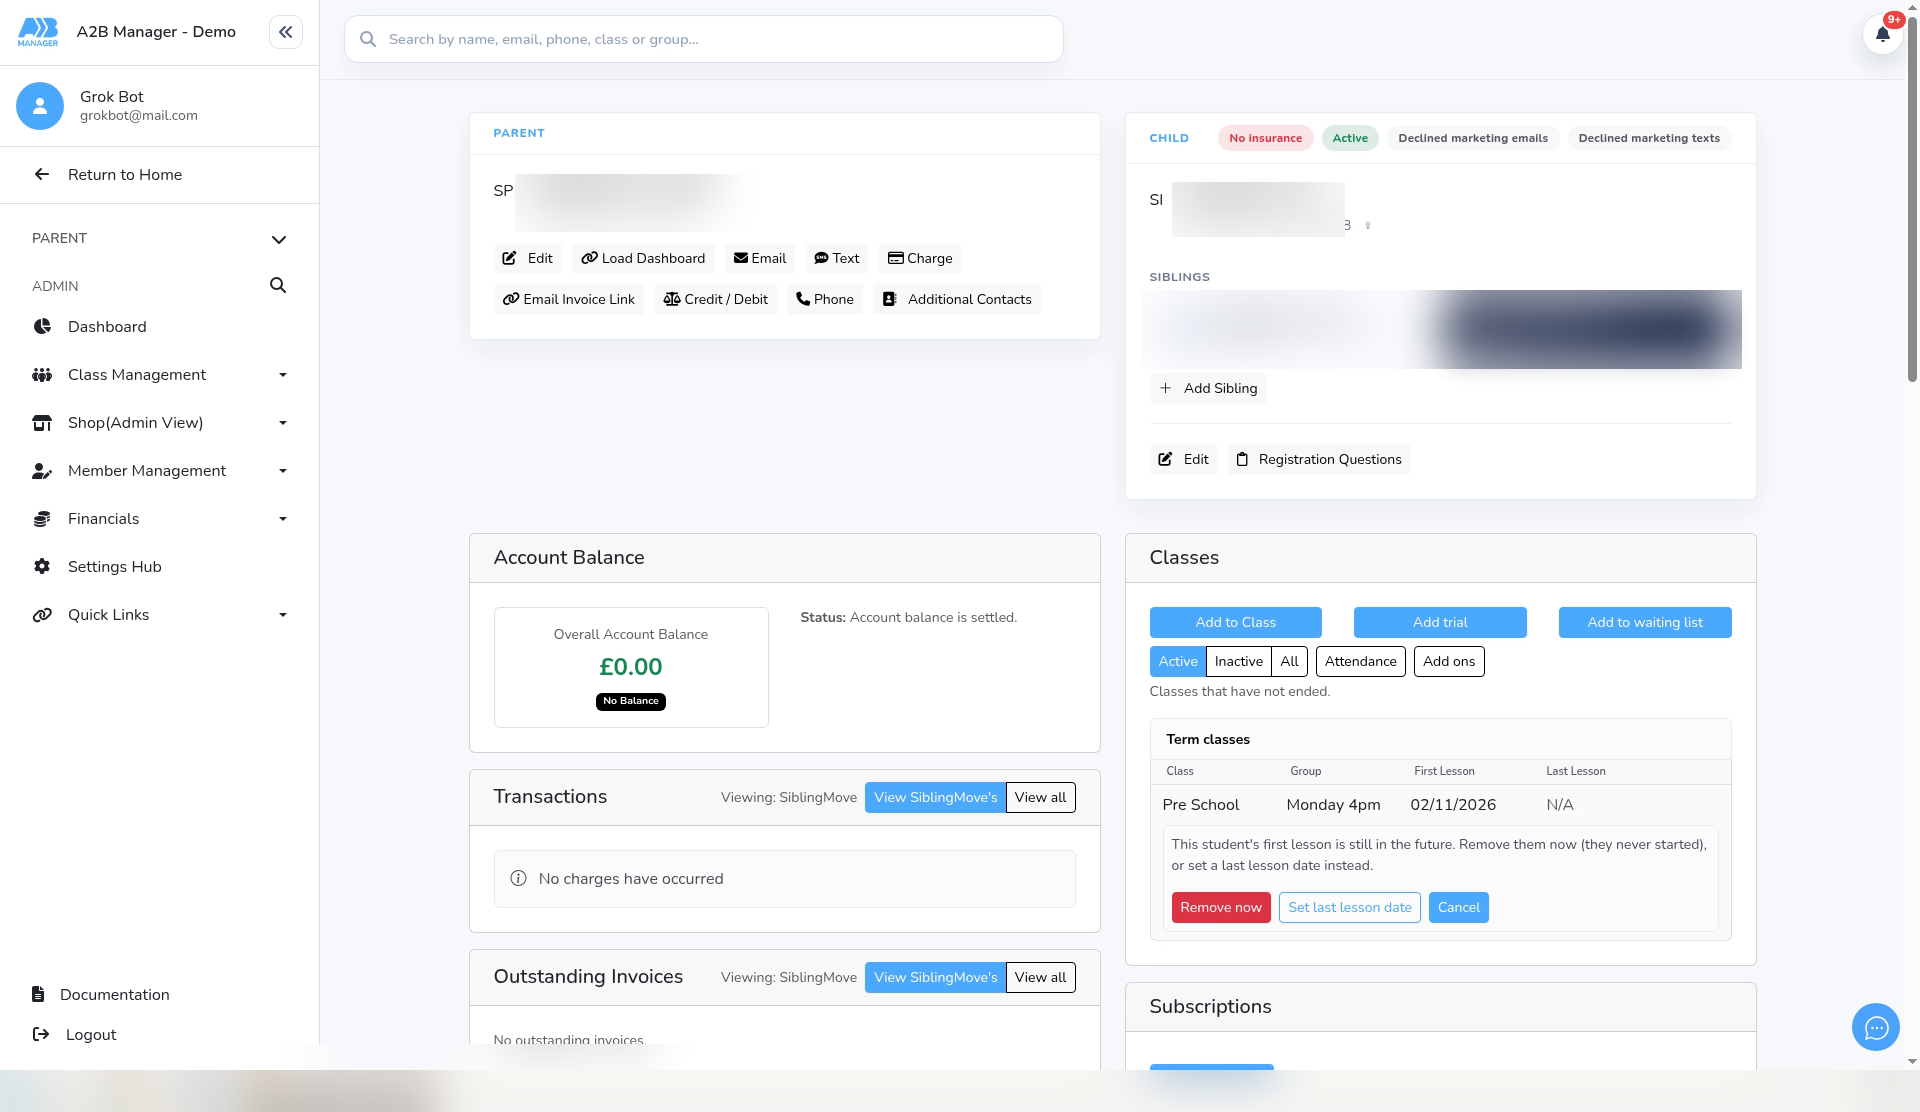
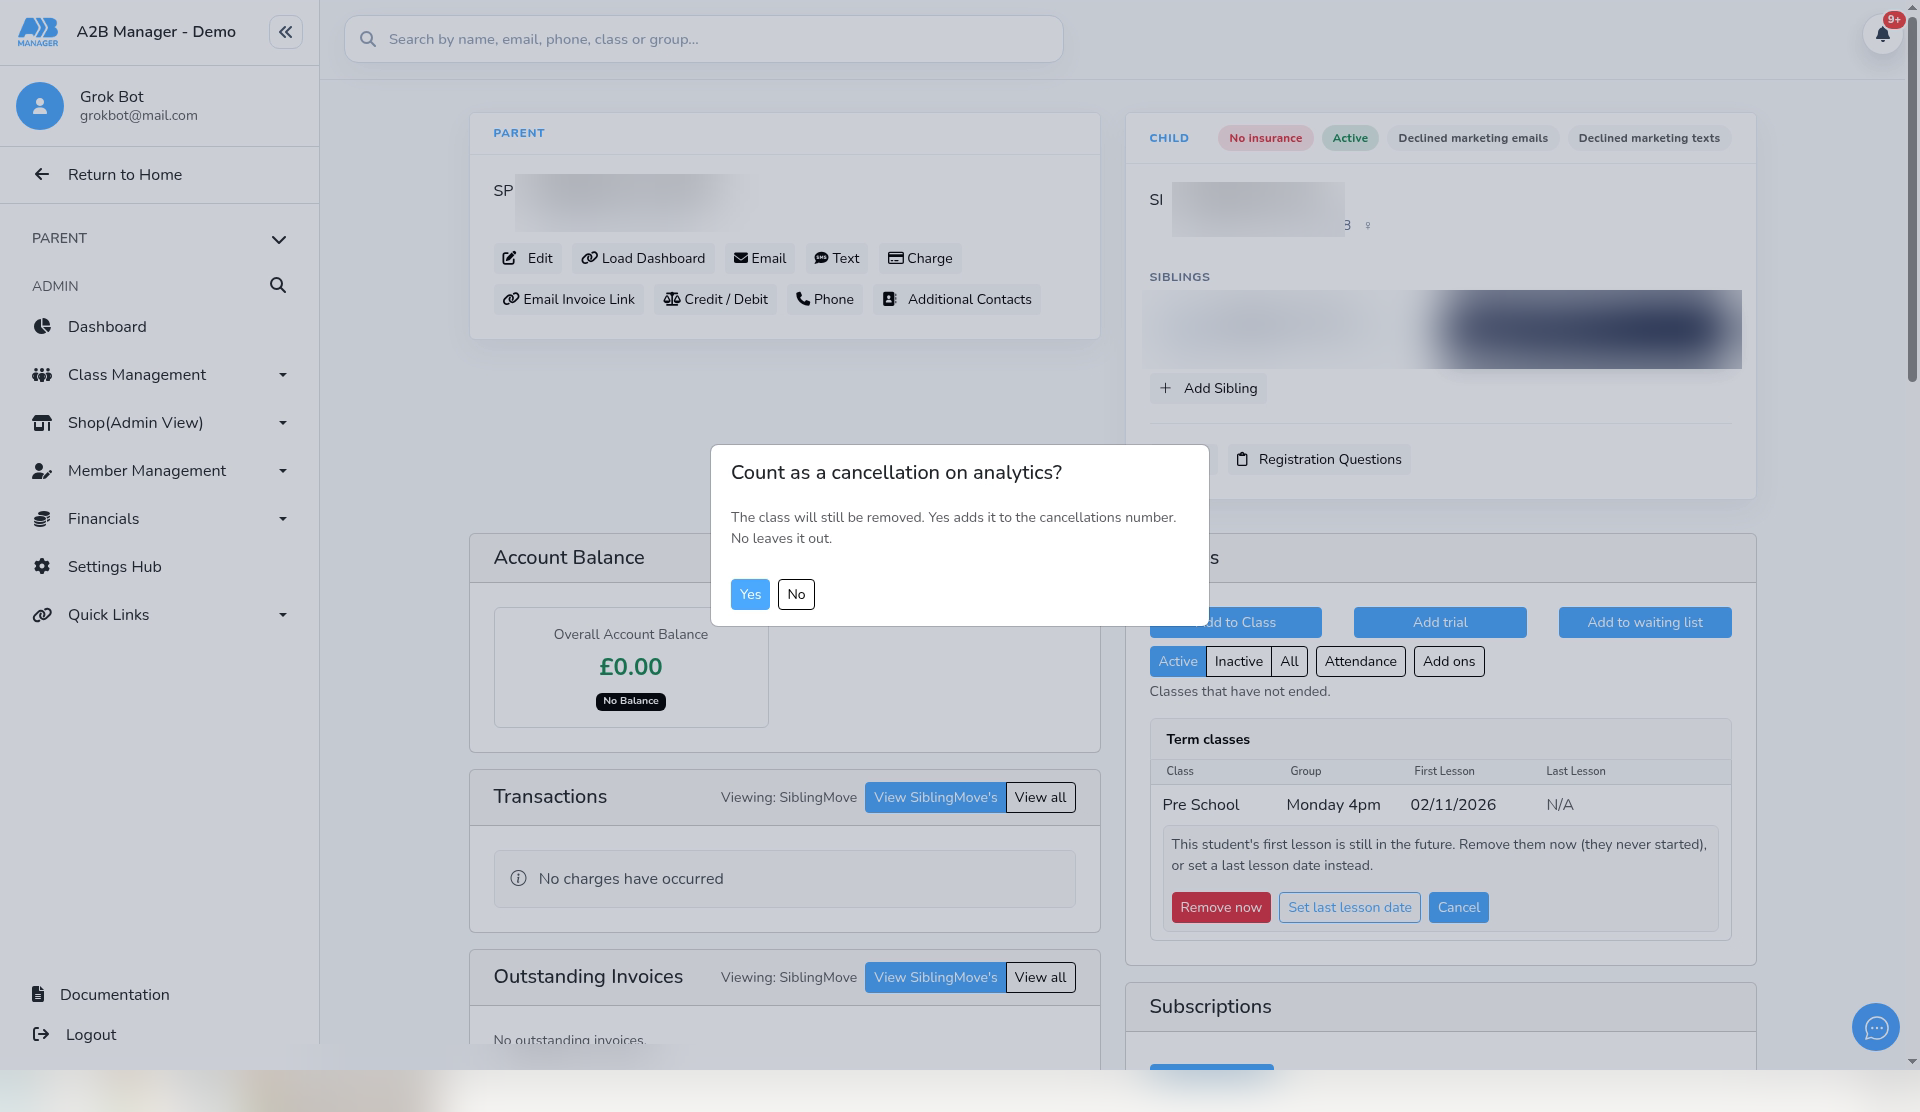
- If the child’s first lesson is still in the future, you’ll see “This student’s first lesson is still in the future. Remove them now (they never started), or set a last lesson date instead.” Click Remove now.
- You’re asked “Count as a cancellation on analytics?” The pop-up explains “The class will still be removed. Yes adds it to the cancellations number. No leaves it out.” We chose No.
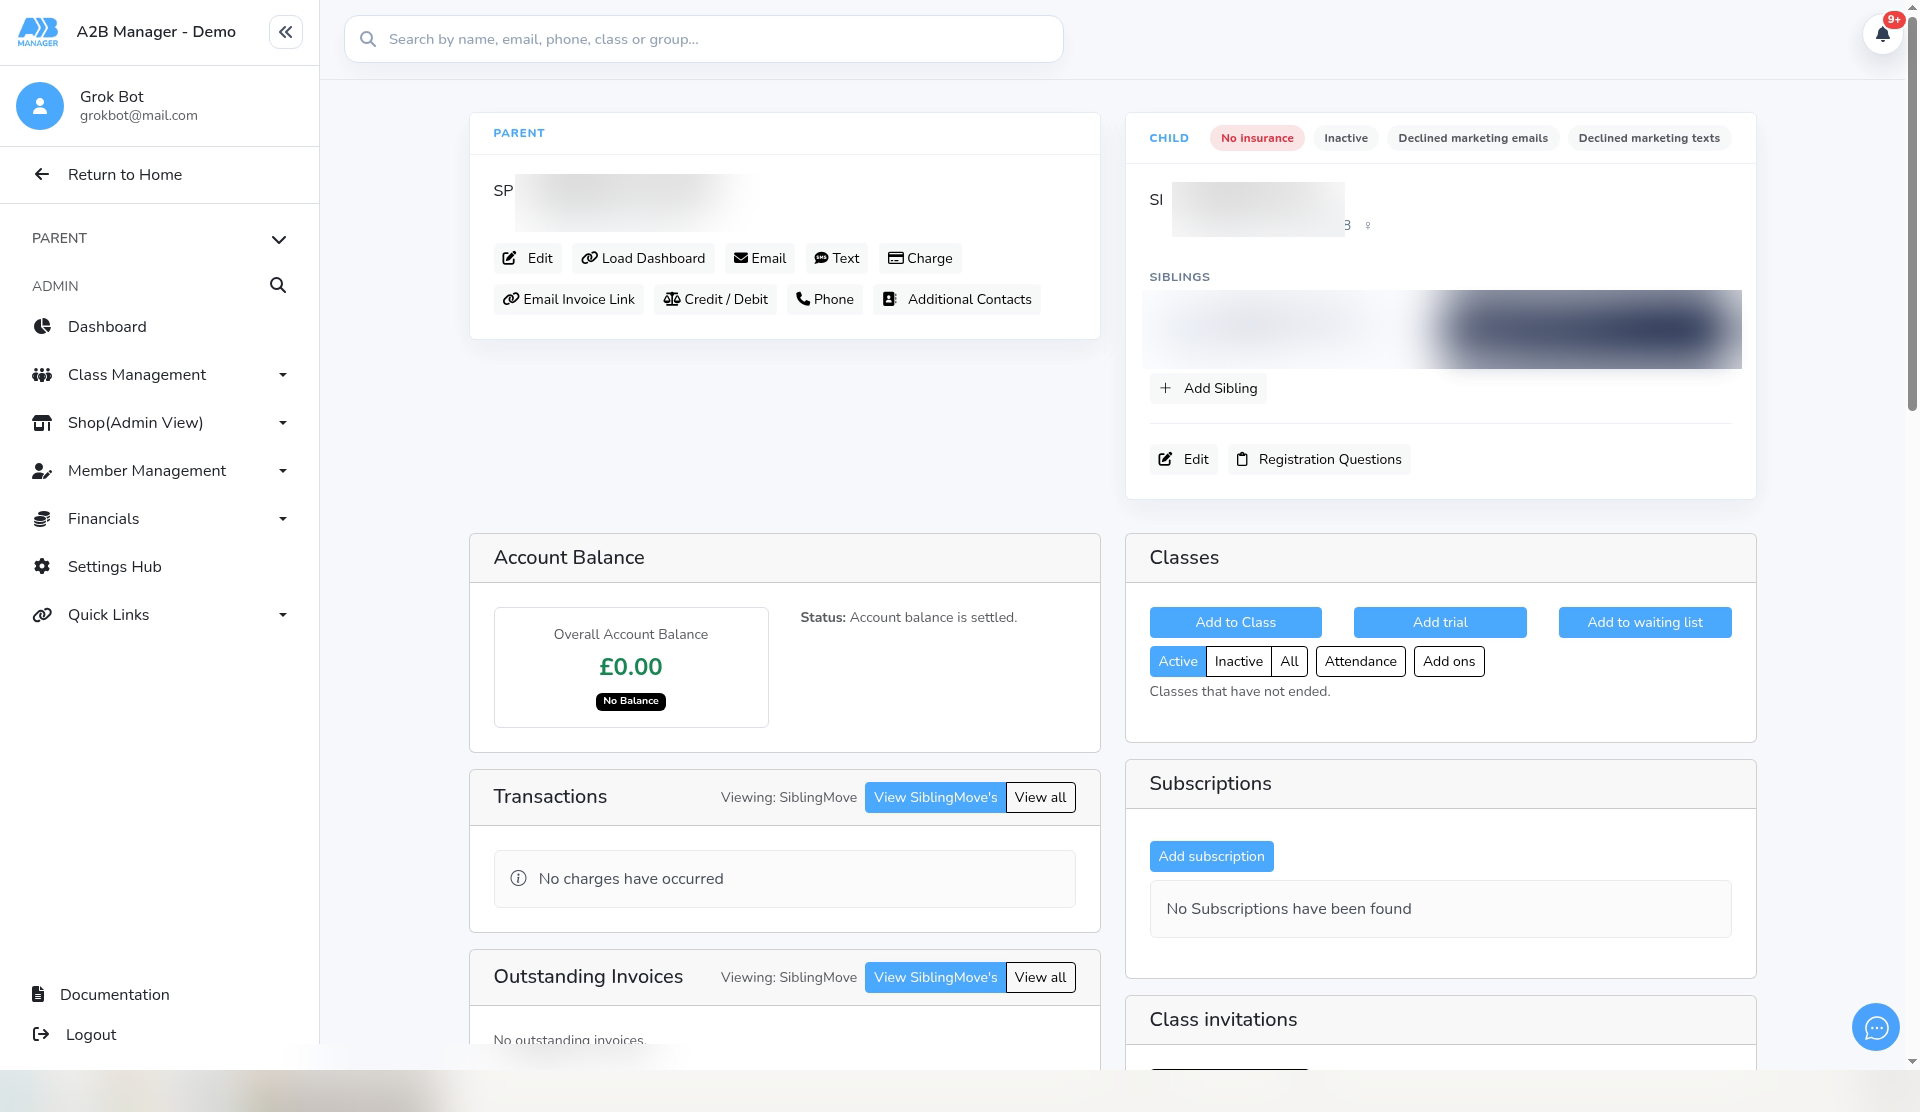
- The class is removed from the Classes table. In our test, the child had no subscription and the profile then showed Inactive.
- Repeat for each class on the old record. The pictures for this step show a test record, with its names blurred.
What doesn’t carry over #
- Add Sibling creates a brand-new record. Nothing is copied from the old one, so enter the child’s details, consents, medical conditions and registration answers again.
- Before you take the old record out of its classes, check its Classes and Subscriptions sections so nothing is missed.
Good to know #
- Add one child at a time. If you open Add Sibling again without reloading the page, the form still shows the last child’s details. Reload the page before adding another child.
- The Siblings strip only shows children on the same parent account. Click a sibling to open their profile.
- There’s no family card. To add a brother or sister to a parent account, use Add Sibling on the Child card.
- Related guides: How to View Sibling Accounts via Profiles, Assigning Subscriptions Between Siblings, How to Change a Parent’s Login Email and Add a Member to a Class from the Profile Page.