

Table of Contents
A term-based class is paid for by the term. You set it up in three parts: the class, a Term group, and the session time with its price. Parents then book the term (or a trial) from your booking page.
Setting up a term-based class #
Step 1: Create the term class (0:00) #
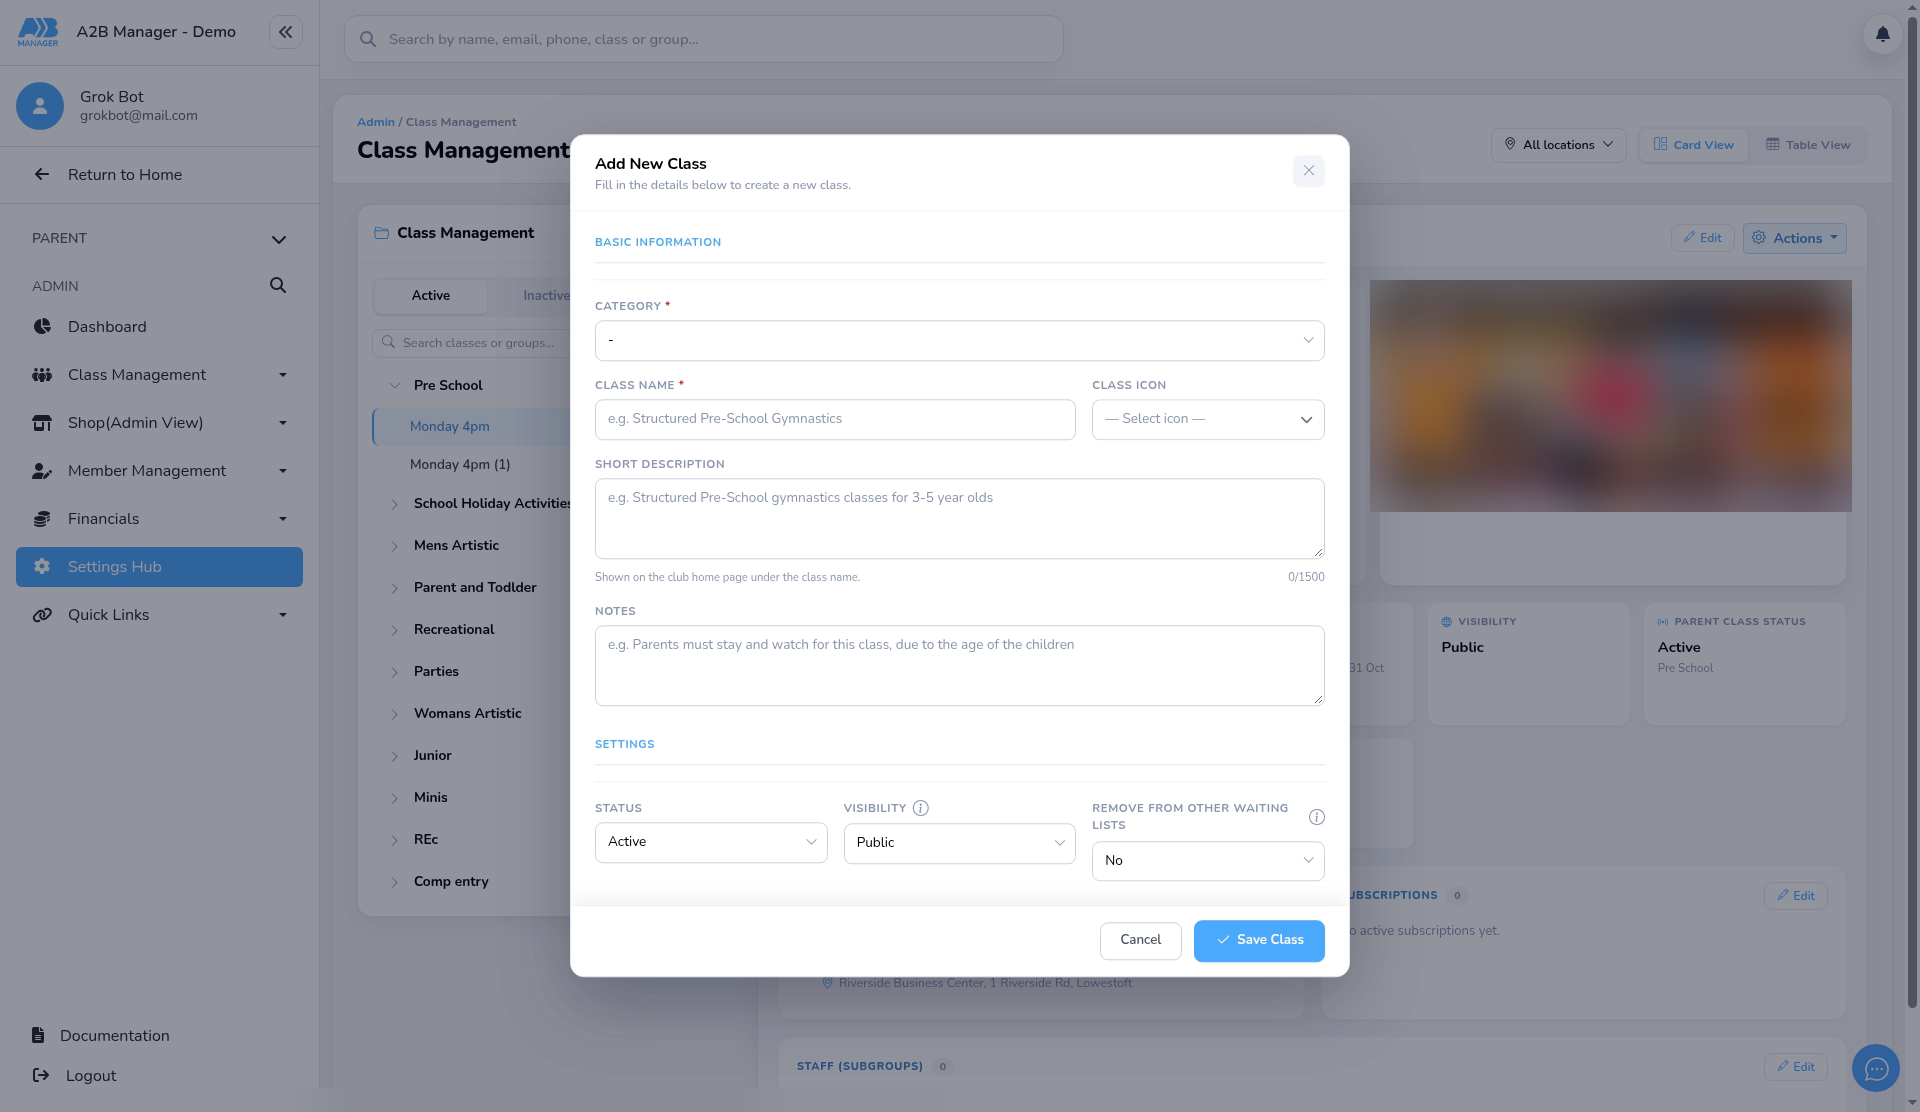
- Go to Settings Hub > Add/Edit Classes and click + New Class.
- Choose the Category and enter the Class Name (both required), for example Pre School.
- Add a Class Icon, a Short Description and any Notes for parents, such as “Parents must stay for this class”.
- Set Status to Active and Visibility to Public so parents can book, and choose whether joining removes the child from other waiting lists. Then save.
Step 2: Add a Term group (0:15) #
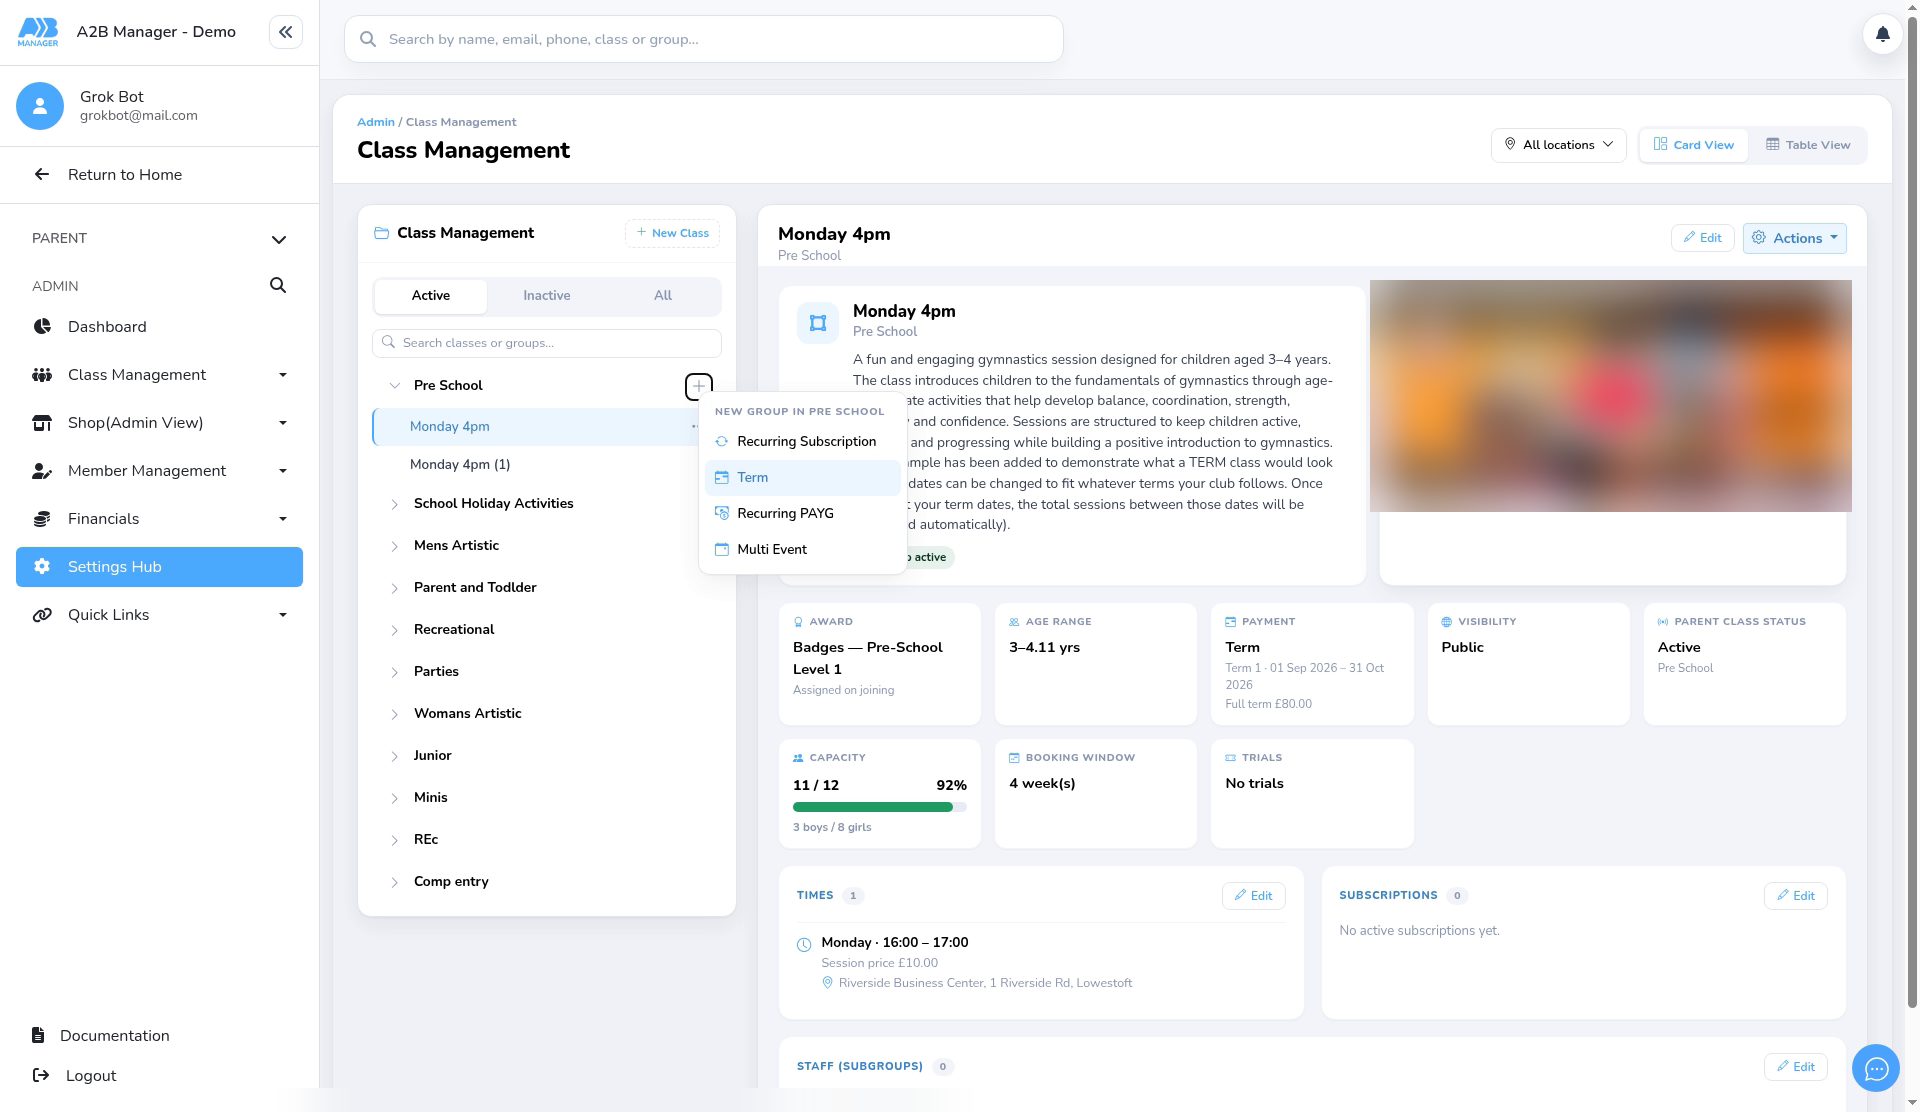
- Click + next to the class and choose Term.
- Name the group after its day and time, for example Monday 4pm.
Step 3: Set up the group (0:28) #
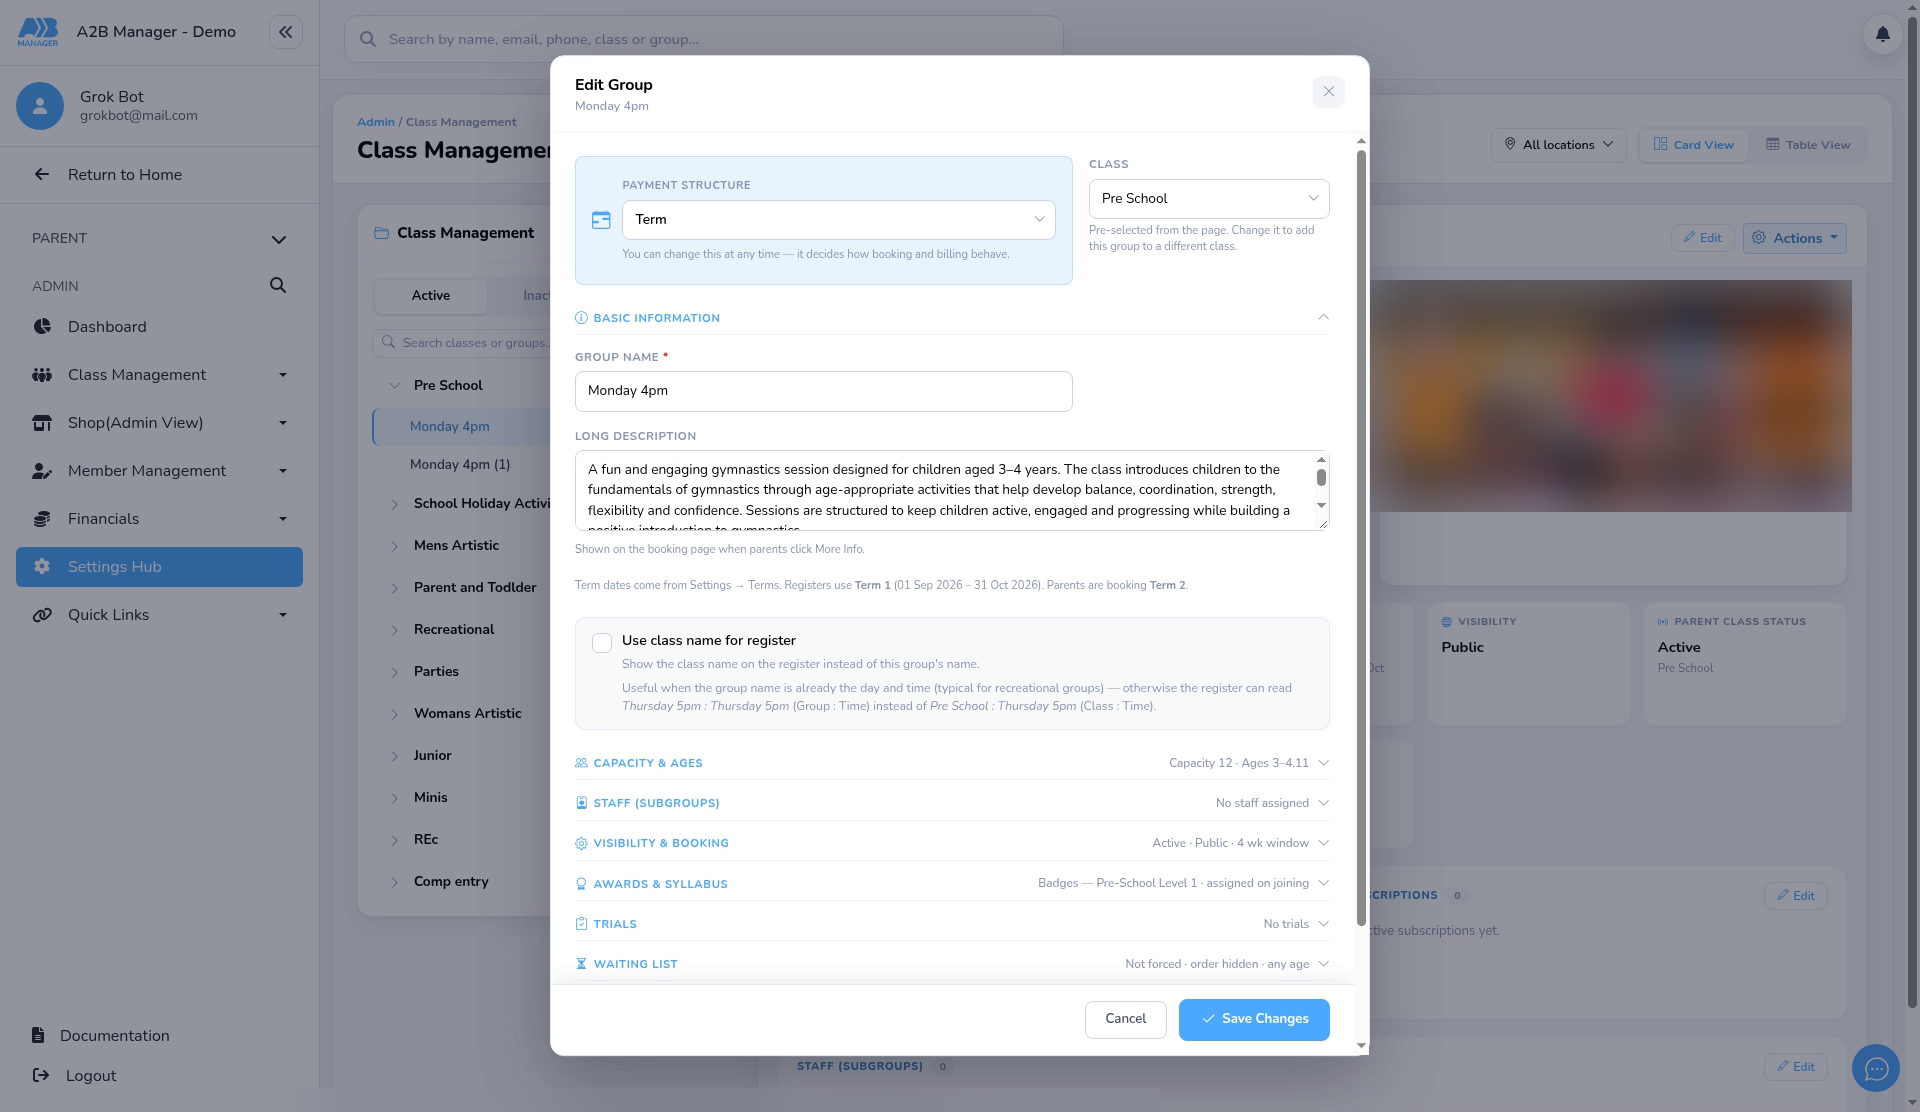
- In the group, click Edit. Under Basic Information add a Long Description (shown when parents click More Info).
- Term dates come from Settings > Terms, and the group shows which term registers use and which term parents are booking. Clubs without terms enter a Term Name, Start Date and End Date here instead. See How to Add Term Dates and Charge For The Term.
- Capacity & Ages: set the number of places (or split by gender) and the age or date-of-birth range.
- Visibility & Booking: set Status, Visibility and the Booking Window in weeks, for example 4.
Step 4: Trials, waiting list and media (1:01) #
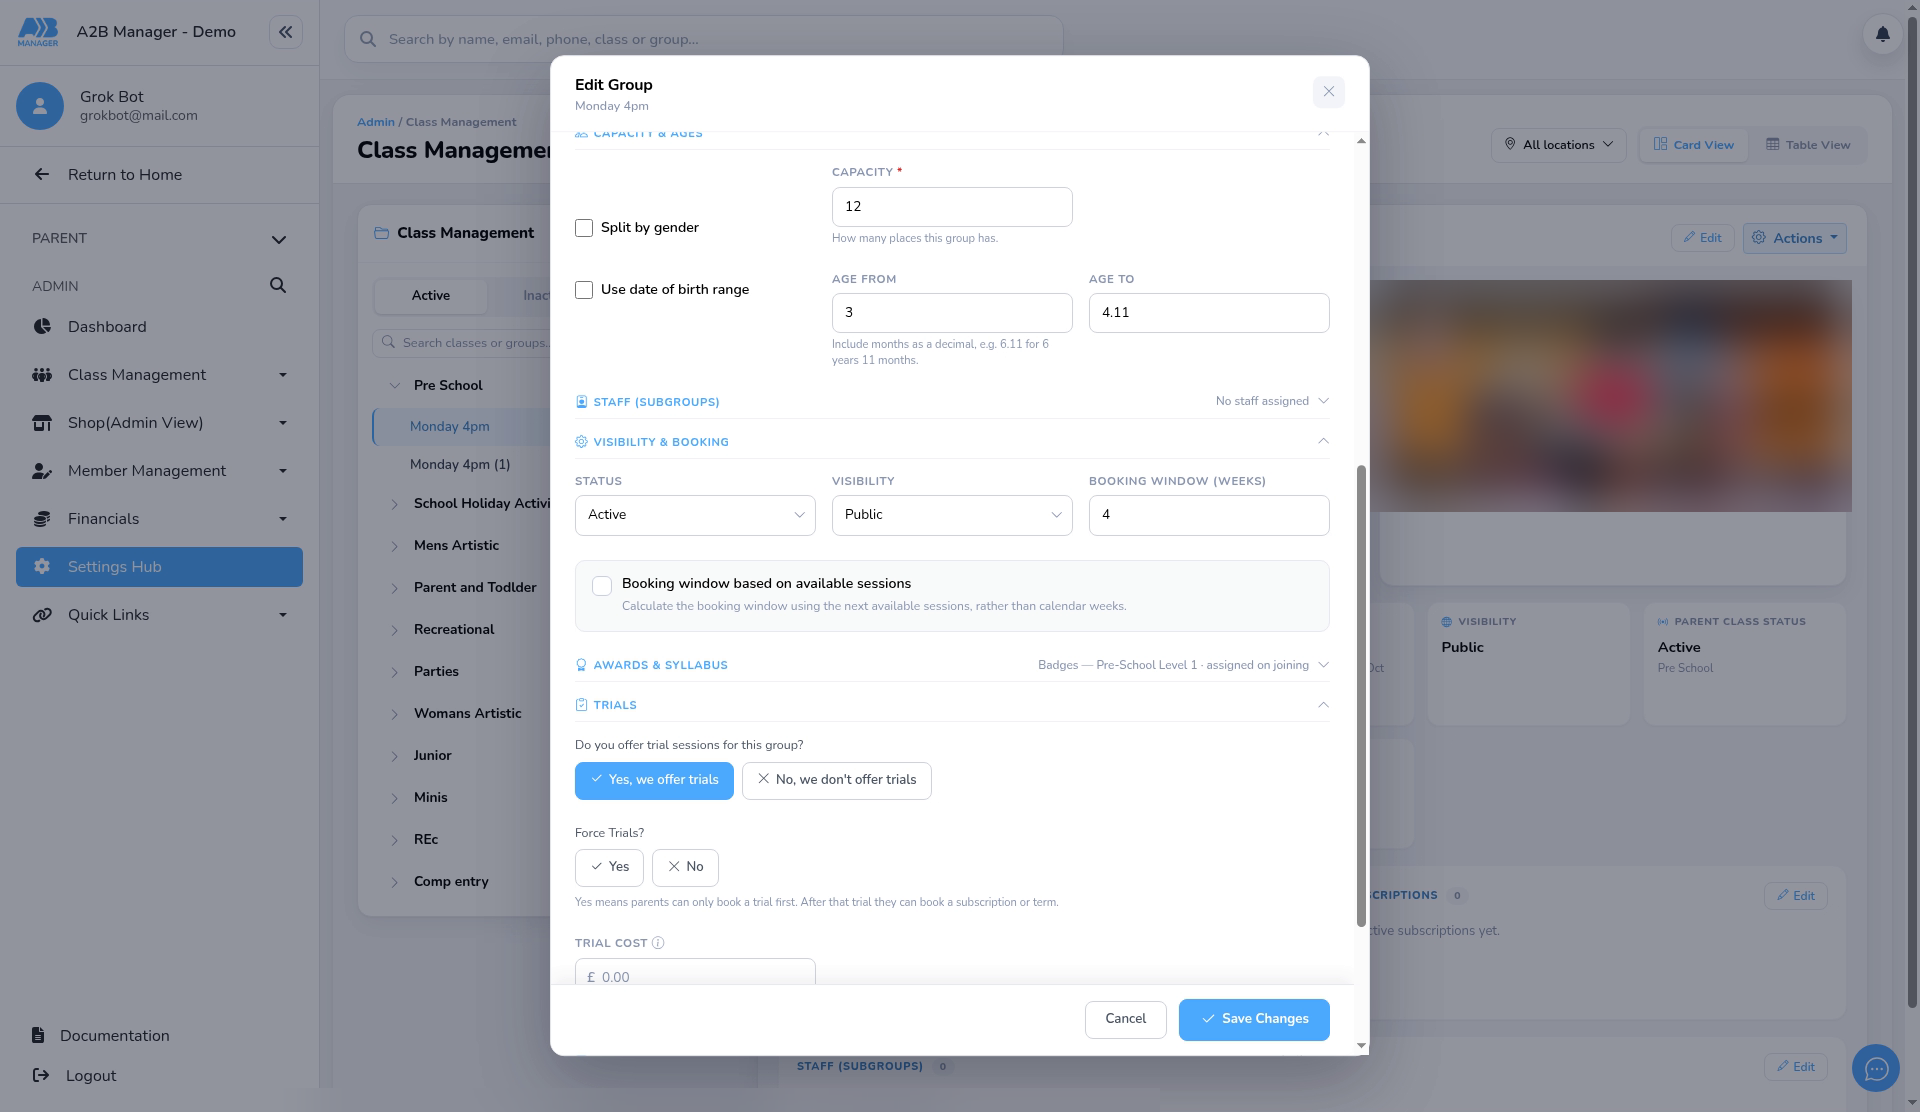
- Trials: choose Yes, we offer trials or No. Yes shows Force Trials? (parents must book a trial first) and Trial Cost. Type 0 for a free trial.
- Once you type 0 as the trial cost, a Try before you buy? option appears. Yes keeps the trial free and counts that session in the child’s first term payment.
- Waiting List, Upsell & Add-ons and Media (a group image or YouTube video, and a brochure) are optional. Save when you’re done.
Step 5: Add the session time and price (1:43) #
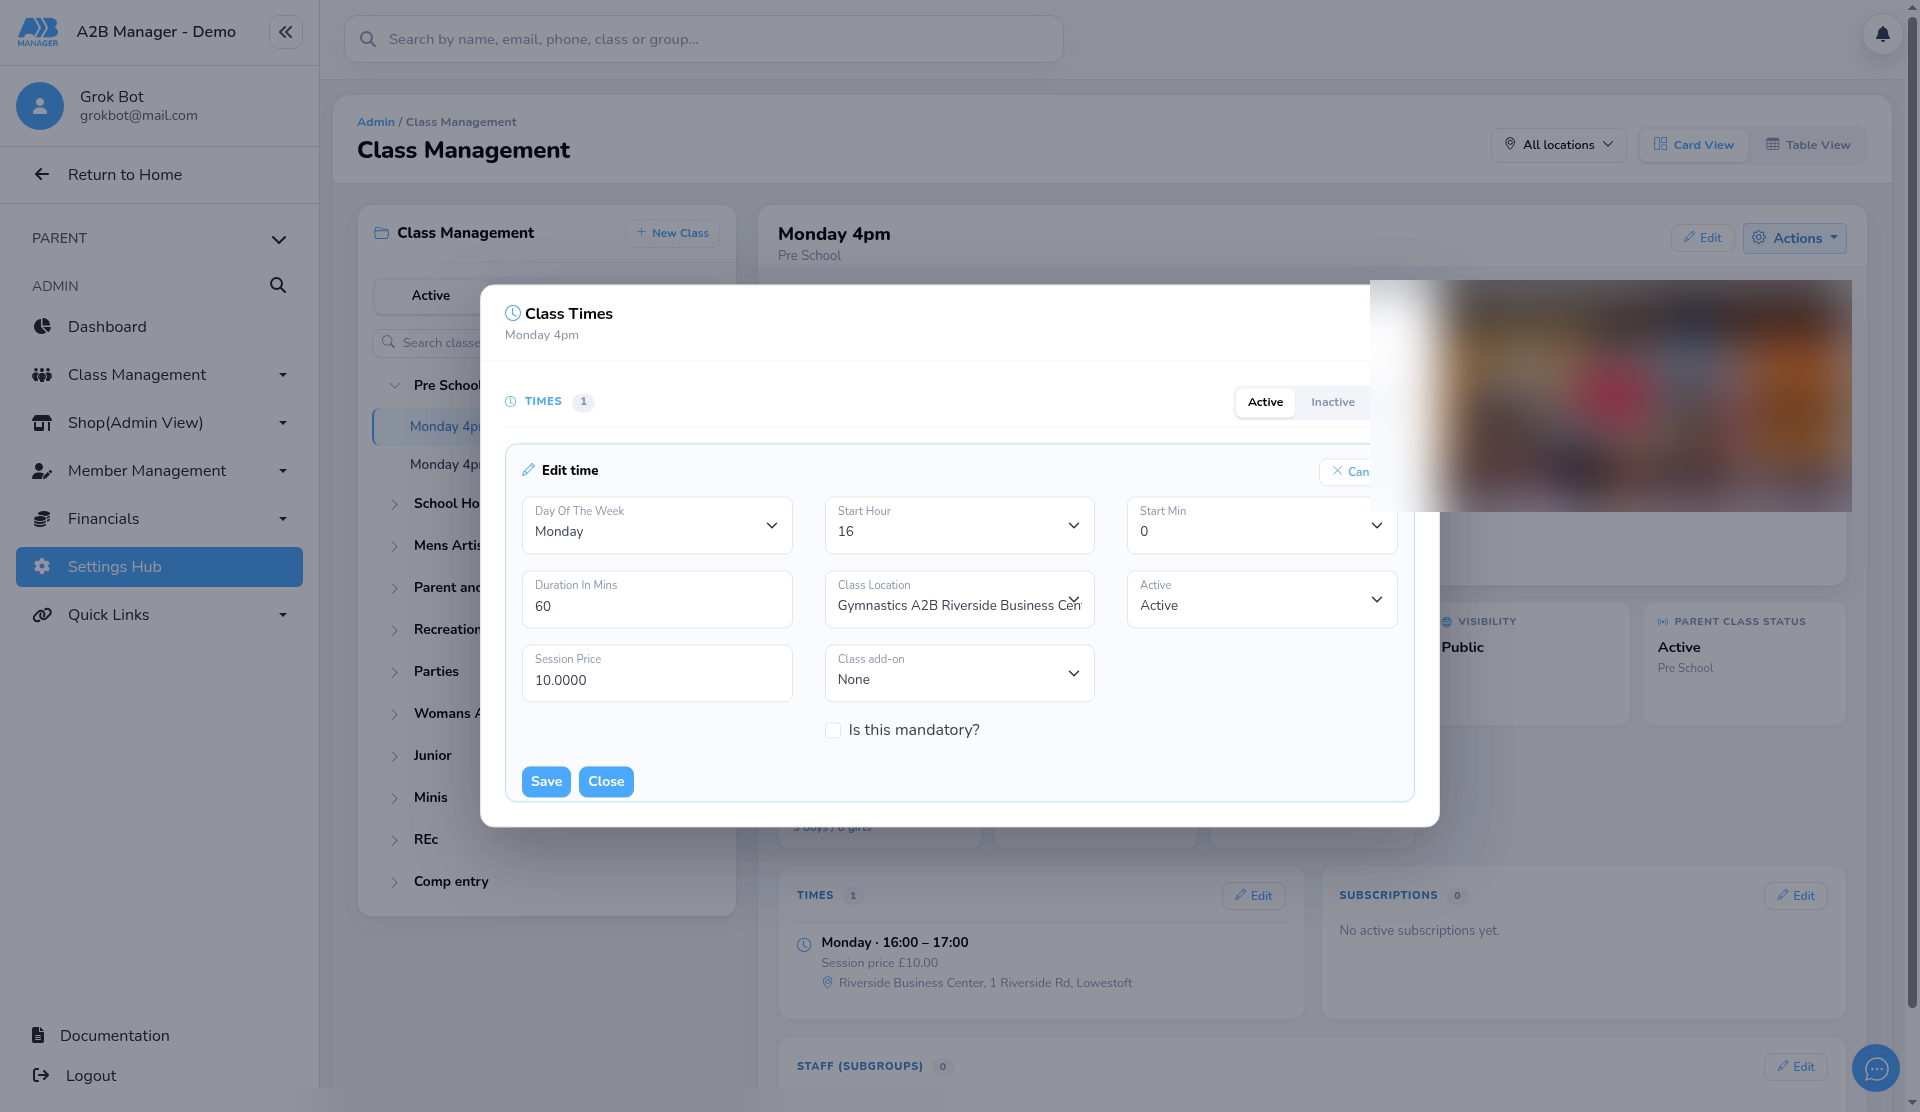
- On the Times card, click Edit, then add or edit a time.
- Set the Day, start time, Duration, Location and Active.
- Enter the Session Price: the price of one session, for example £10. Add a Class add-on (such as a T-shirt) if needed, and tick Is this mandatory? if every child must buy it. Then save.
- Annual fees such as insurance or membership are linked separately on the Subscriptions card. See Setting Up Your First Recurring Subscription Class.
Step 6: Check the booking page (2:08) #
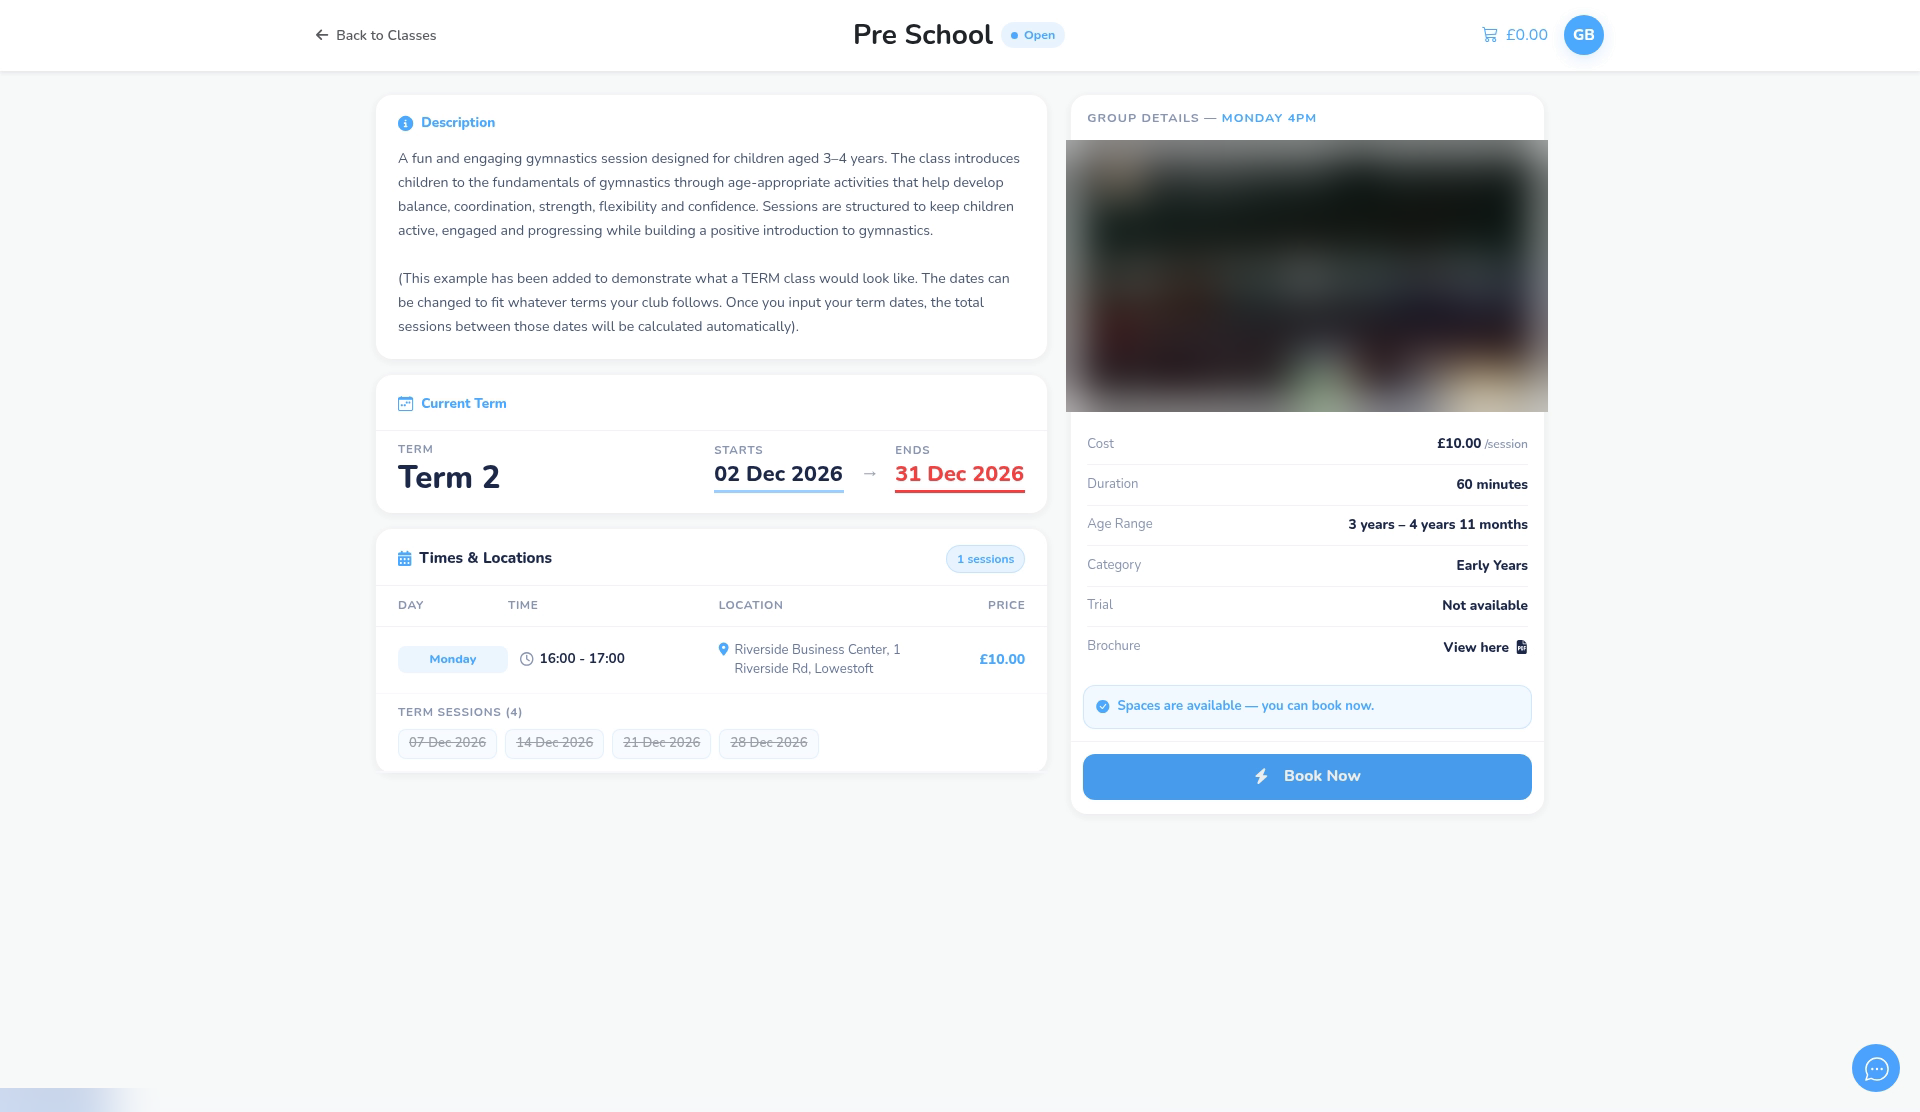
- Open the class from your club’s booking page and click More Info.
- Check the Current Term and its dates, the times and location, the term sessions and the price per session.
- Parents click Book Now, choose their child and add the booking to the basket.
How the term price is worked out #
- Parents pay the Session Price for each session left in the term, from the day they join to the end of the term. Dates when the club or class is closed aren’t counted.
- For example, £10 per session × 8 sessions left = £80.
Trial or full term #
- If the group offers trials, the basket shows a Booking type choice: Trial or Full term. Parents can book a trial session first or pay for the whole term.
FAQs #
- Can I add more than one session a week? Yes, add another time to the same group.
- Can I remove a group? Groups can’t be deleted; use Deactivate.


