

Table of Contents
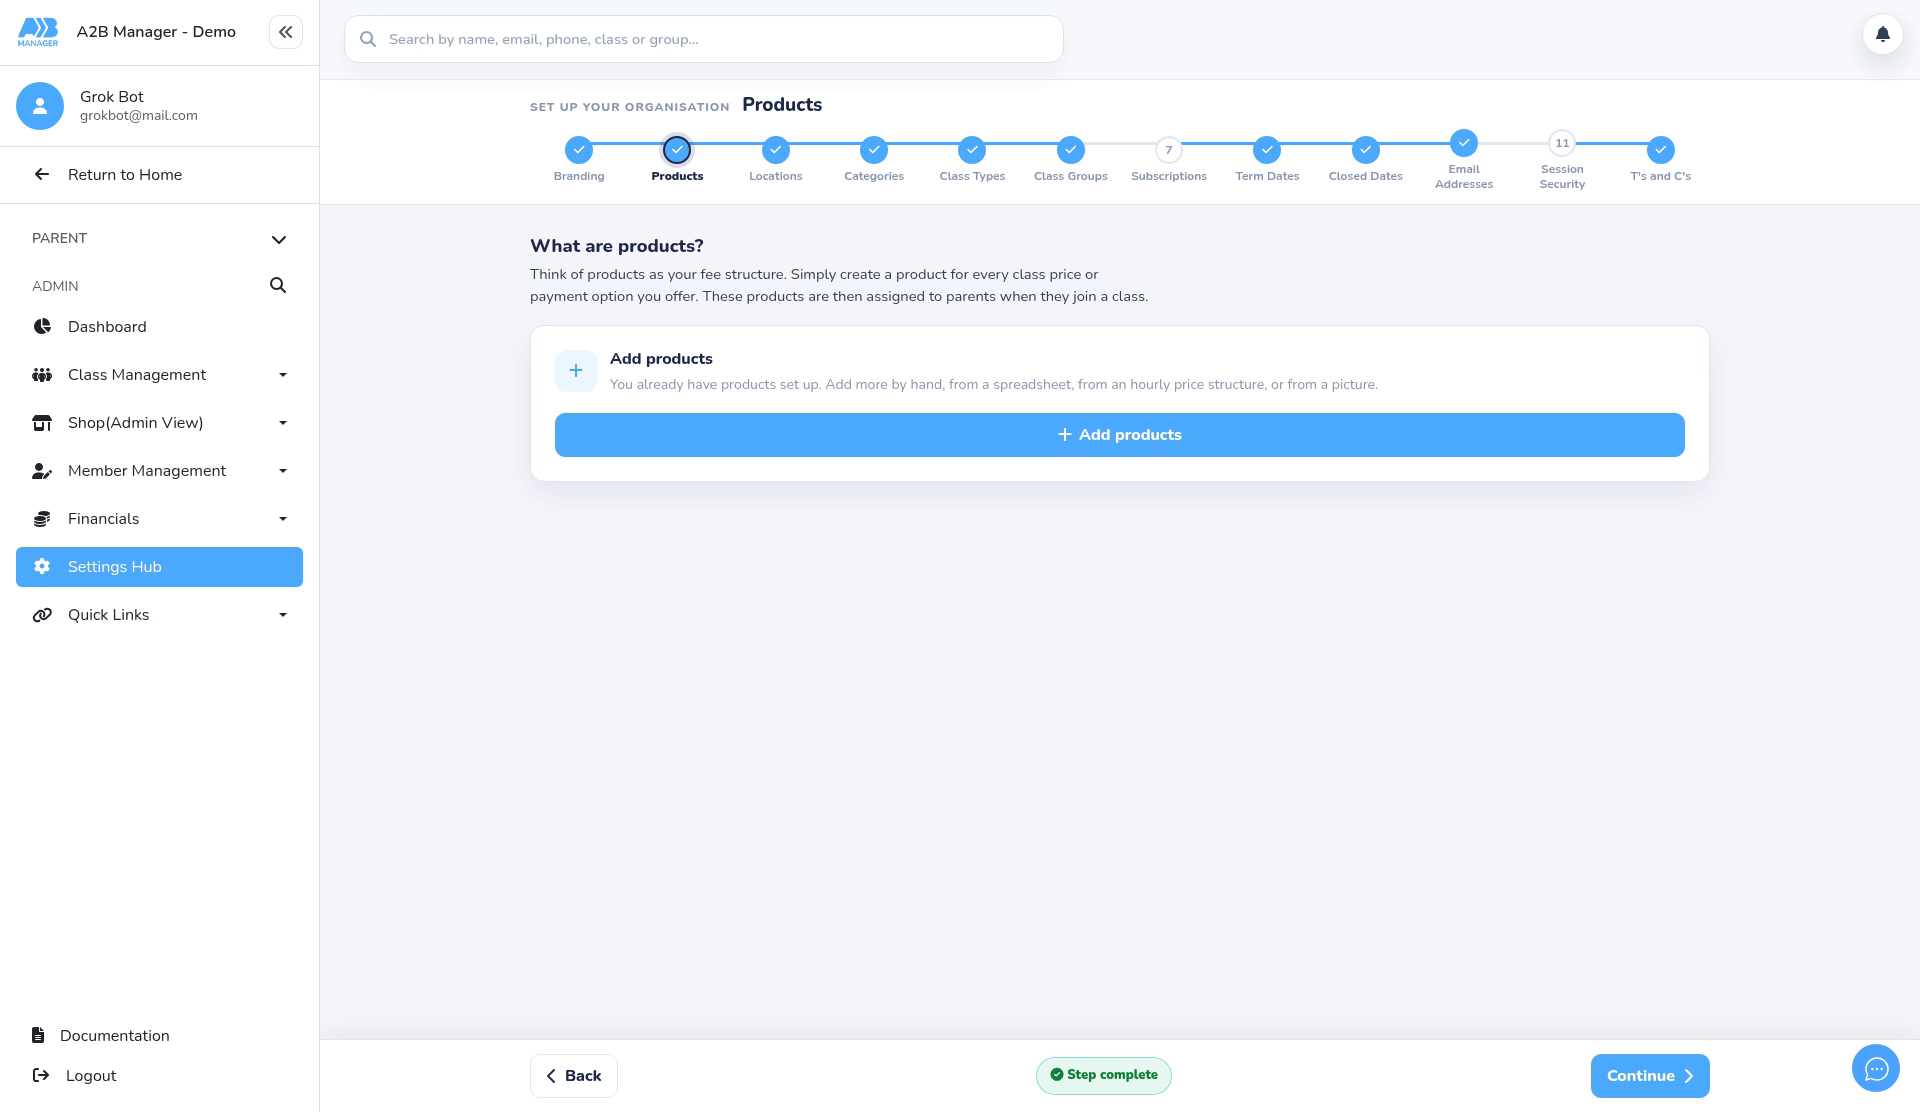
Products are your fee structure. Create a product for every class price or payment option you offer. They are then assigned to parents when they join a class, and are set up in your Stripe account.
Adding products #
Step 1: Open the Products step (0:00) #
- Open the Setup Wizard and go to the Products step (“What are products?”).
Step 2: Choose how to add products (0:10) #
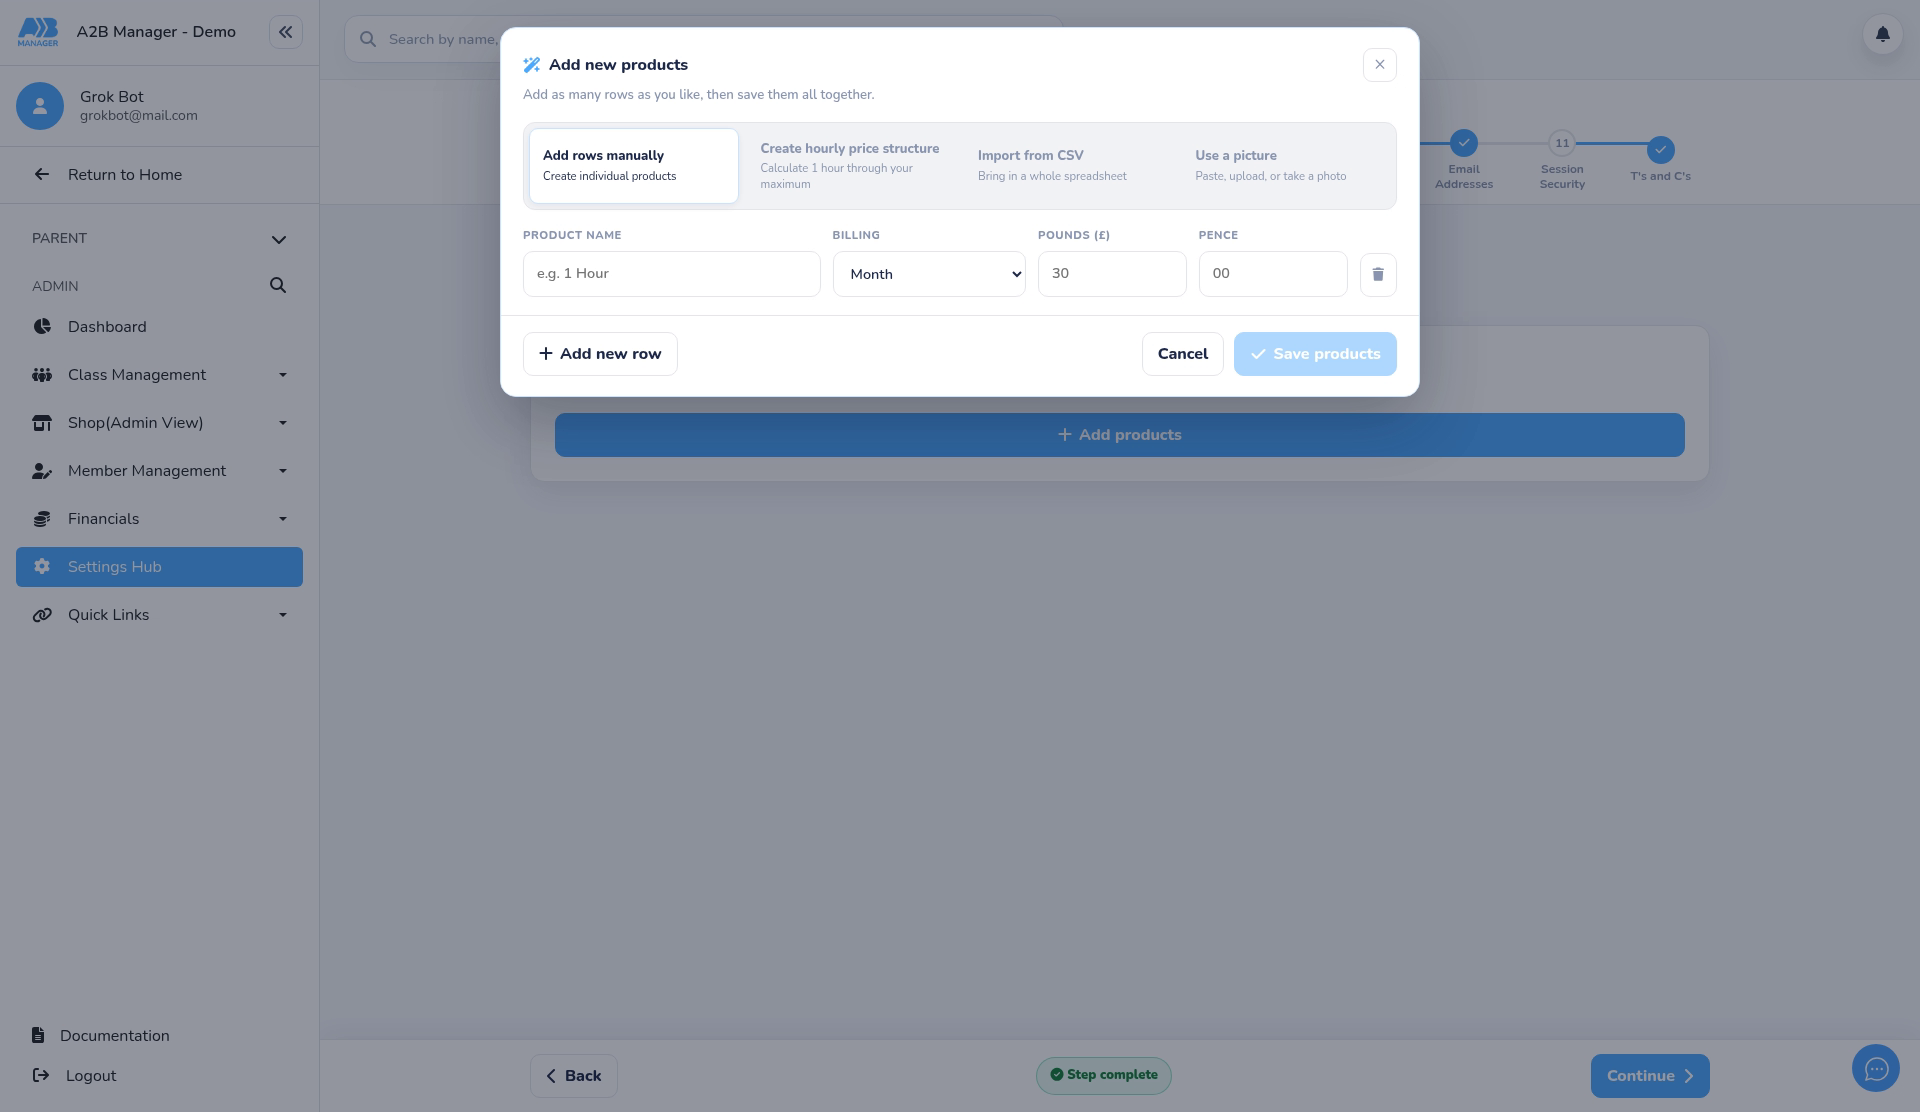
- Click Add products. The Add new products window gives you four ways: Add rows manually, Create hourly price structure, Import from CSV and Use a picture.
Step 3: Add a product by hand (0:23) #
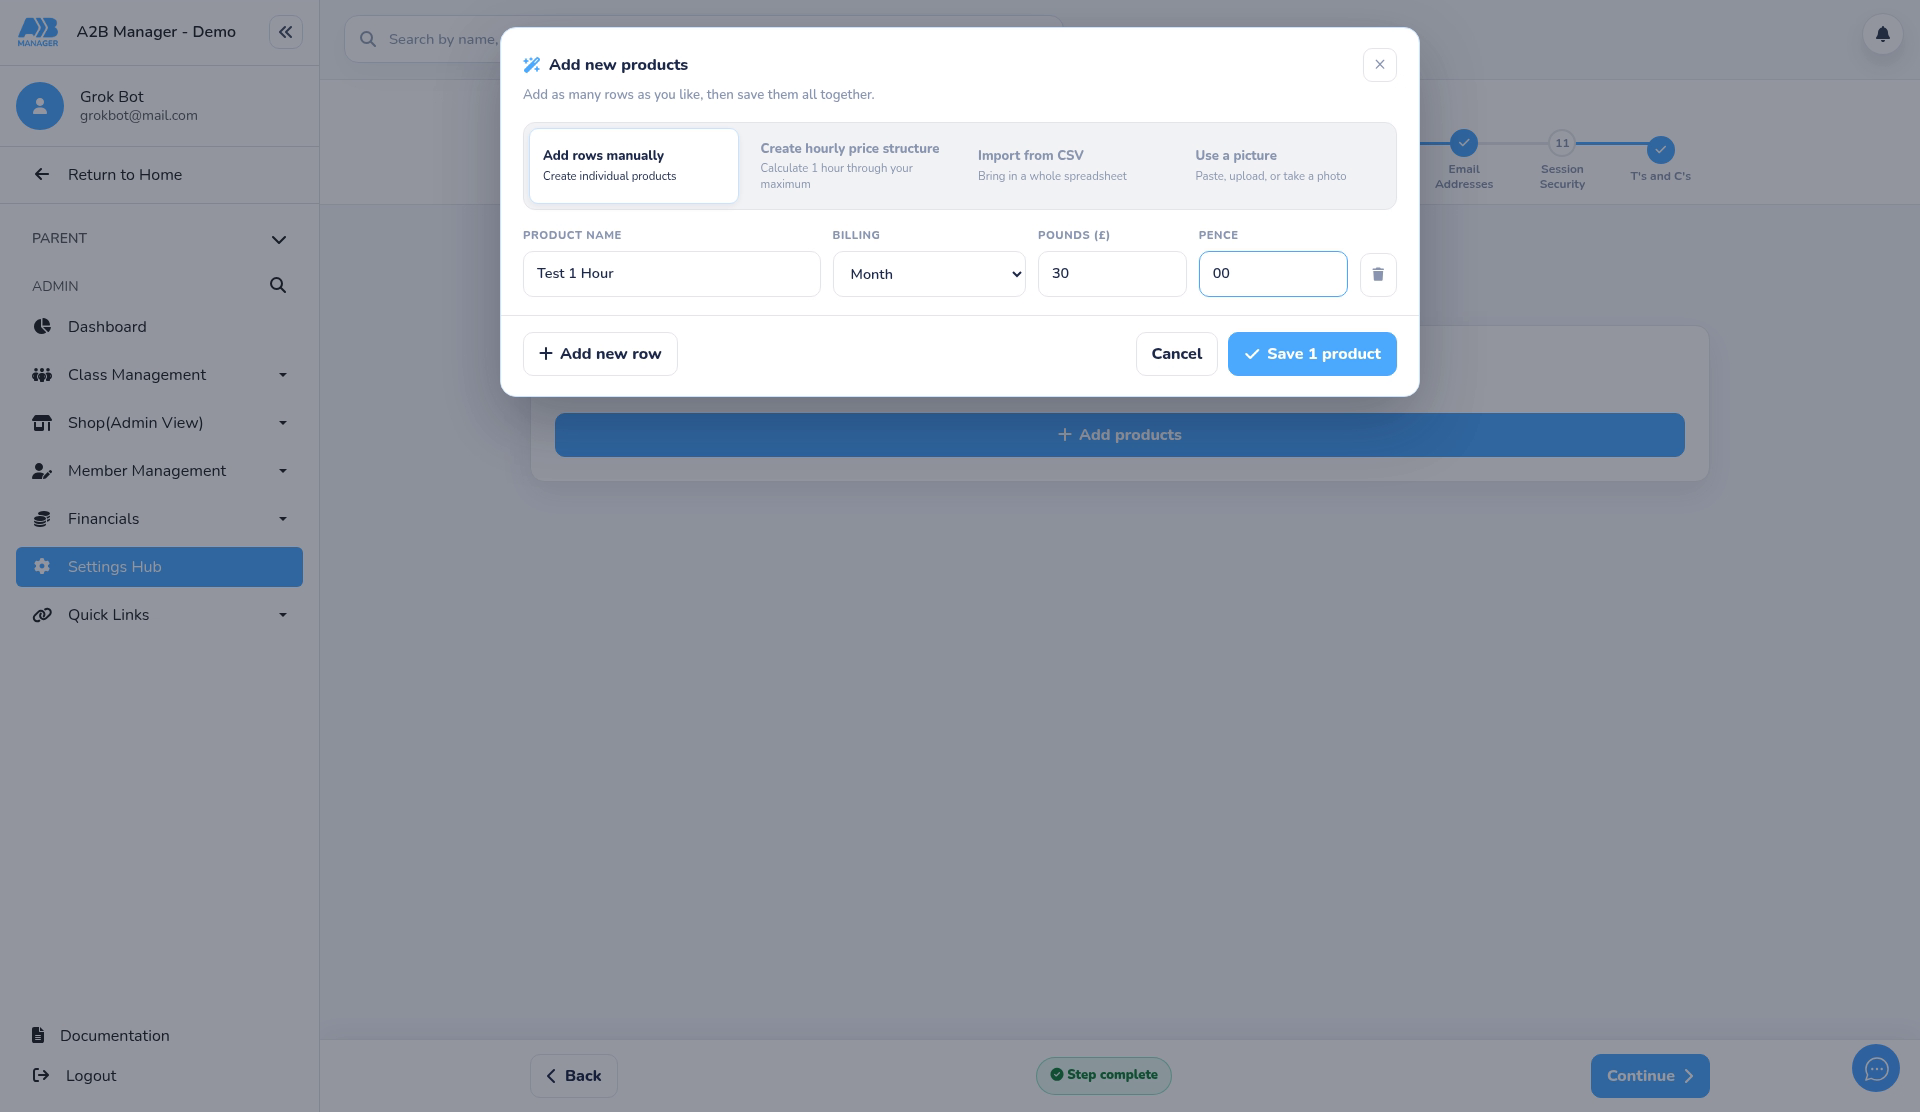
- With Add rows manually, type a Product name, for example Test 1 Hour.
- Choose the Billing: Month, Year, Every 3 months or One-off.
- Enter the price in Pounds (£) and Pence.
Step 4: Add more rows (0:52) #
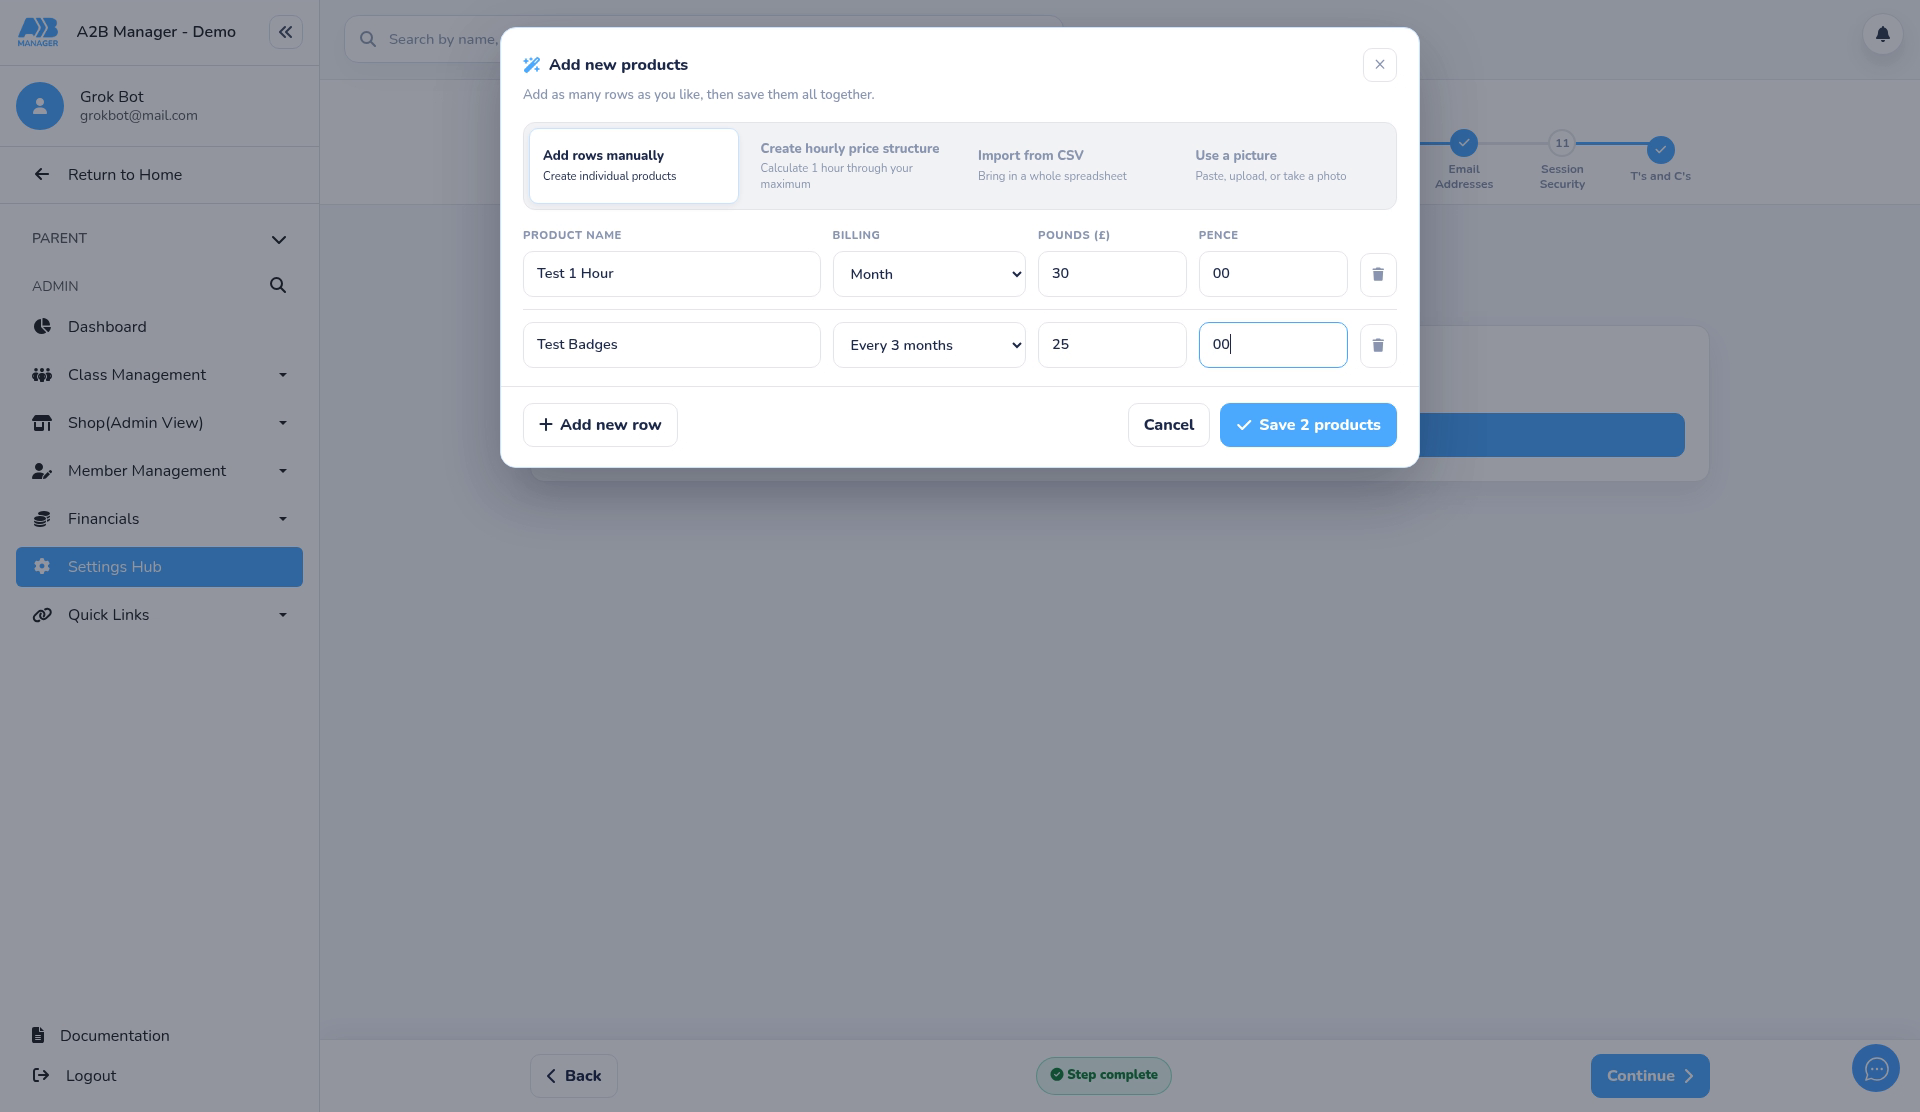
- Click Add new row for each extra product, for example Test Badges billed every 3 months at £25.00.
- Use Remove to delete a row you don’t want.
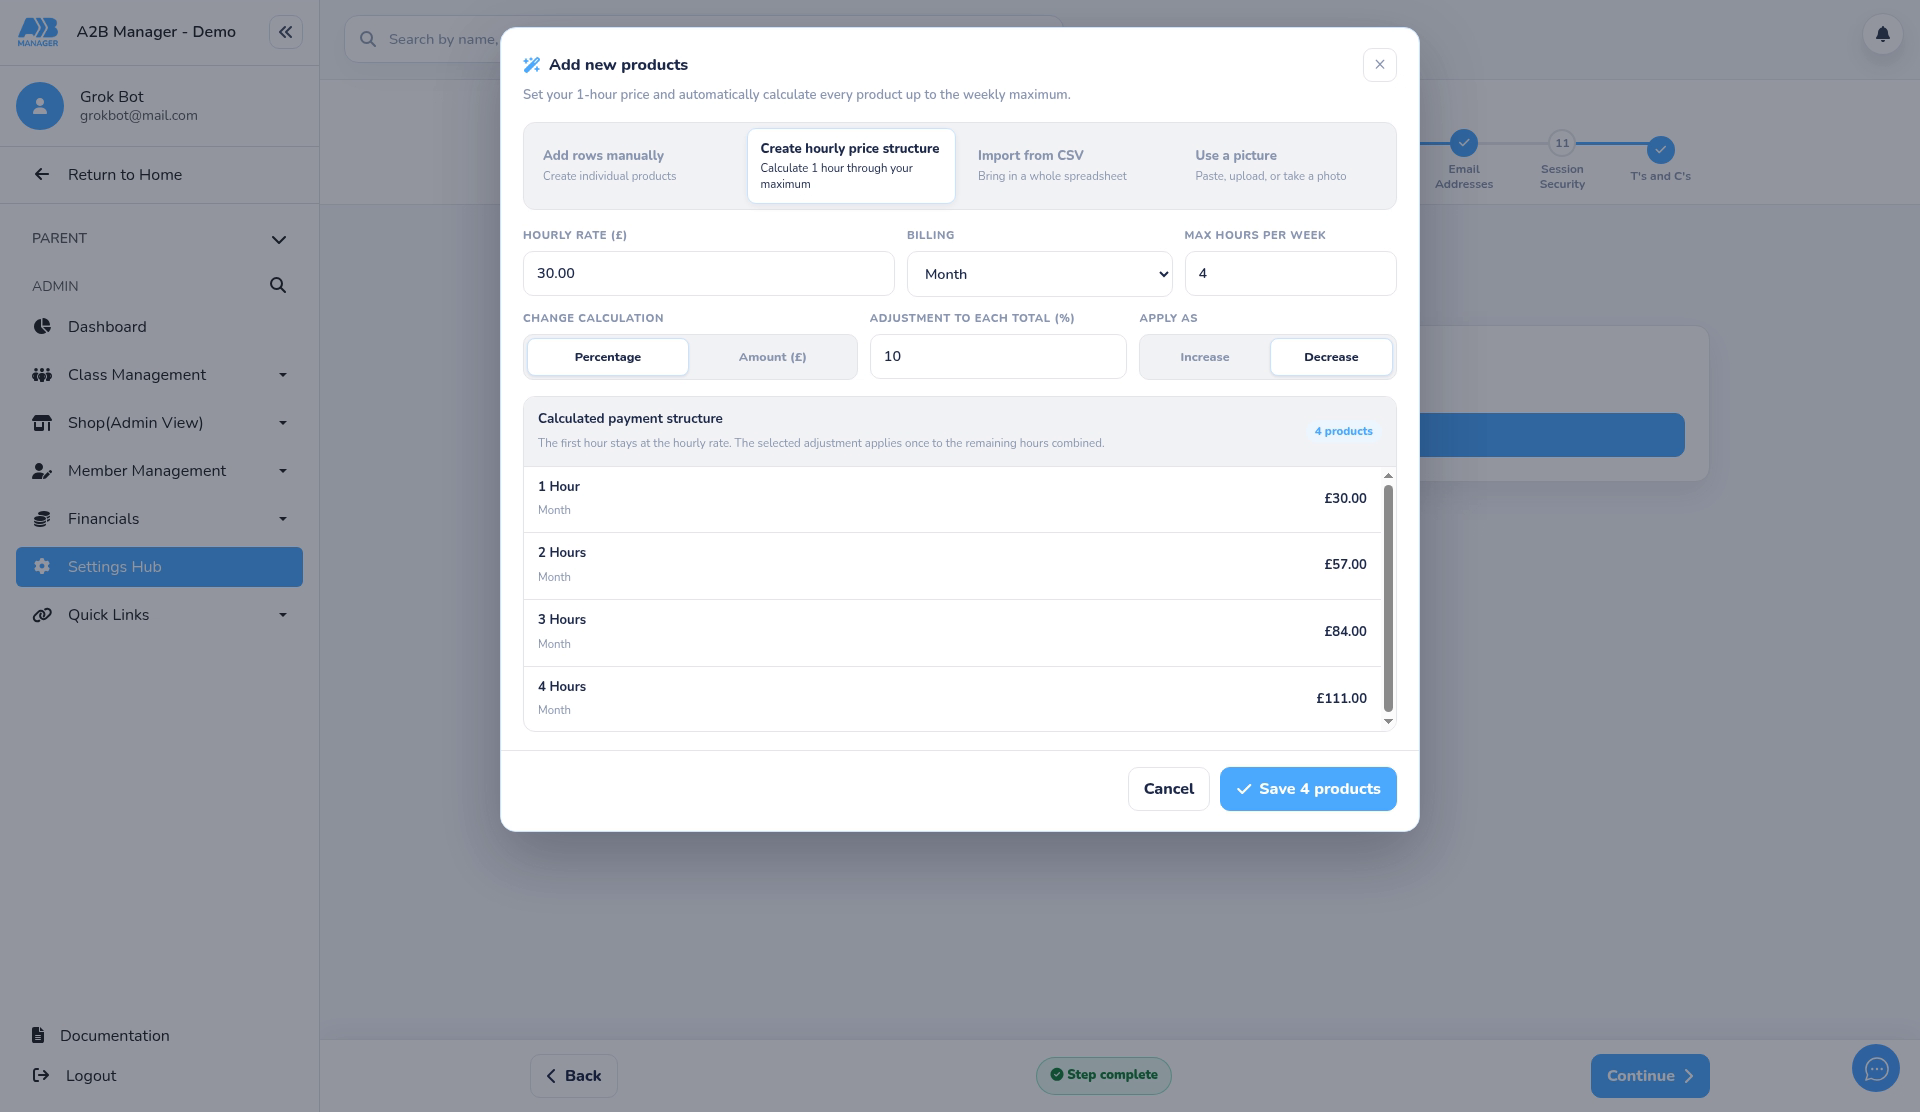
Step 5: Create an hourly price structure (1:36) #
- Choose Create hourly price structure to create prices from 1 hour up to your maximum.
- Enter the Hourly rate (£), Billing and Max hours per week.
- Under Change calculation, choose Percentage or Amount (£), enter the change, and choose Increase or Decrease. The Calculated payment structure shows each price.
Step 6: Import a CSV or use a picture, then save (2:45) #
- Import from CSV needs a Product Name column, plus Billing, Pounds and Pence. You can check the rows before saving.
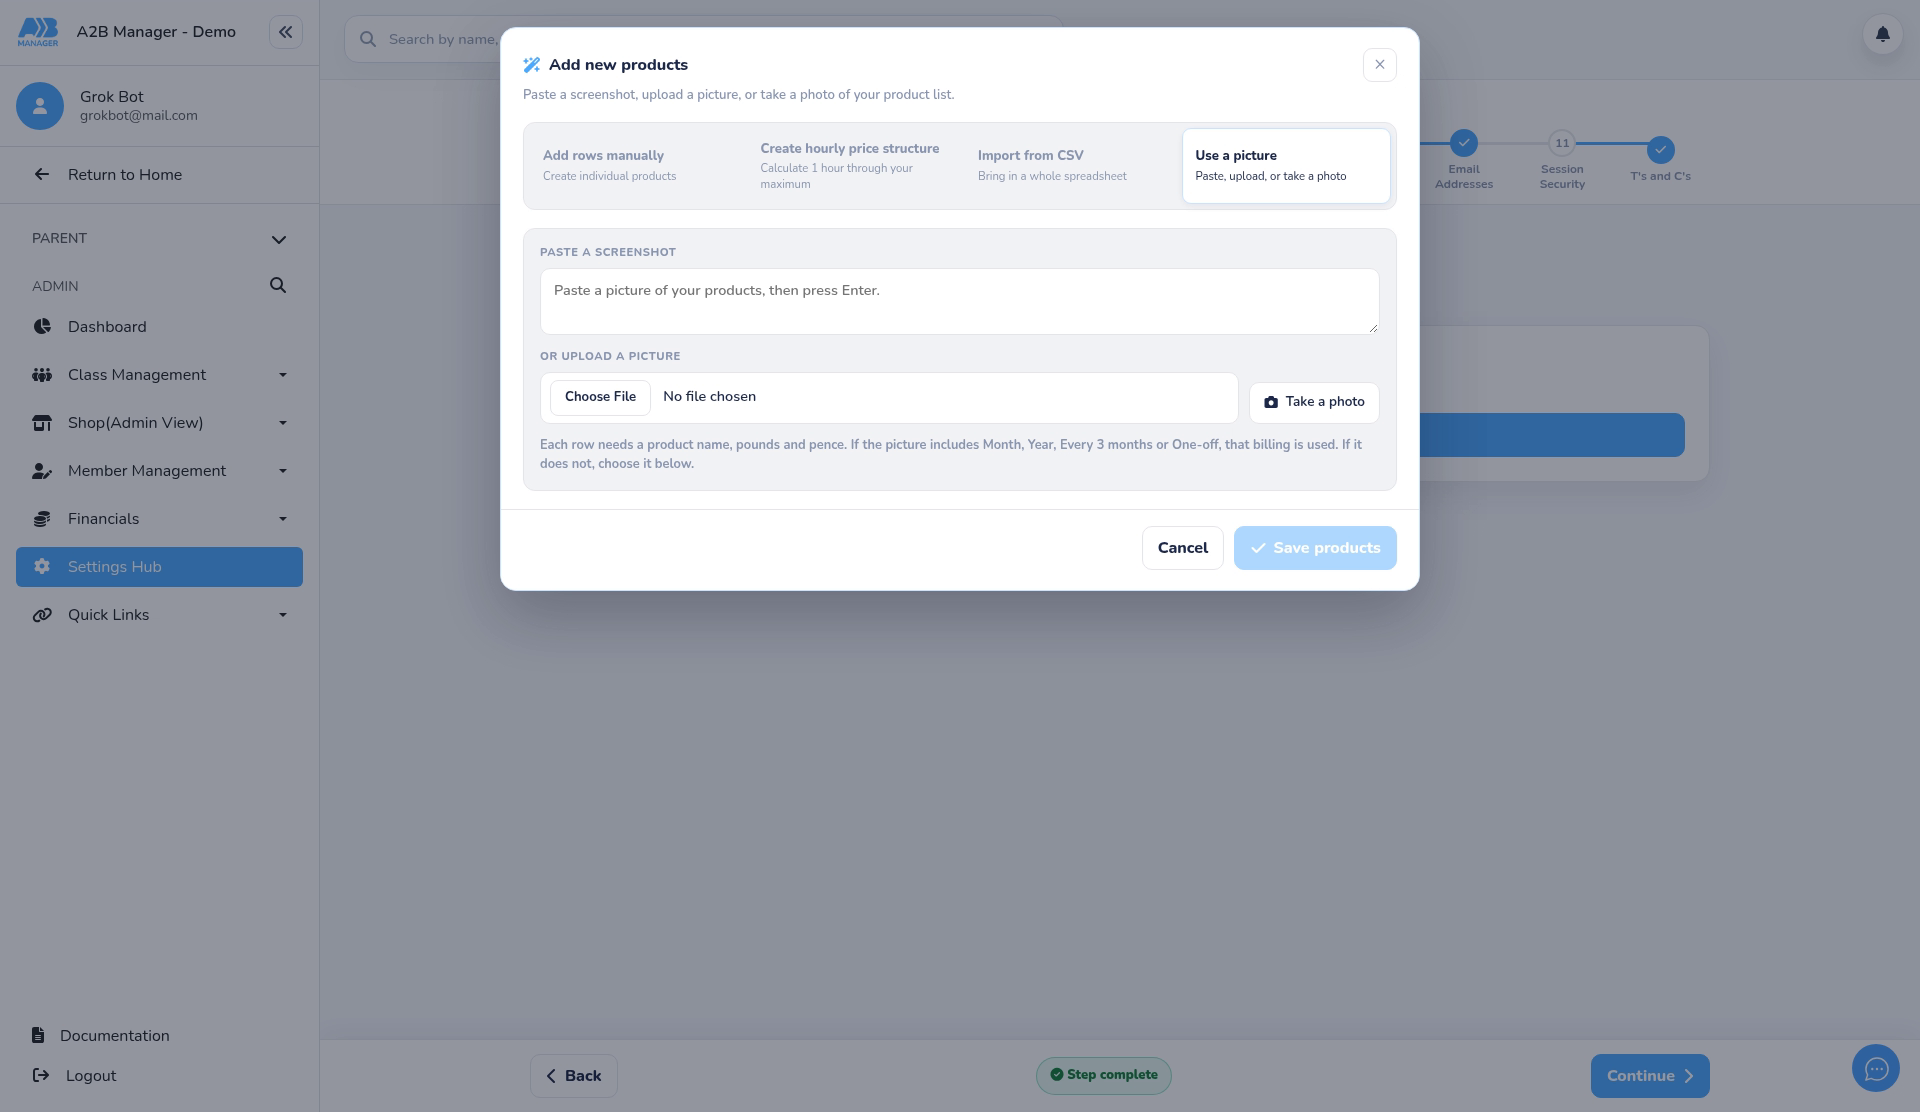
- Use a picture lets you paste, upload or take a photo of your price list. The products are read from it for you to check.
- Click Save N products to create them.
Good to know #
- Your existing products are listed with their price, status and number of subscribers. Use Show to see active or archived products.
- You can Archive a product to stop using it, and Restore it later.
- Saving creates the products in your Stripe account, so check names and prices before you click Save.


