

Table of Contents
Subscriptions are what members pay for their classes. In this step you link your Stripe plans to your class groups, and you can set up several groups at once.
Adding a subscription #
Step 1: Choose the groups (0:00) #
- Open the Setup Wizard and go to the Subscriptions step (“Set up the subscriptions members pay”).
- Tick a class type to select all of its groups, or tick individual groups. Select all and Clear help with bigger lists.
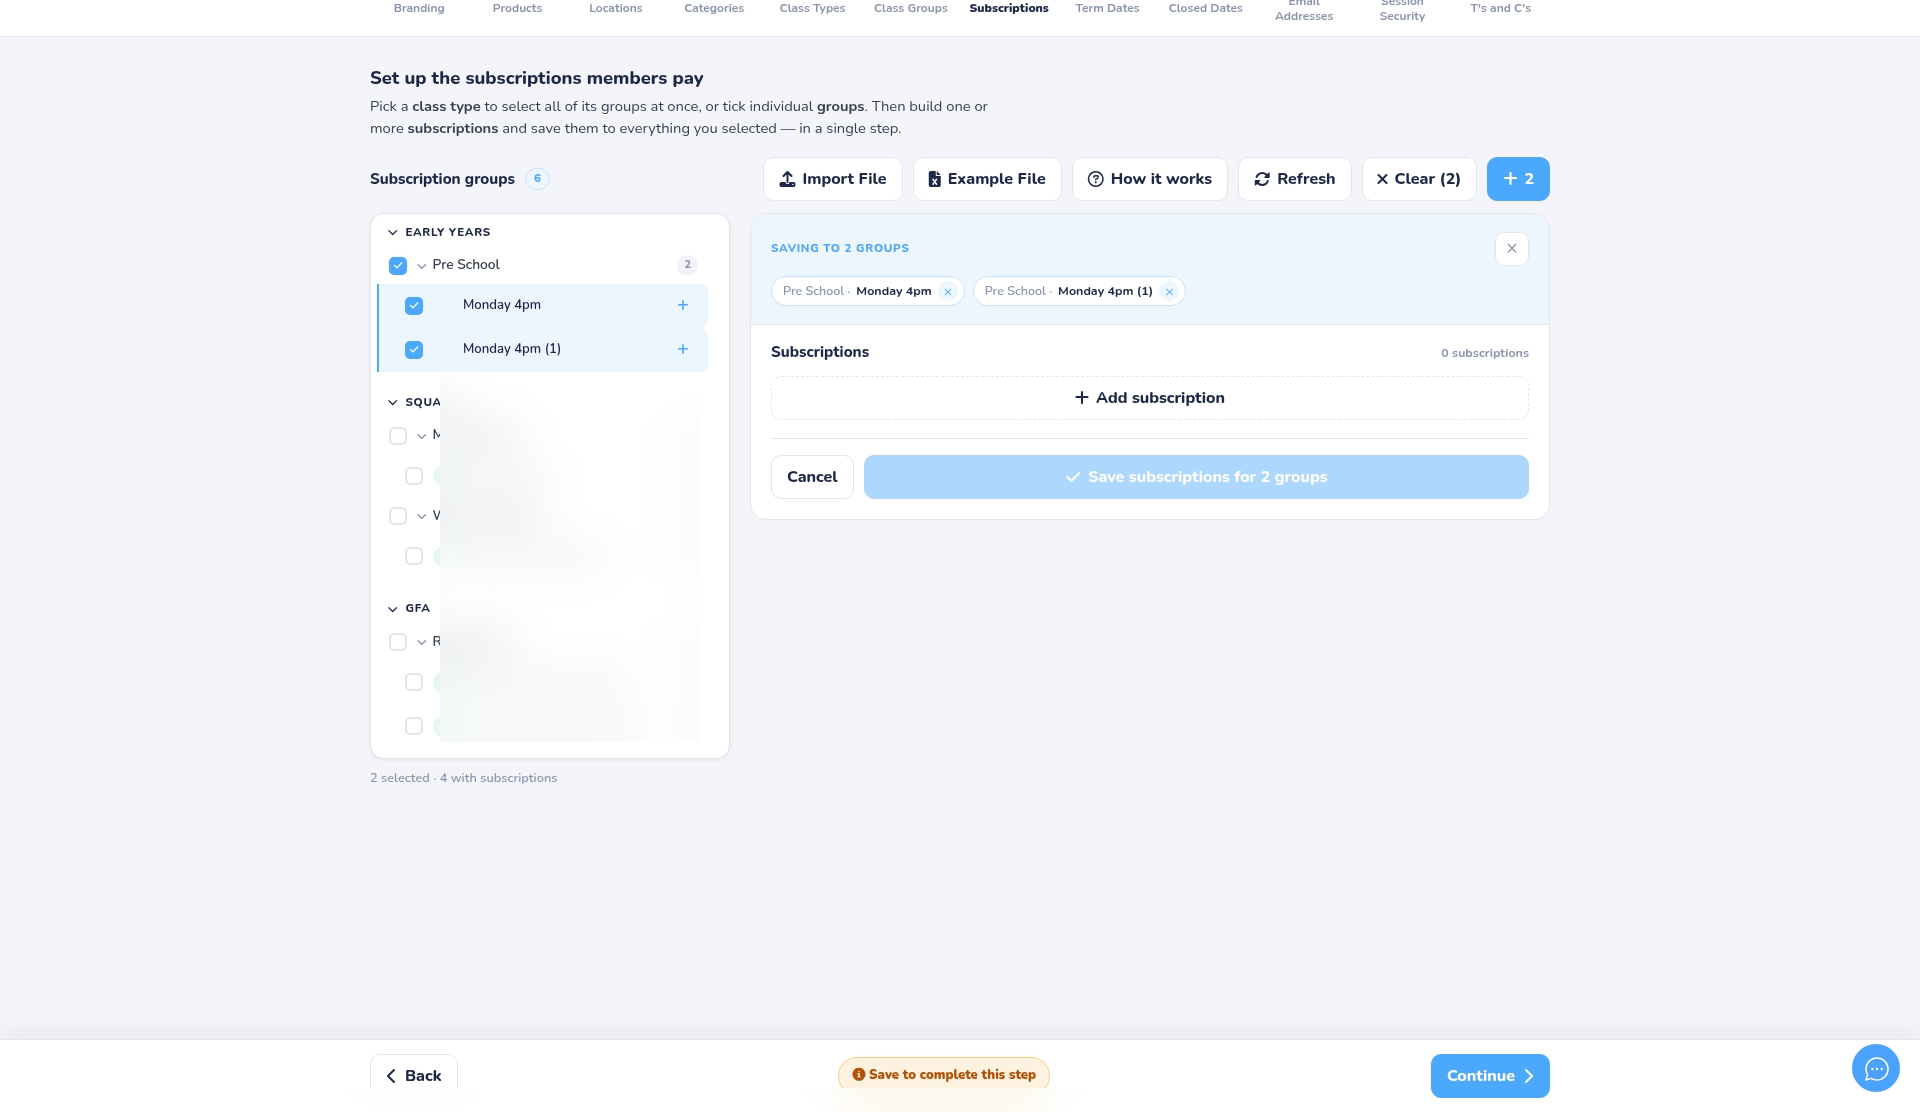
Step 2: Add a subscription (0:10) #
- Click Add subscription.
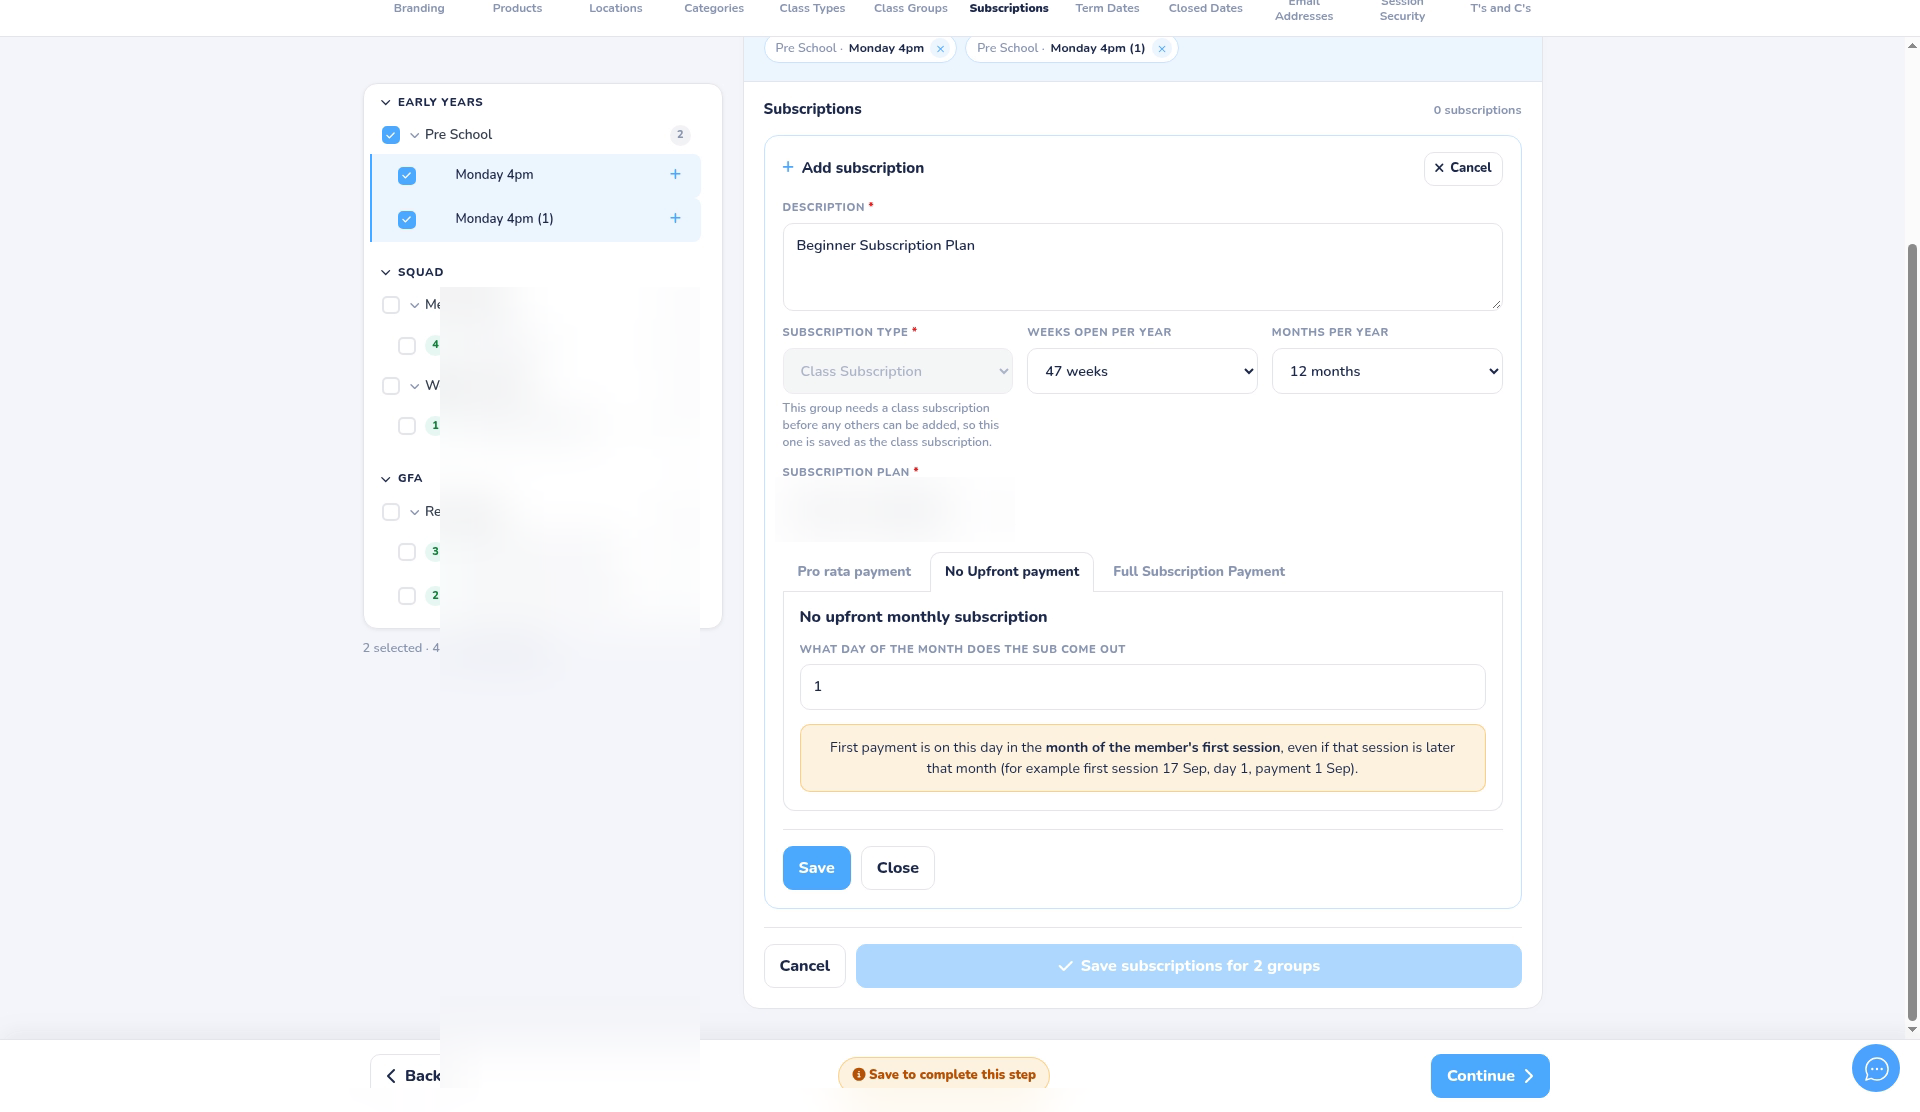
- Type a Description that parents will recognise, for example Beginner Subscription Plan.
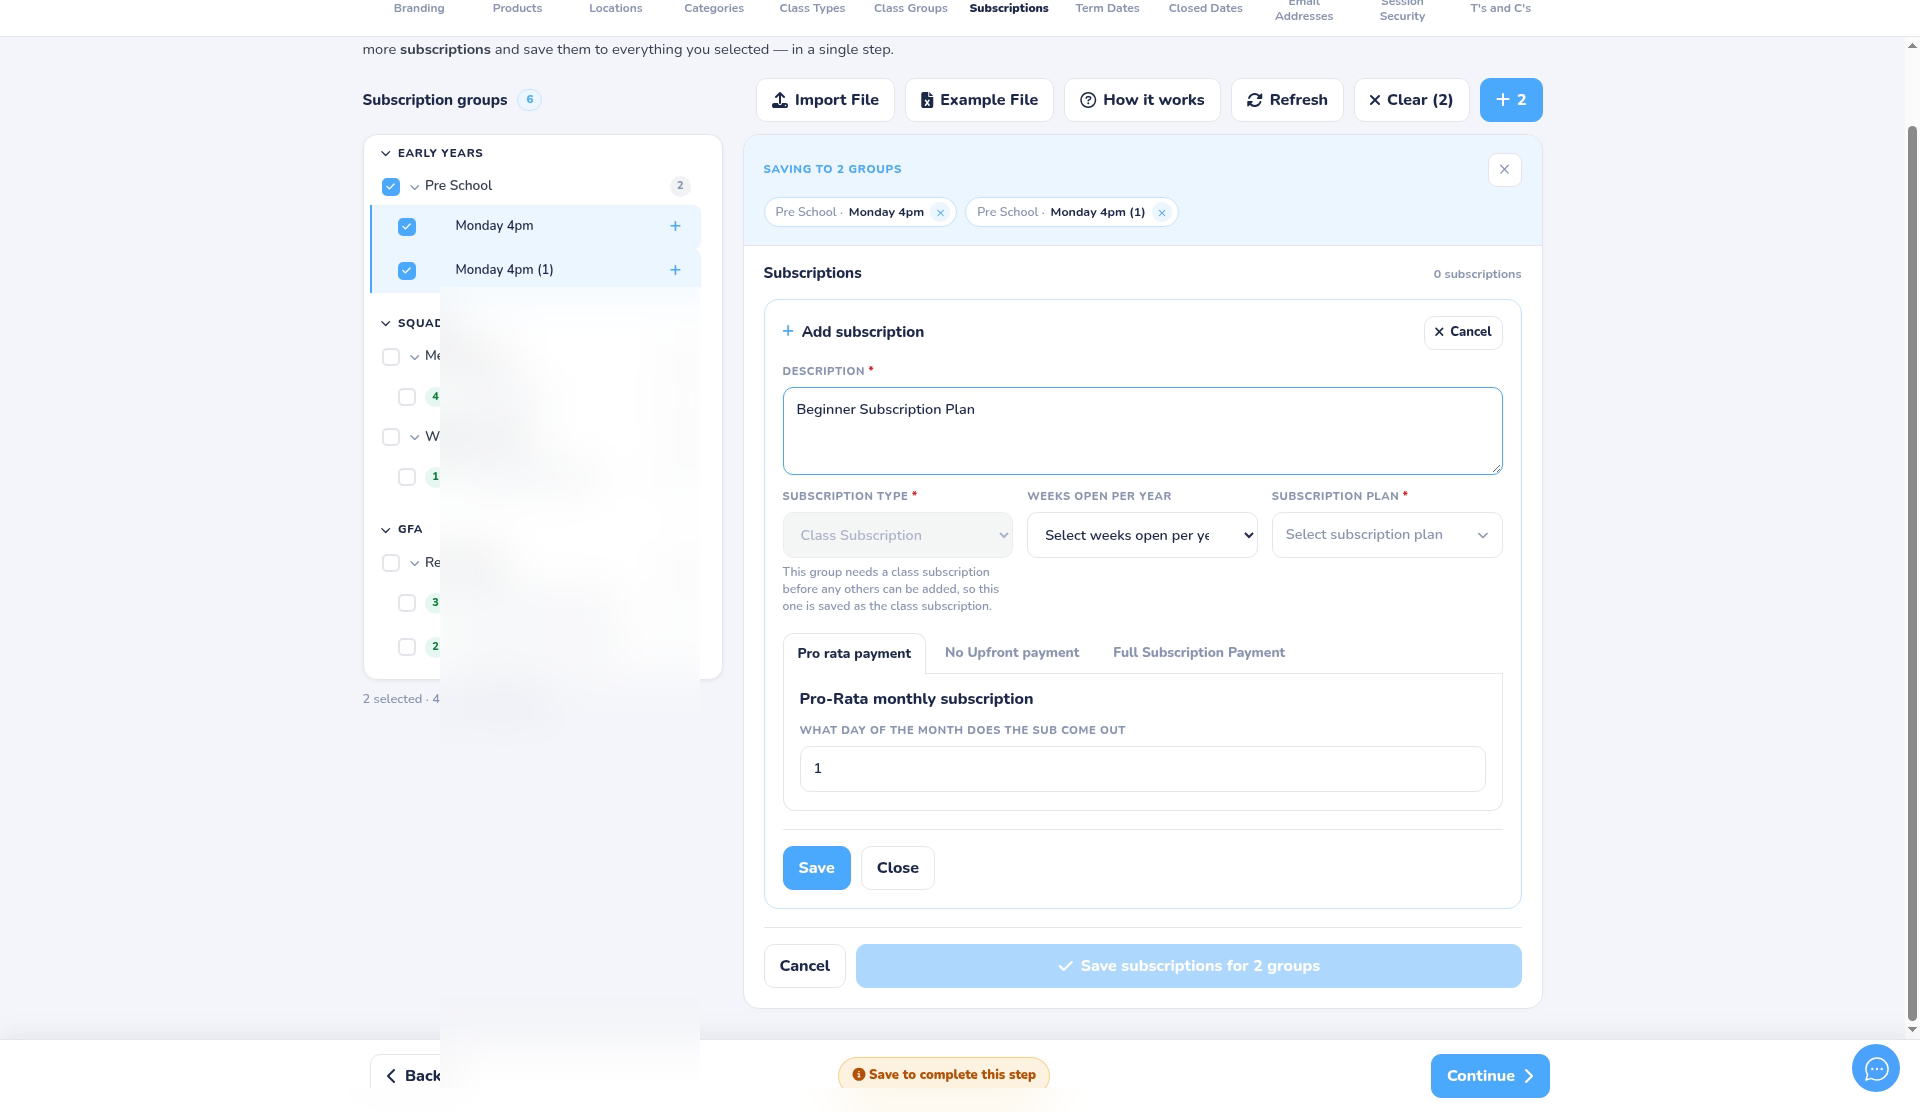
Step 3: Set the type and weeks (0:35) #
- Choose the Subscription type: Class Subscription, Insurance Subscription or Other. Some groups need a class subscription first, so the type is set for you.
- Choose Weeks open per year, for example 47 weeks, or choose open all year.
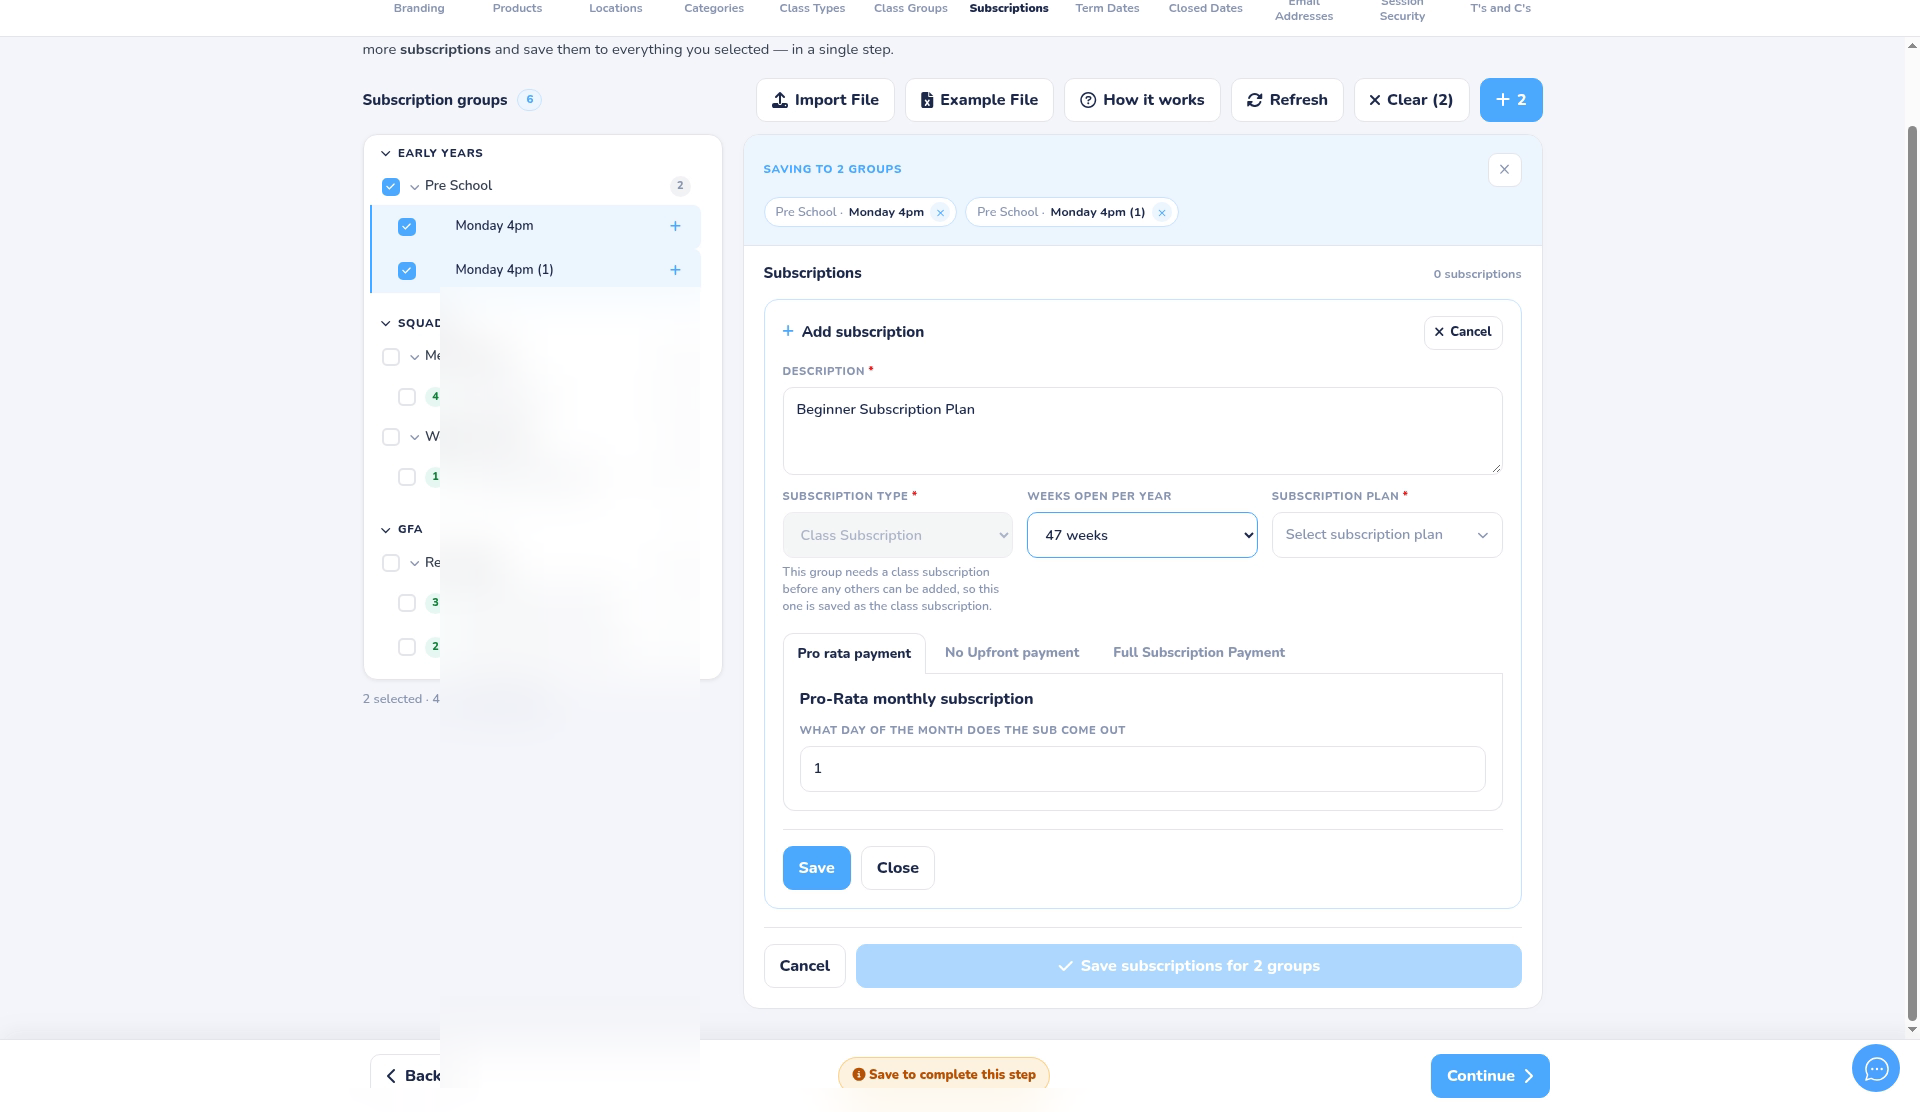
Step 4: Choose the plan (0:56) #
- Open Subscription plan and pick one of your Stripe plans. You can search by name.
- Some plans also ask for Months per year.
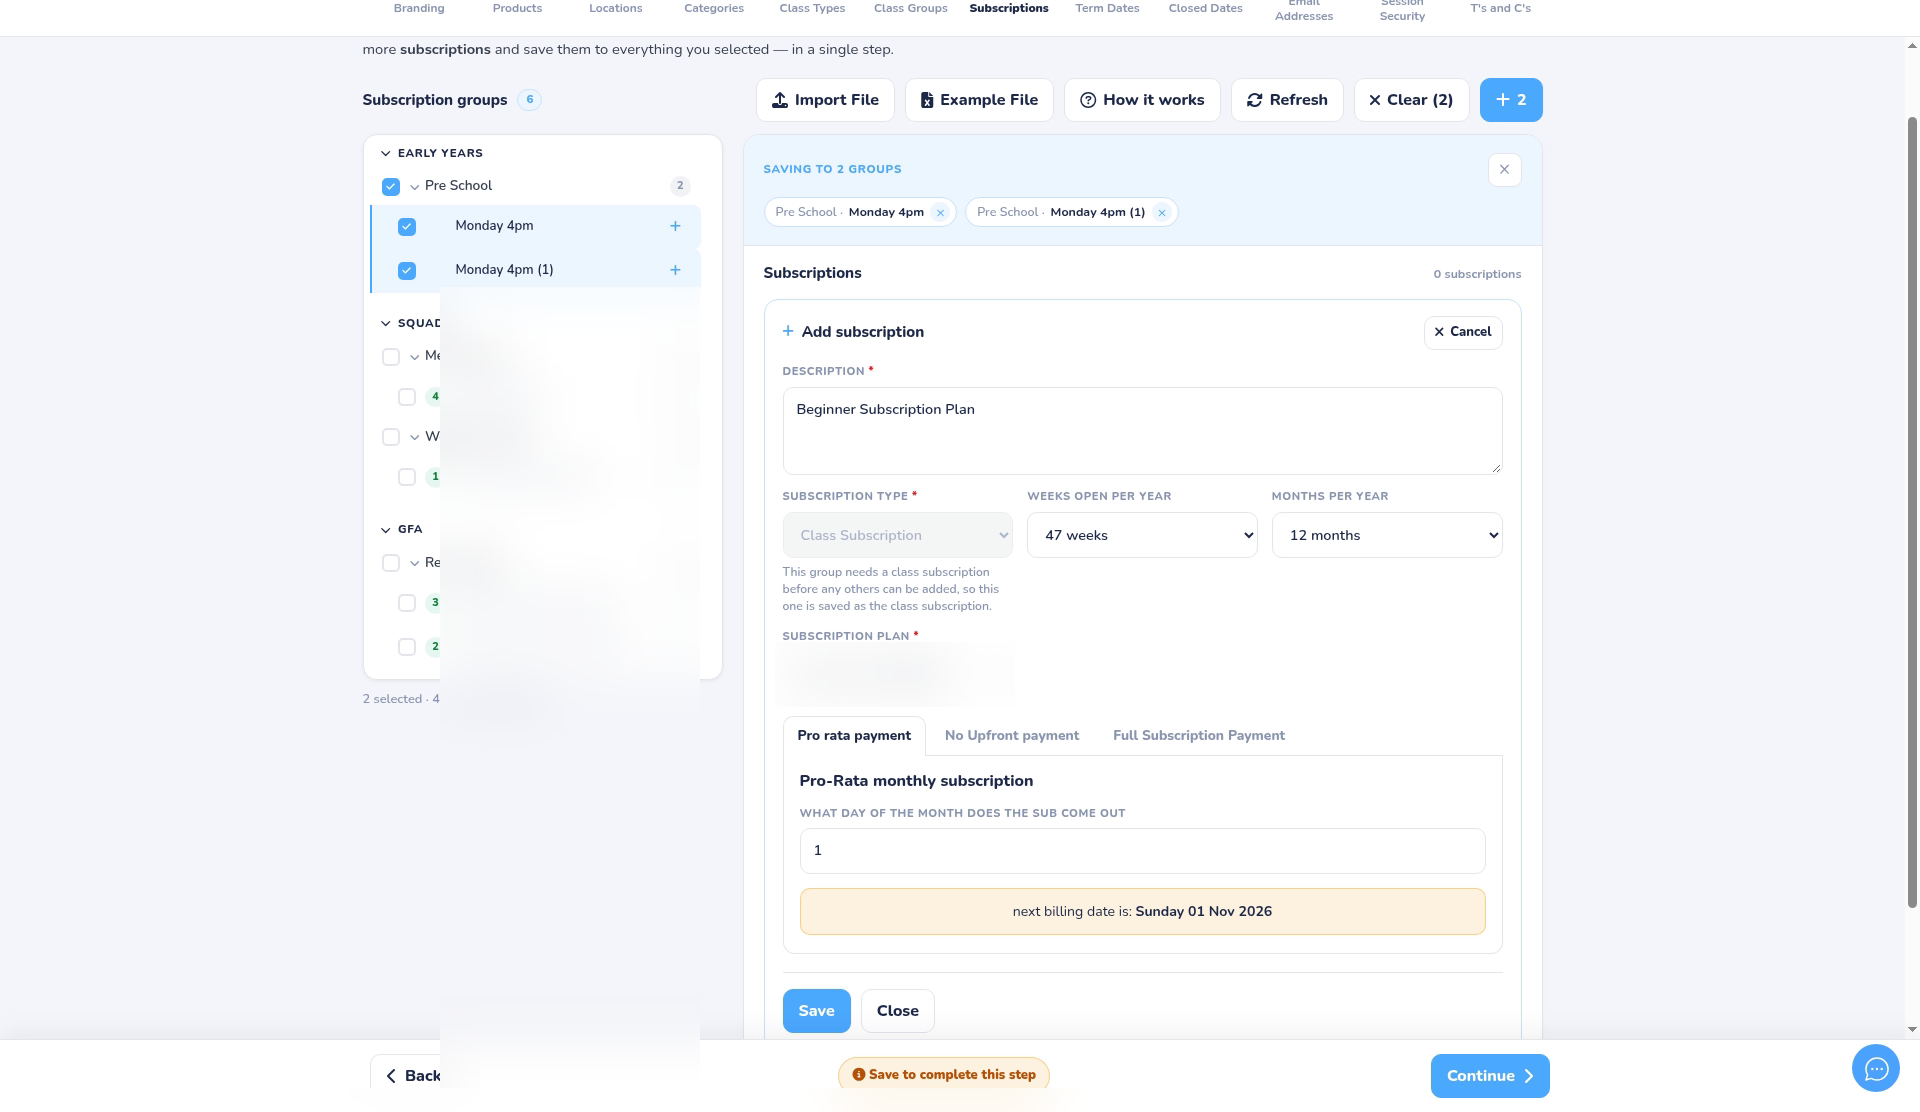
Step 5: Choose how members pay and save (1:23) #
- Pick a payment tab: Pro rata payment, No Upfront payment or Full Subscription Payment.
- Set What day of the month does the sub come out. The form shows the next billing date so you can check it.
- Click Save subscriptions for N groups to save it to every group you ticked.
Good to know #
- Groups you don’t charge for can be left alone. They show No subscriptions set up yet.
- To set up lots of groups at once, click Example File to download a sheet with your groups and Stripe plans filled in, complete it, then upload it with Import File.
- How it works opens a short guide to this step.
- Once saved, each subscription is listed under its group, where you can change it, copy it to other groups, or remove it.


