

Table of Contents
Email templates control the emails A2B Manager sends for you. Automatic emails go out when something happens, such as a waiting list booking. Reusable templates are ones you can pick whenever you send an email yourself.
Working with email templates #
Step 1: Open the Email Template Builder (0:00) #
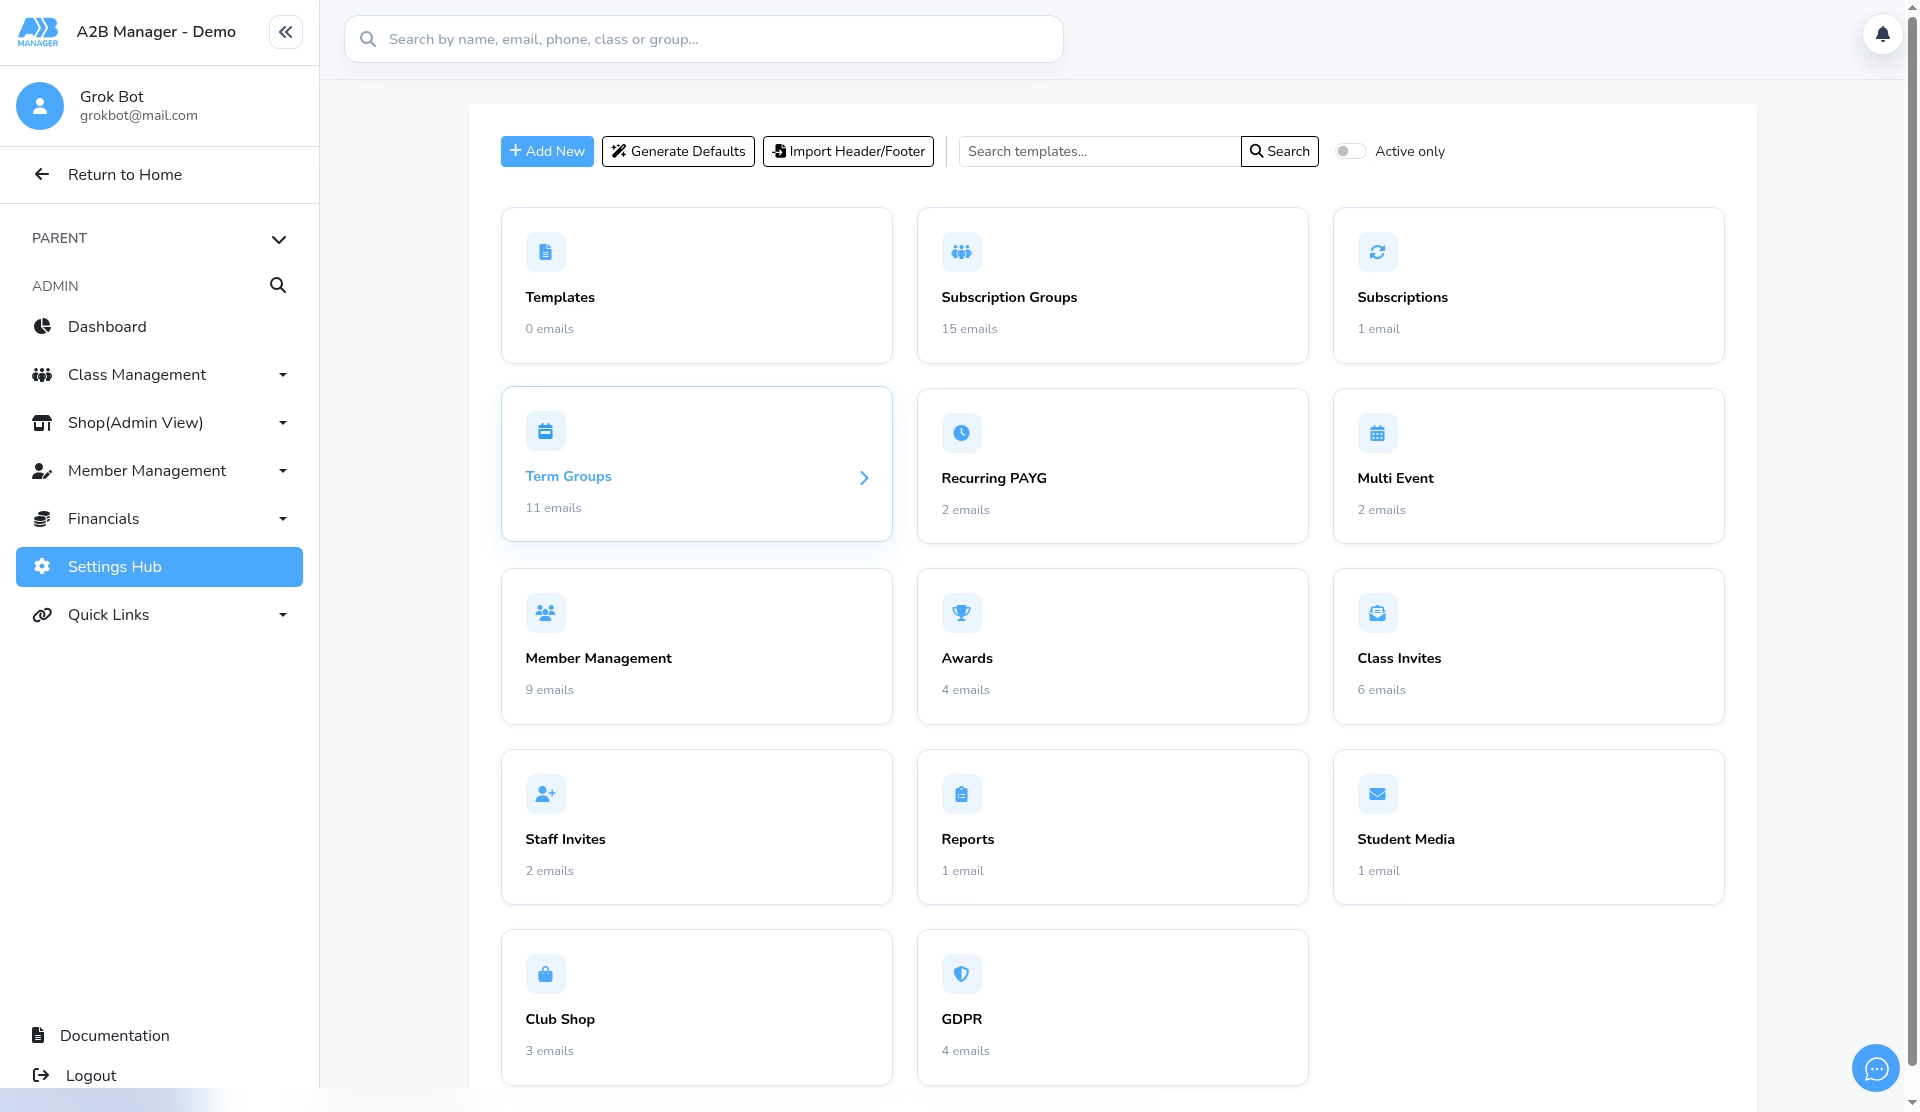
- Go to Settings Hub > Email Template Builder.
- Your emails are grouped into tiles, such as Templates, Subscription Groups, Term Groups, Recurring PAYG, Awards, Club Shop and GDPR. Each tile shows how many emails it holds.
Step 2: Find your way around (0:15) #
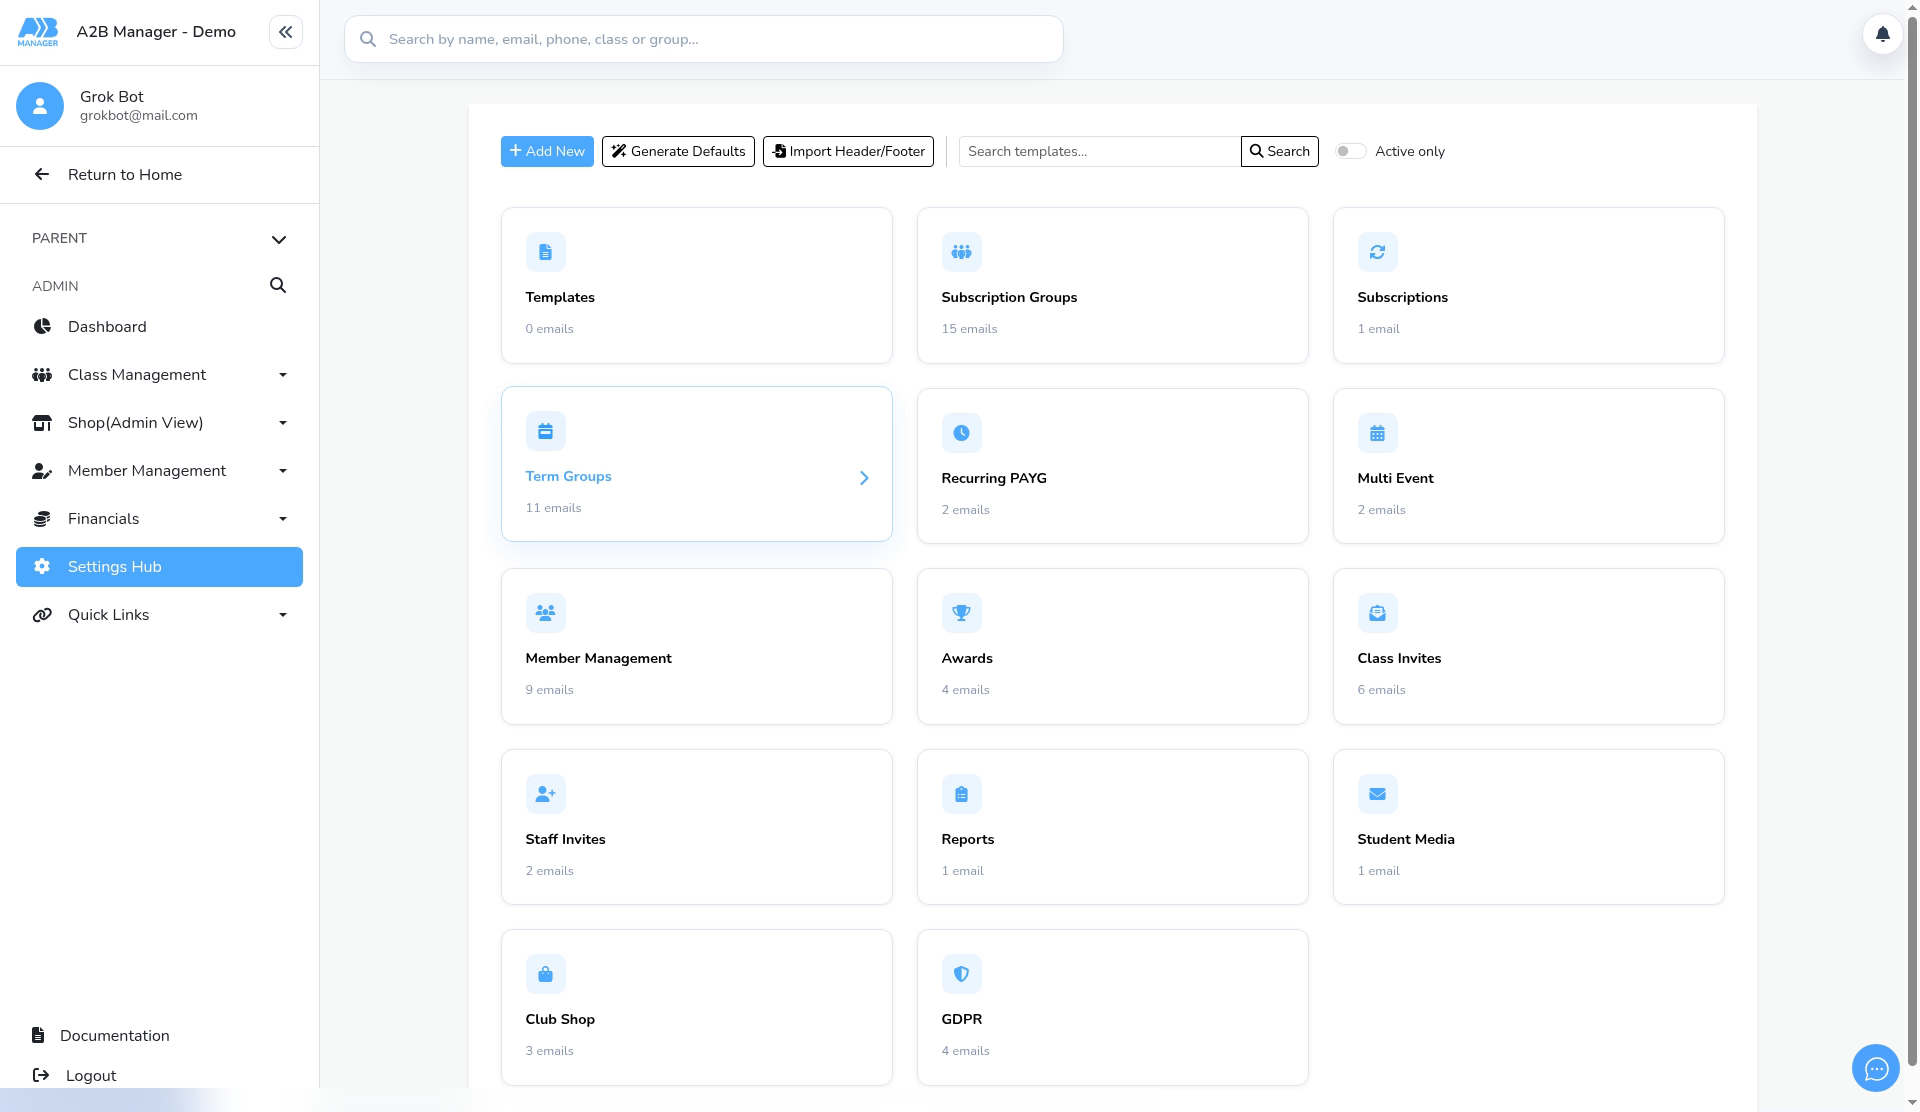
- Add New starts a new email. Use Search templates to find one, and Active only to hide inactive emails.
- Generate Defaults adds the standard set of emails.
- Import Header/Footer adds your club’s email header and footer to every template. Both buttons run as soon as you click them.
Step 3: Open a group of emails (0:42) #
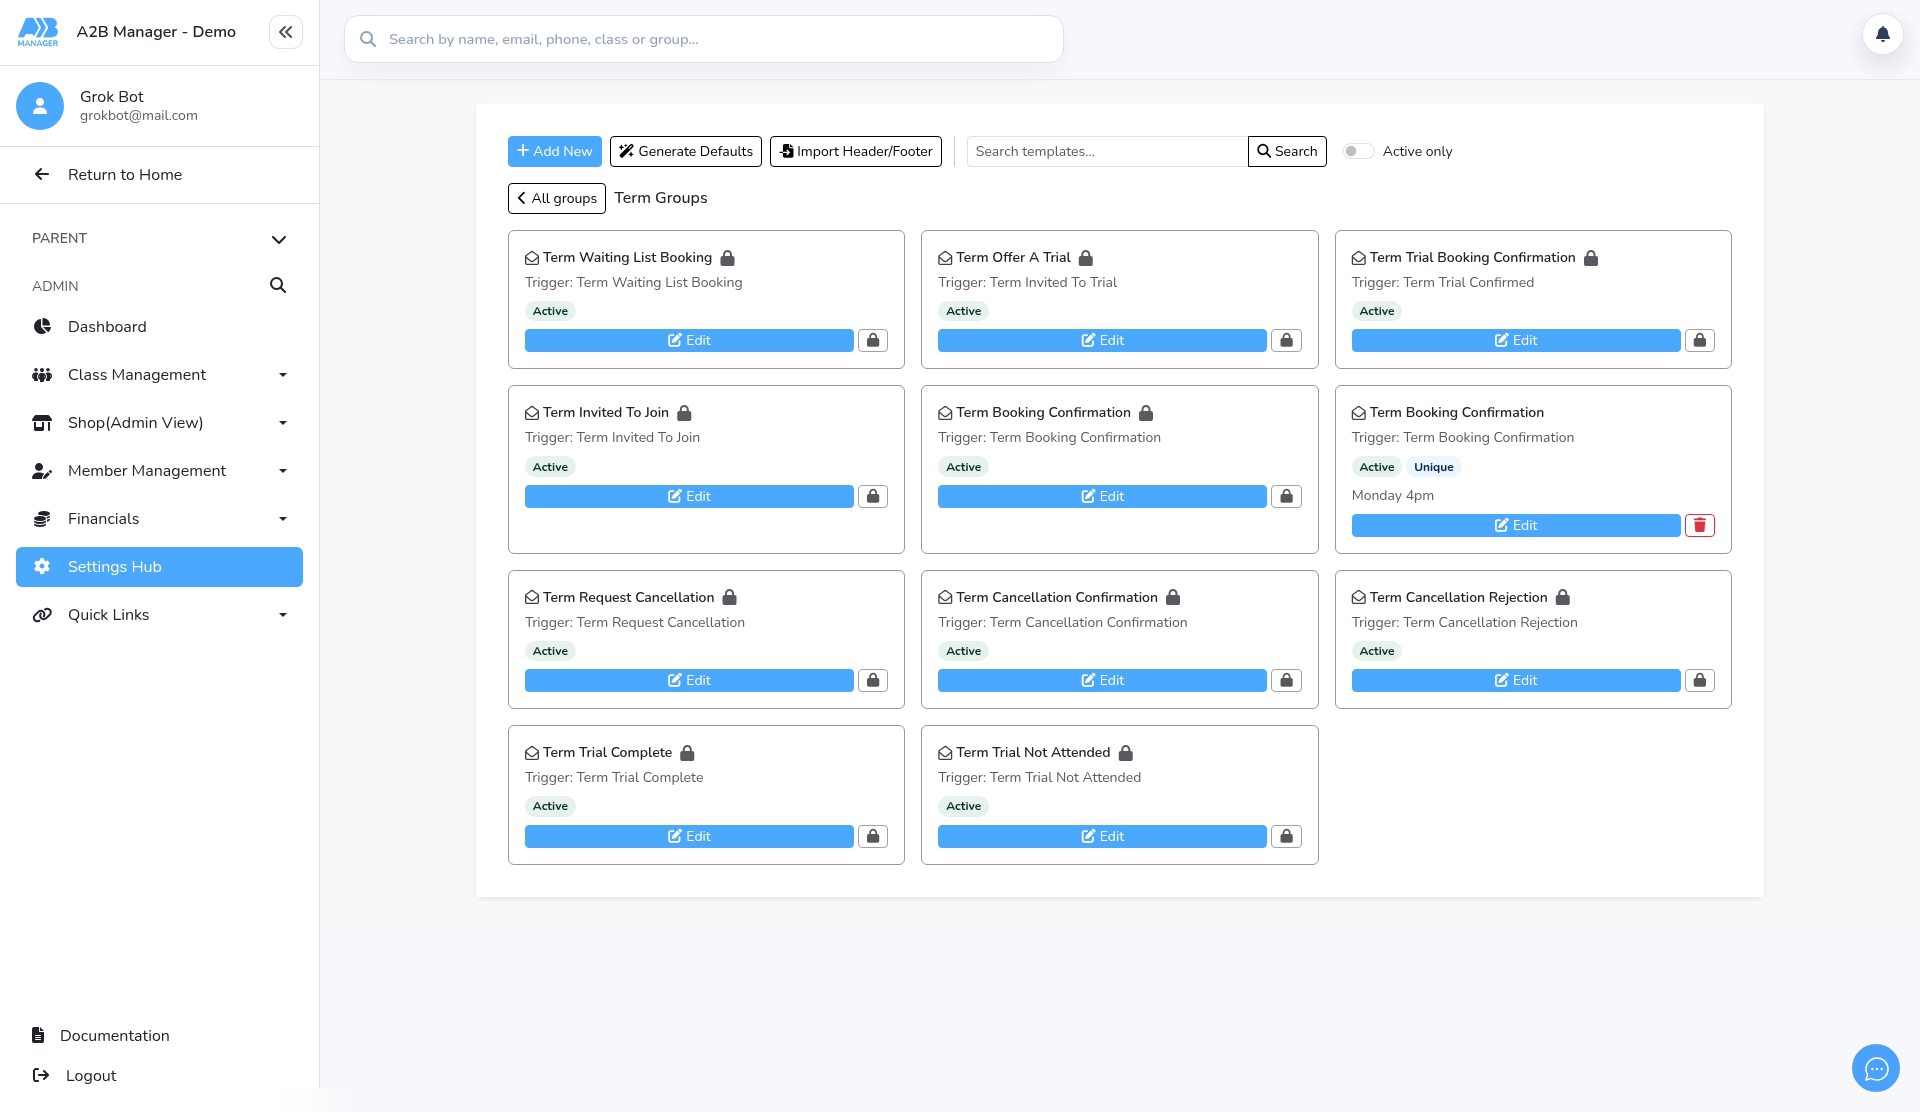
- Click a tile, for example Term Groups. Each card shows the email’s trigger (the event that sends it), whether it’s Active, and an Edit button.
- A padlock means the email can’t be deleted. A Unique badge means it’s a version for one class group only.
- Use All groups to go back to the tiles.
Step 4: Edit an automatic email (0:57) #
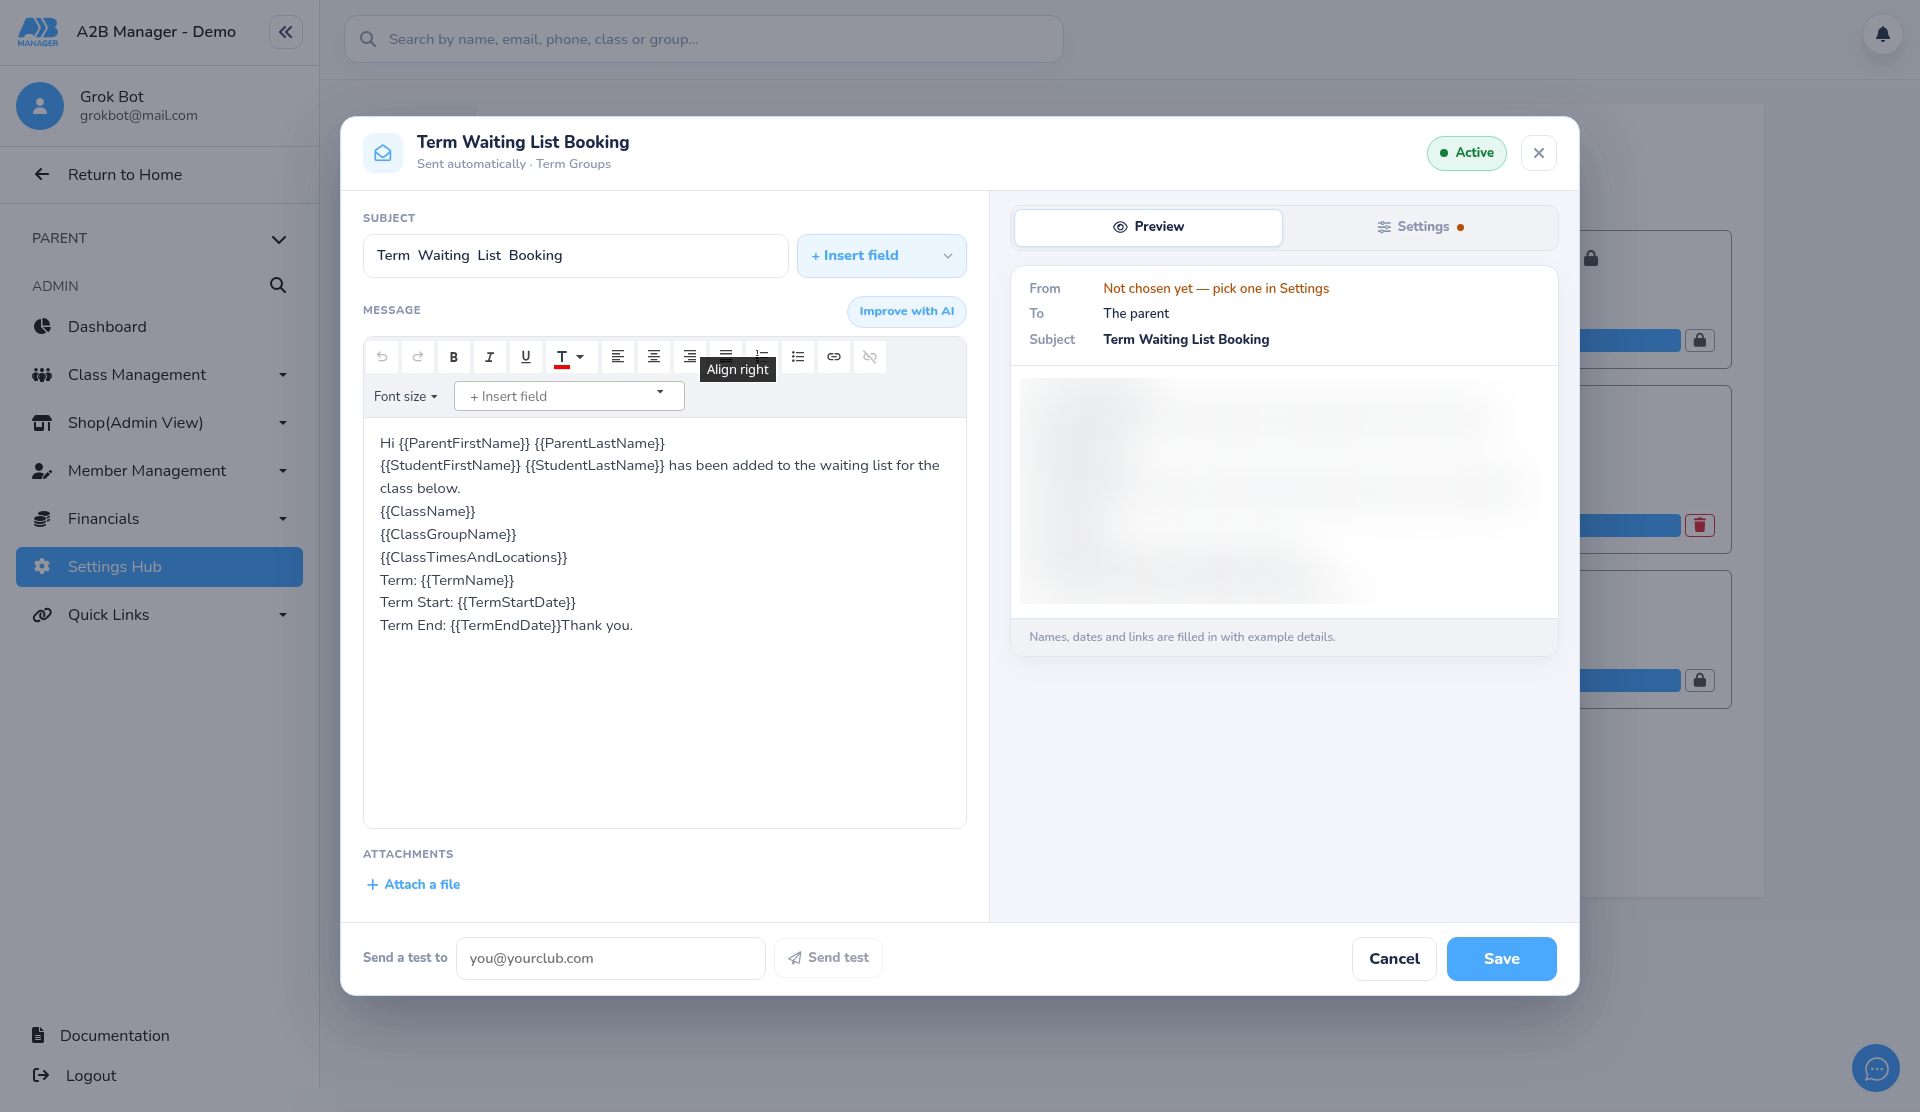
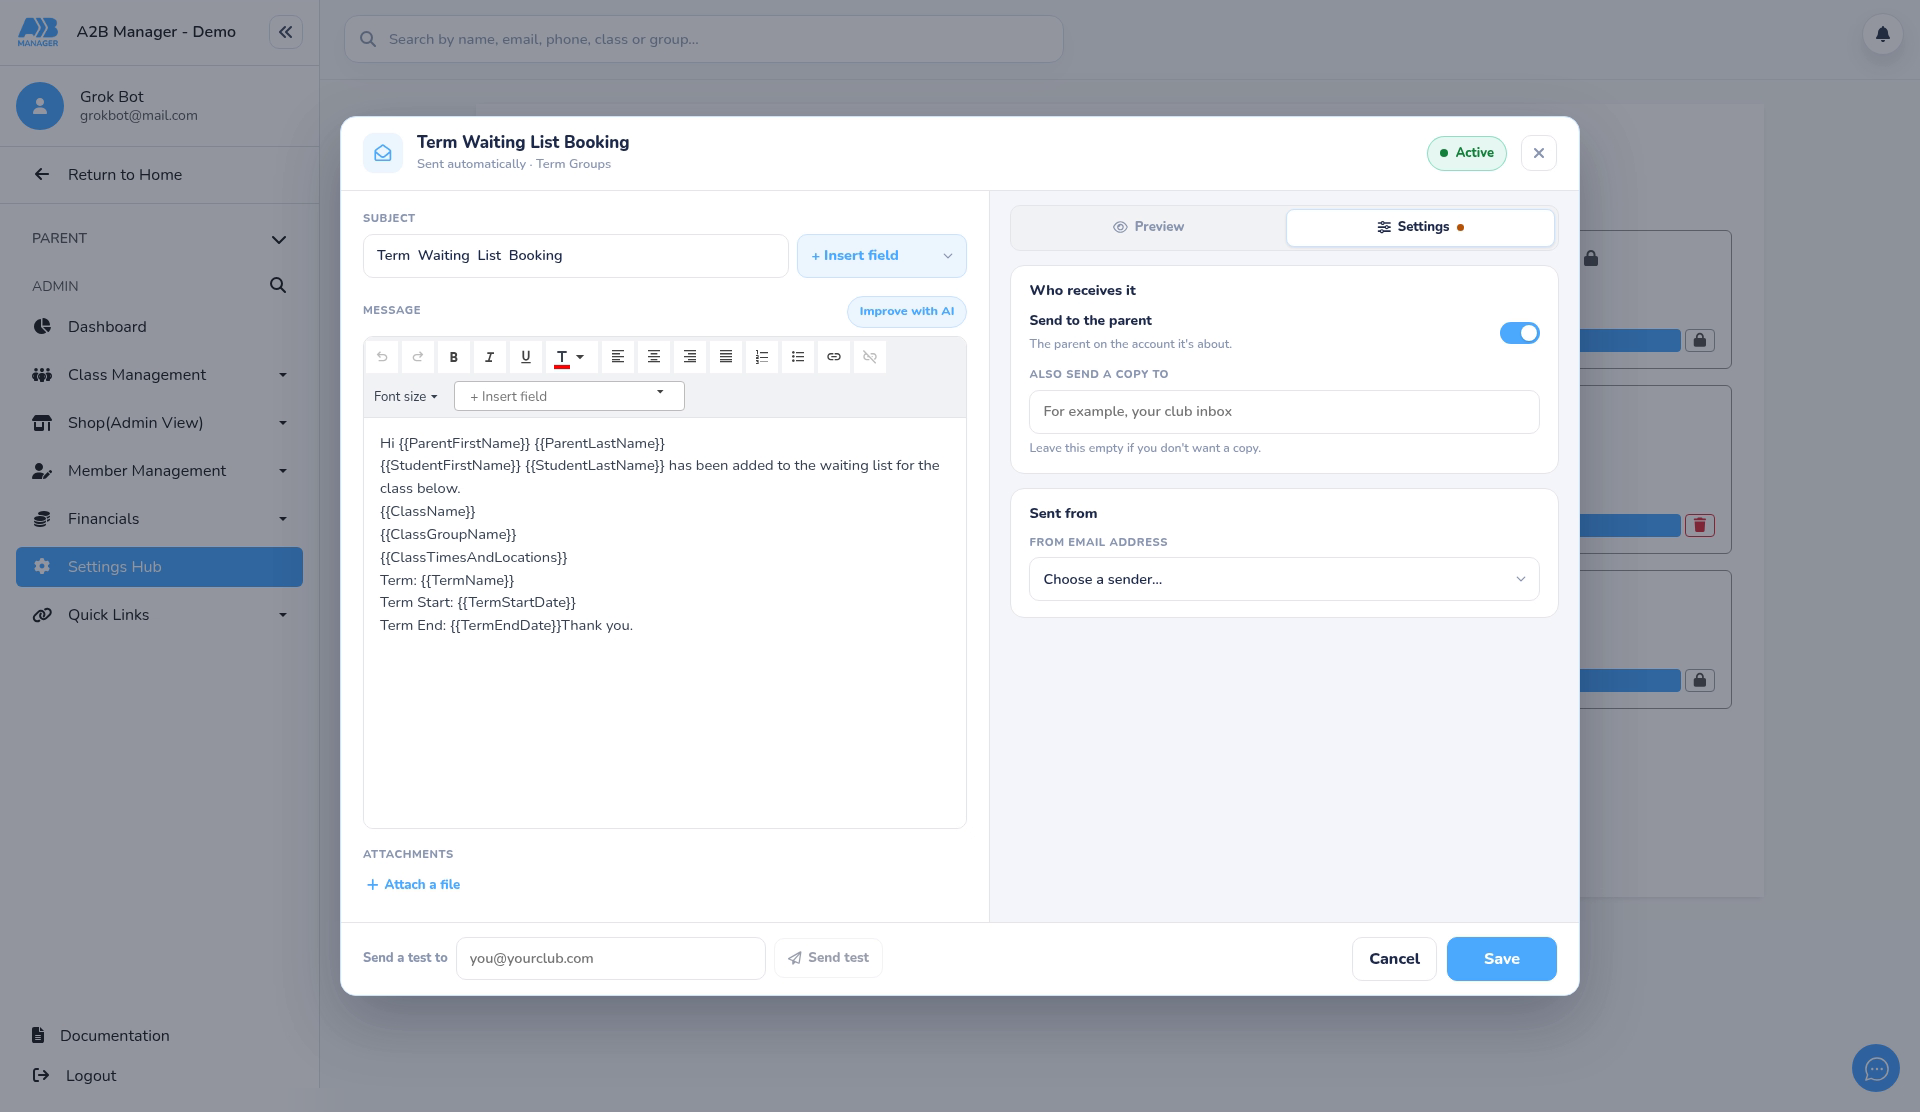
- Click Edit. Change the Subject and Message.
- Use Insert field to add details that fill in automatically, such as the parent’s or child’s name, the class and the term dates.
- Improve with AI can tidy up your wording, and Attach a file adds an attachment.
- The Preview tab shows how the email will look, filled in with example details. The Active badge at the top shows whether the email is switched on.
Step 5: Choose who receives it (1:09) #
- Open the Settings tab.
- Send to the parent sends the email to the parent on the account. Under Also send a copy to, add an address (for example your club inbox) if staff should get a copy. Leave it empty if you don’t want one.
- Under Sent from, choose the From email address. Only verified addresses are listed. See Add new email sender address.
- To check it, enter your address in Send a test to and click Send test. Click Save to keep your changes, or Cancel to close without saving.
Step 6: Create a reusable template (1:25) #
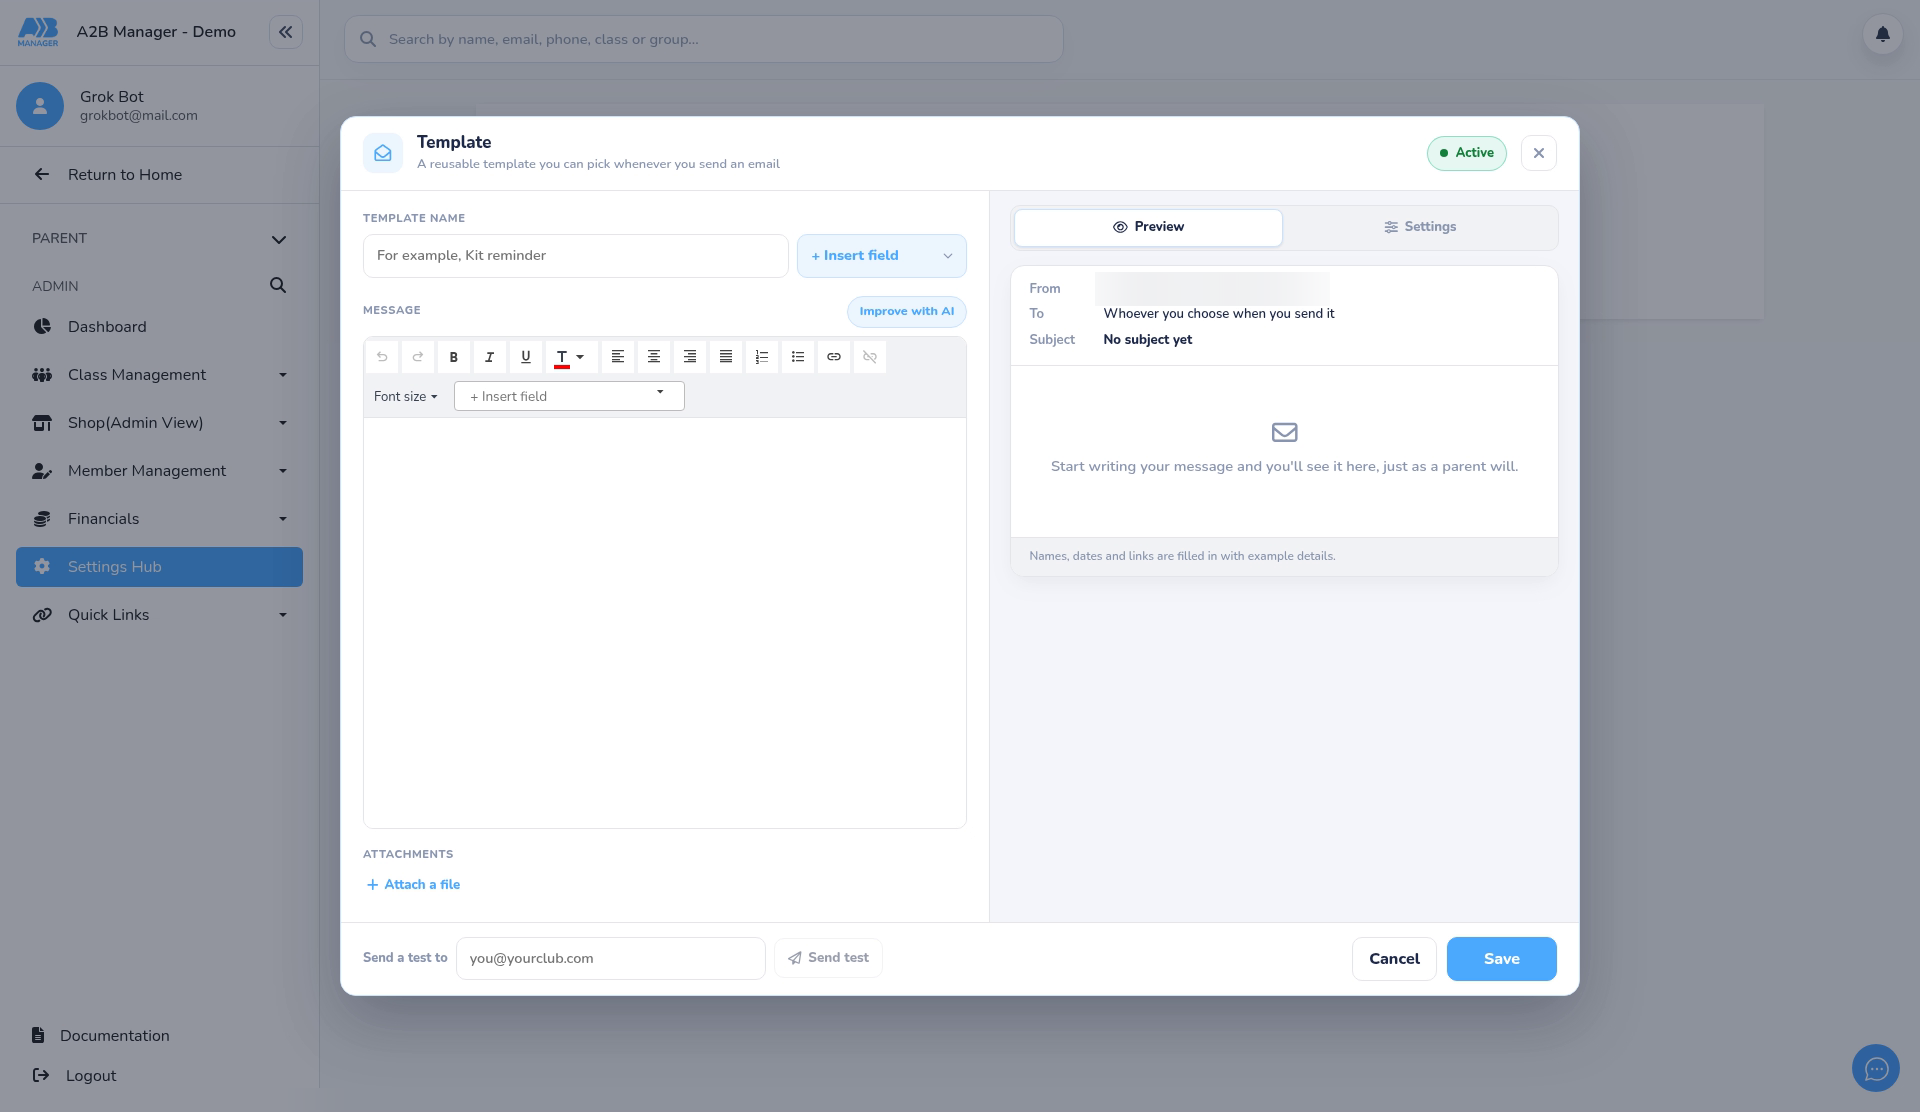
- Click All groups, open the Templates tile and click + (or use Add New).
- Enter a Template name, for example Kit reminder, and write your message. Then click Save.
- When you email members, choose it from the Template list and the email fills in for you.
Good to know #
- Each trigger has one email, which can go to the parent and send a copy to your club at the same time. You don’t need a second email for staff.
- A class group can have its own version of an email, shown with the Unique badge.
- Deleting a template happens immediately. There’s no confirmation and it can’t be undone, so check before you click the bin.


