

Table of Contents
When a parent joins the waiting list for a full group, they get a waiting list email. Each group type has its own template.
Joining the waiting list (parent view) #
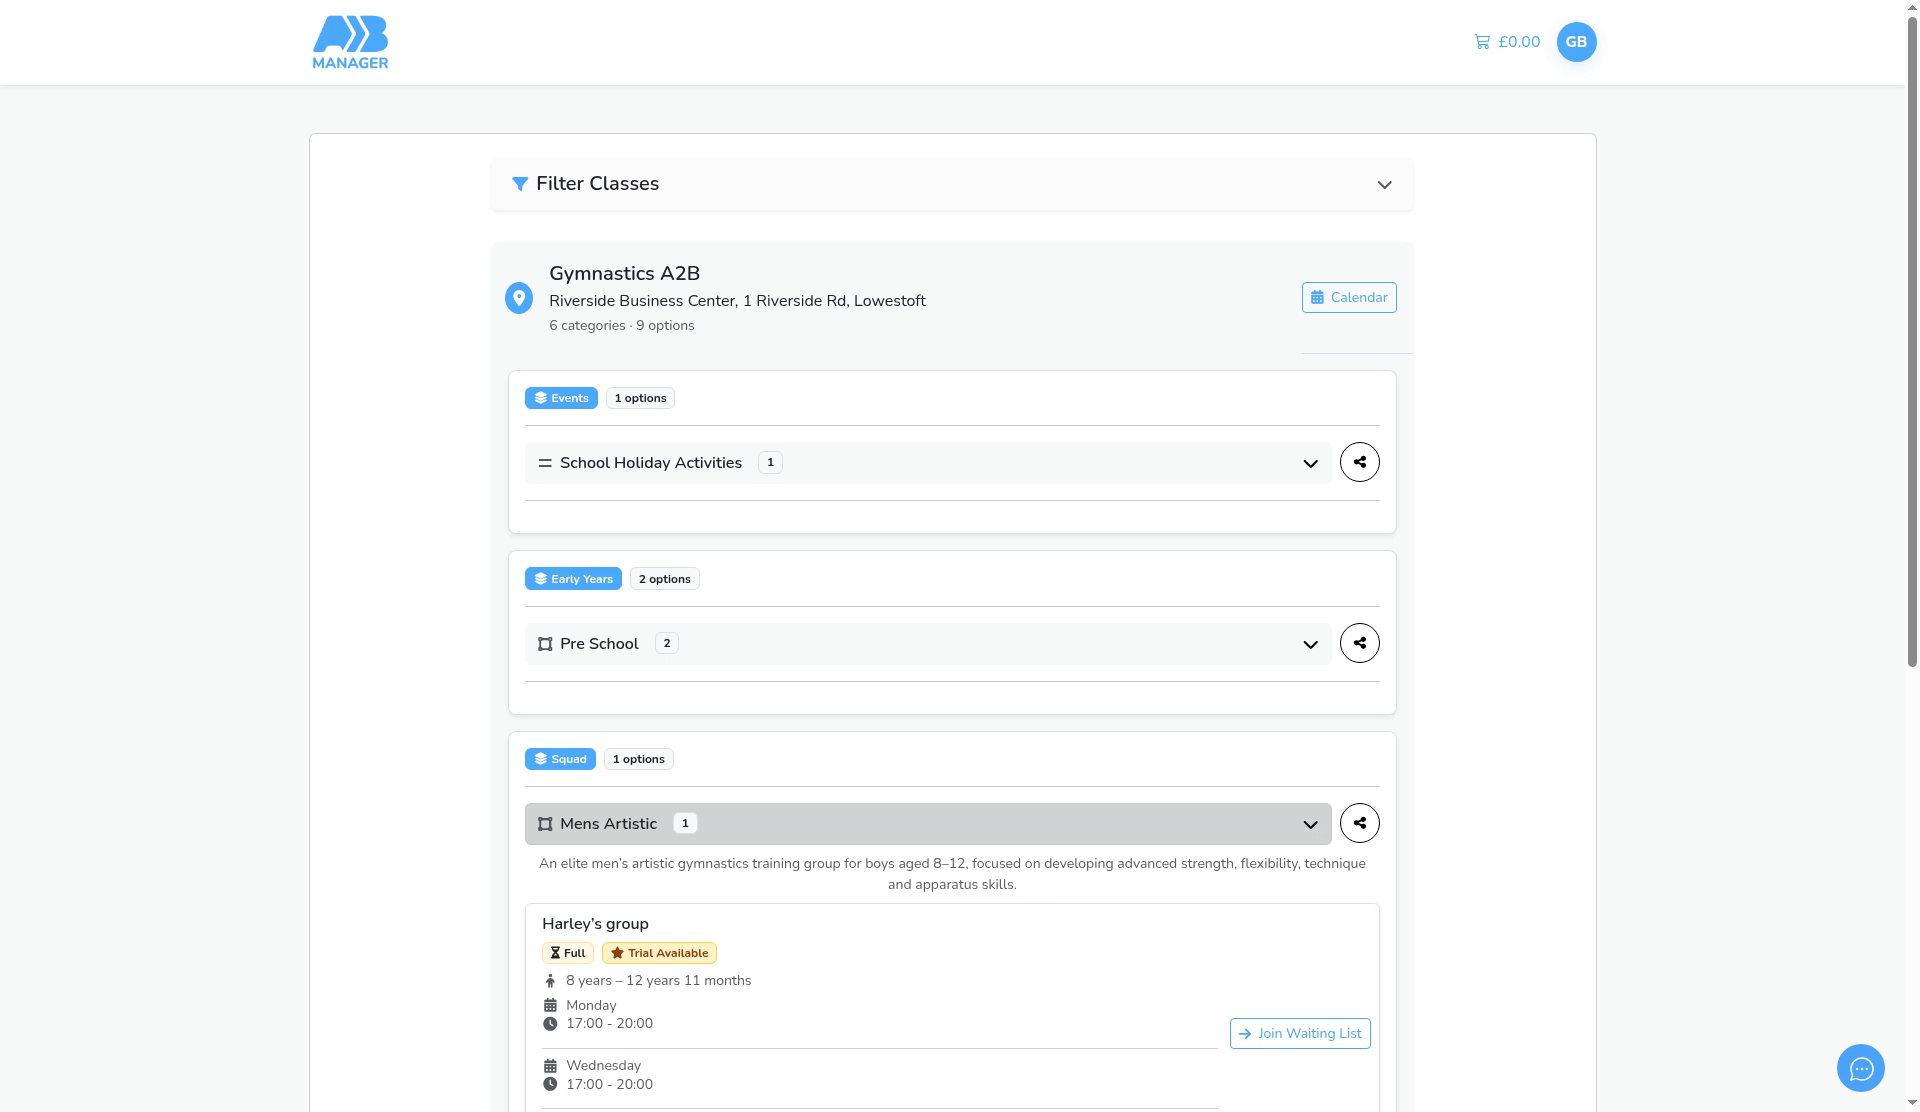
Step 1: Find the full group (0:00) #
- On your club’s classes page, open the category. A full group shows Full and a Join Waiting List button.
- The parent clicks Join Waiting List.
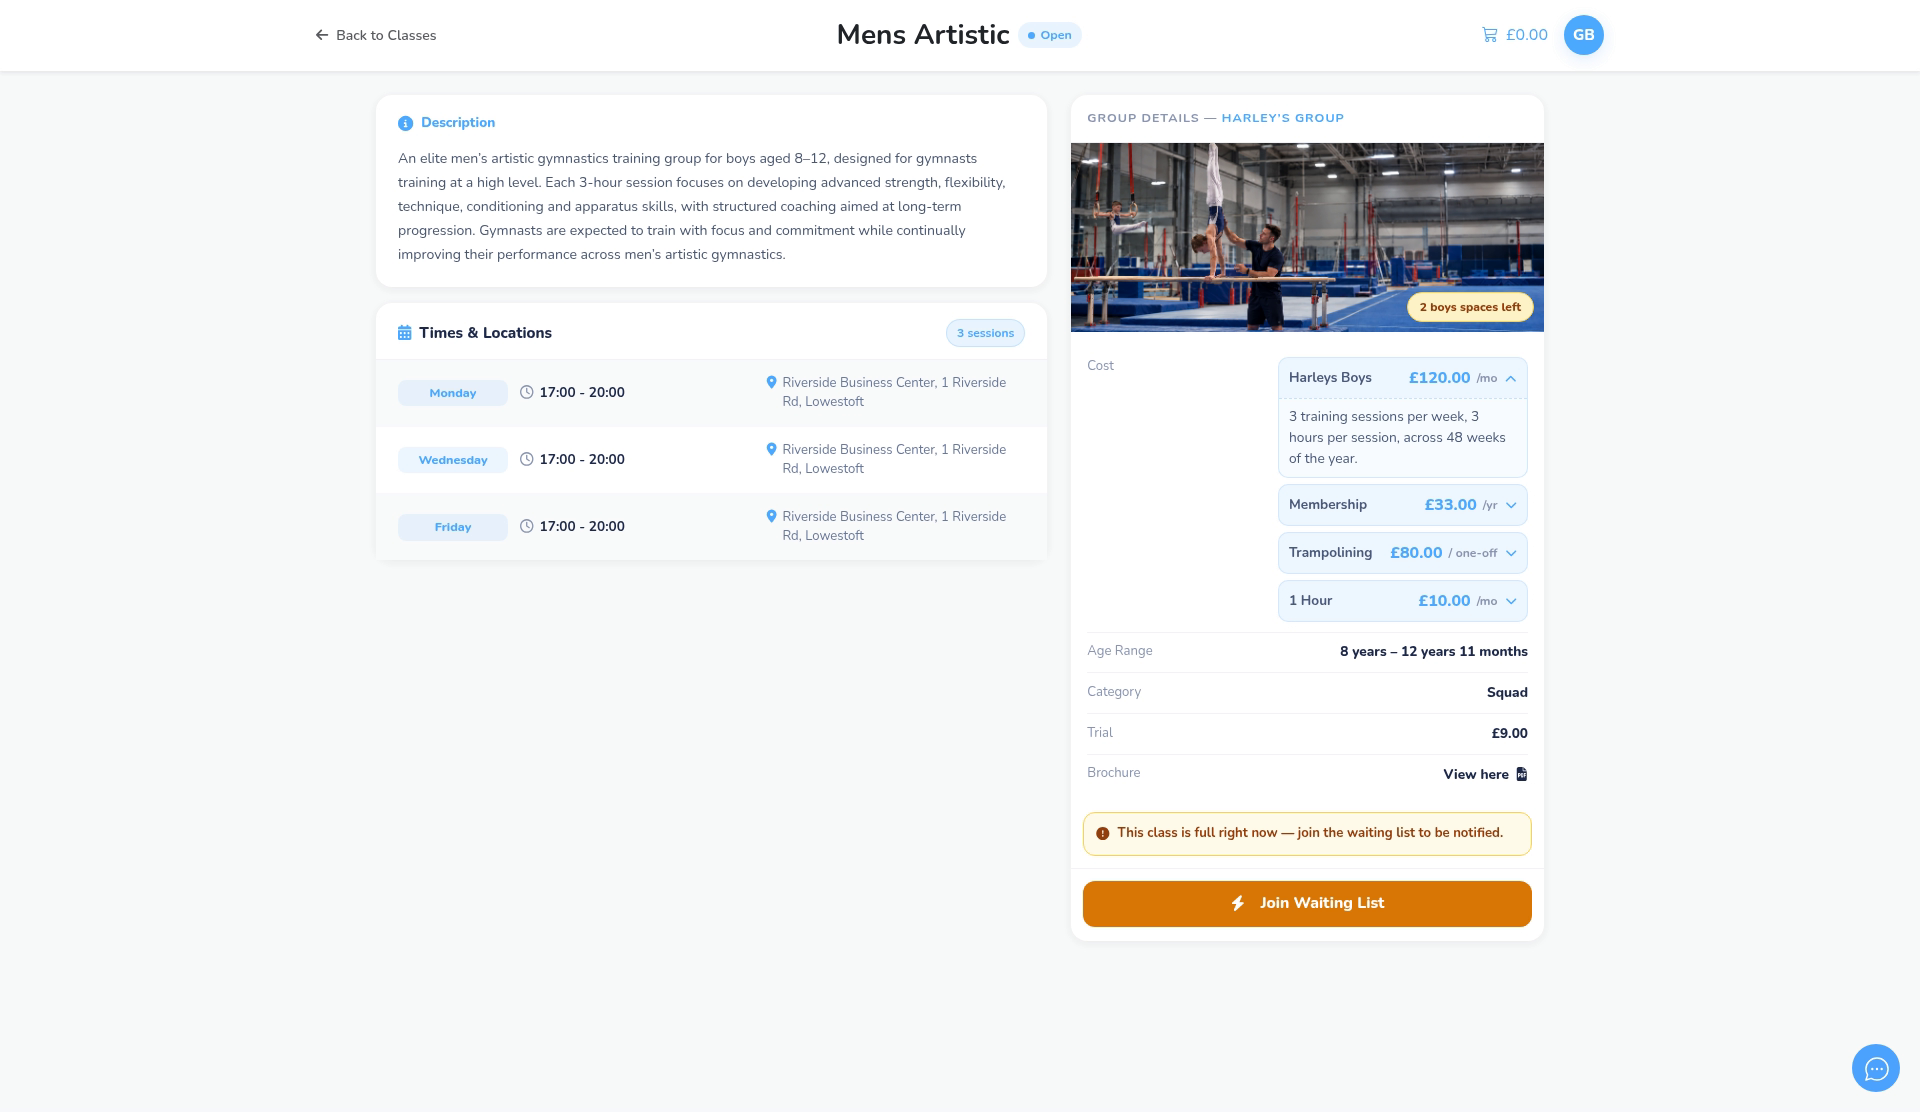
Step 2: Open the waiting list (0:13) #
- The class page says the class is full and the child will be notified when a space becomes available.
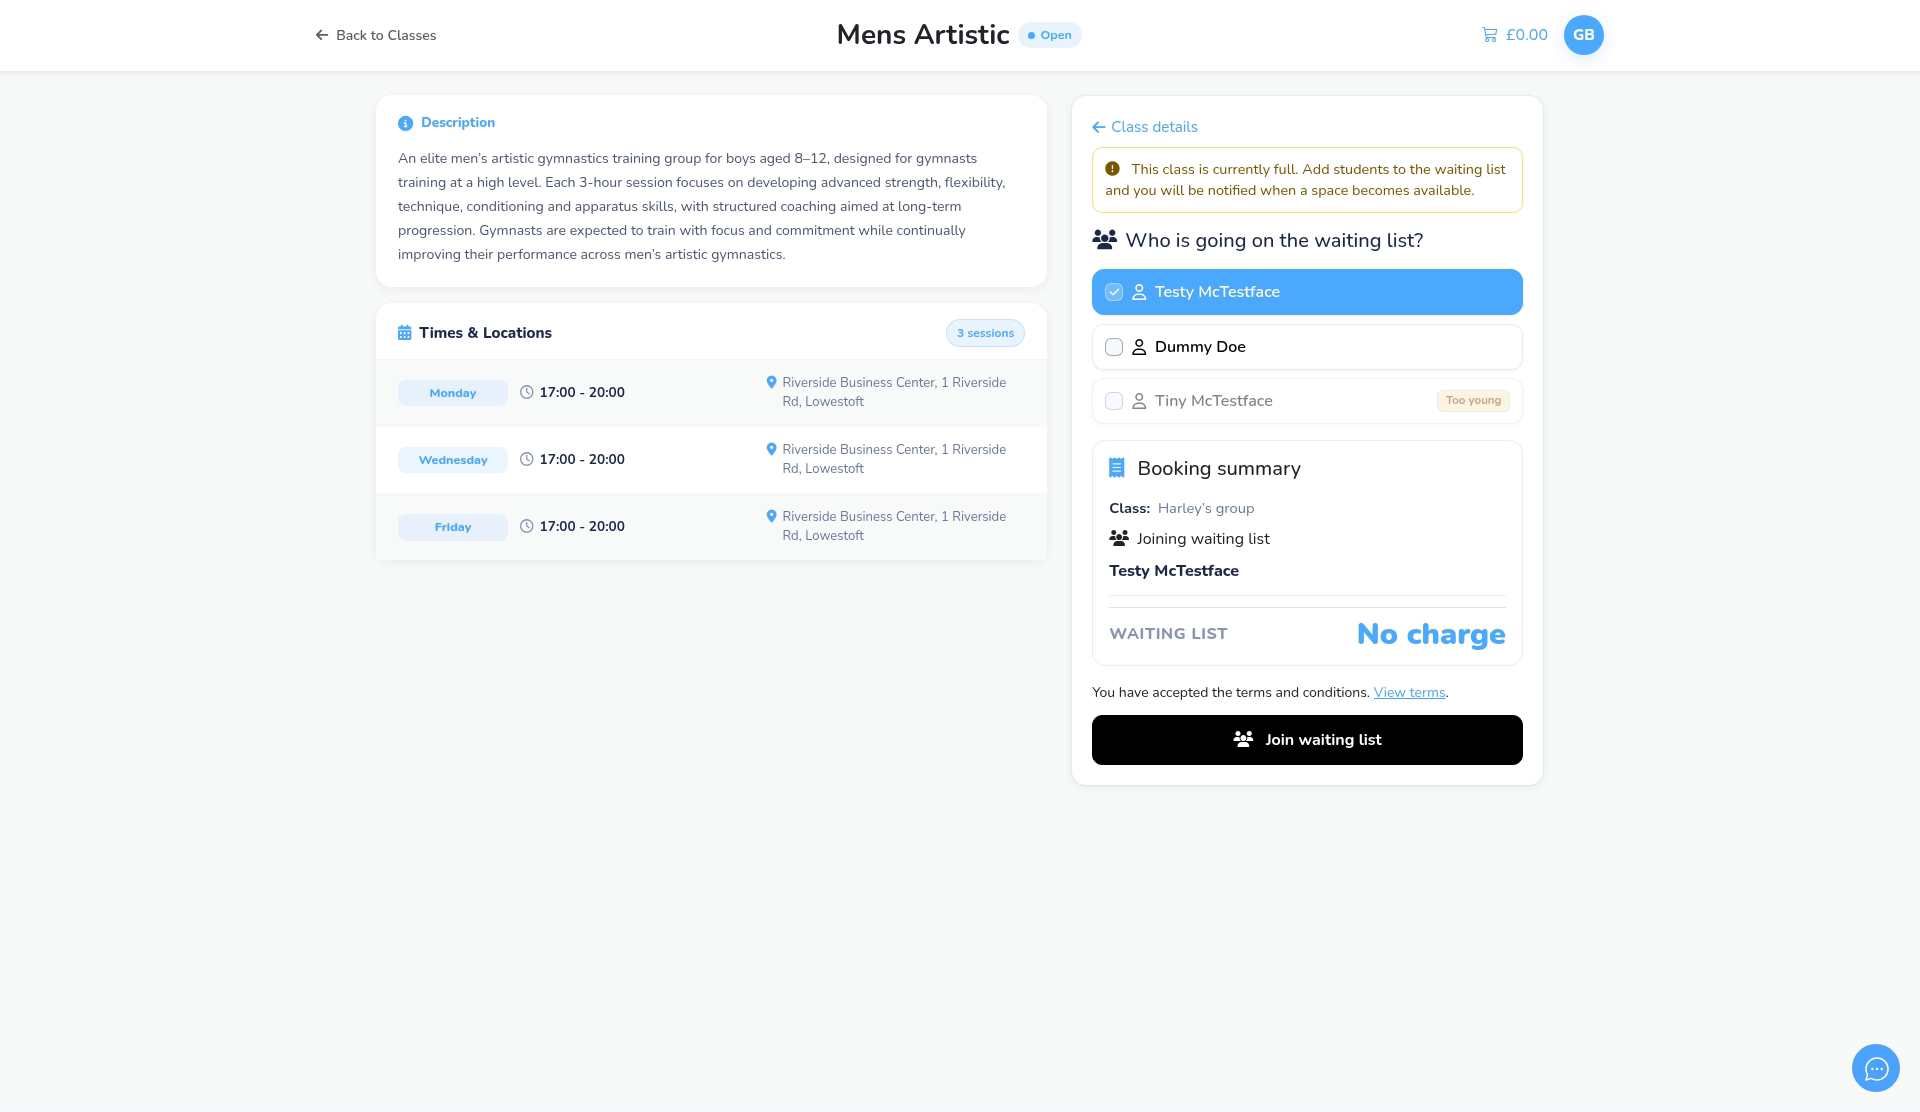
Step 3: Choose the child (0:22) #
- Under Who is going on the waiting list?, the parent ticks their child. Children outside the age range show Too young and can’t be picked.
- The Booking summary shows Waiting list and No charge.
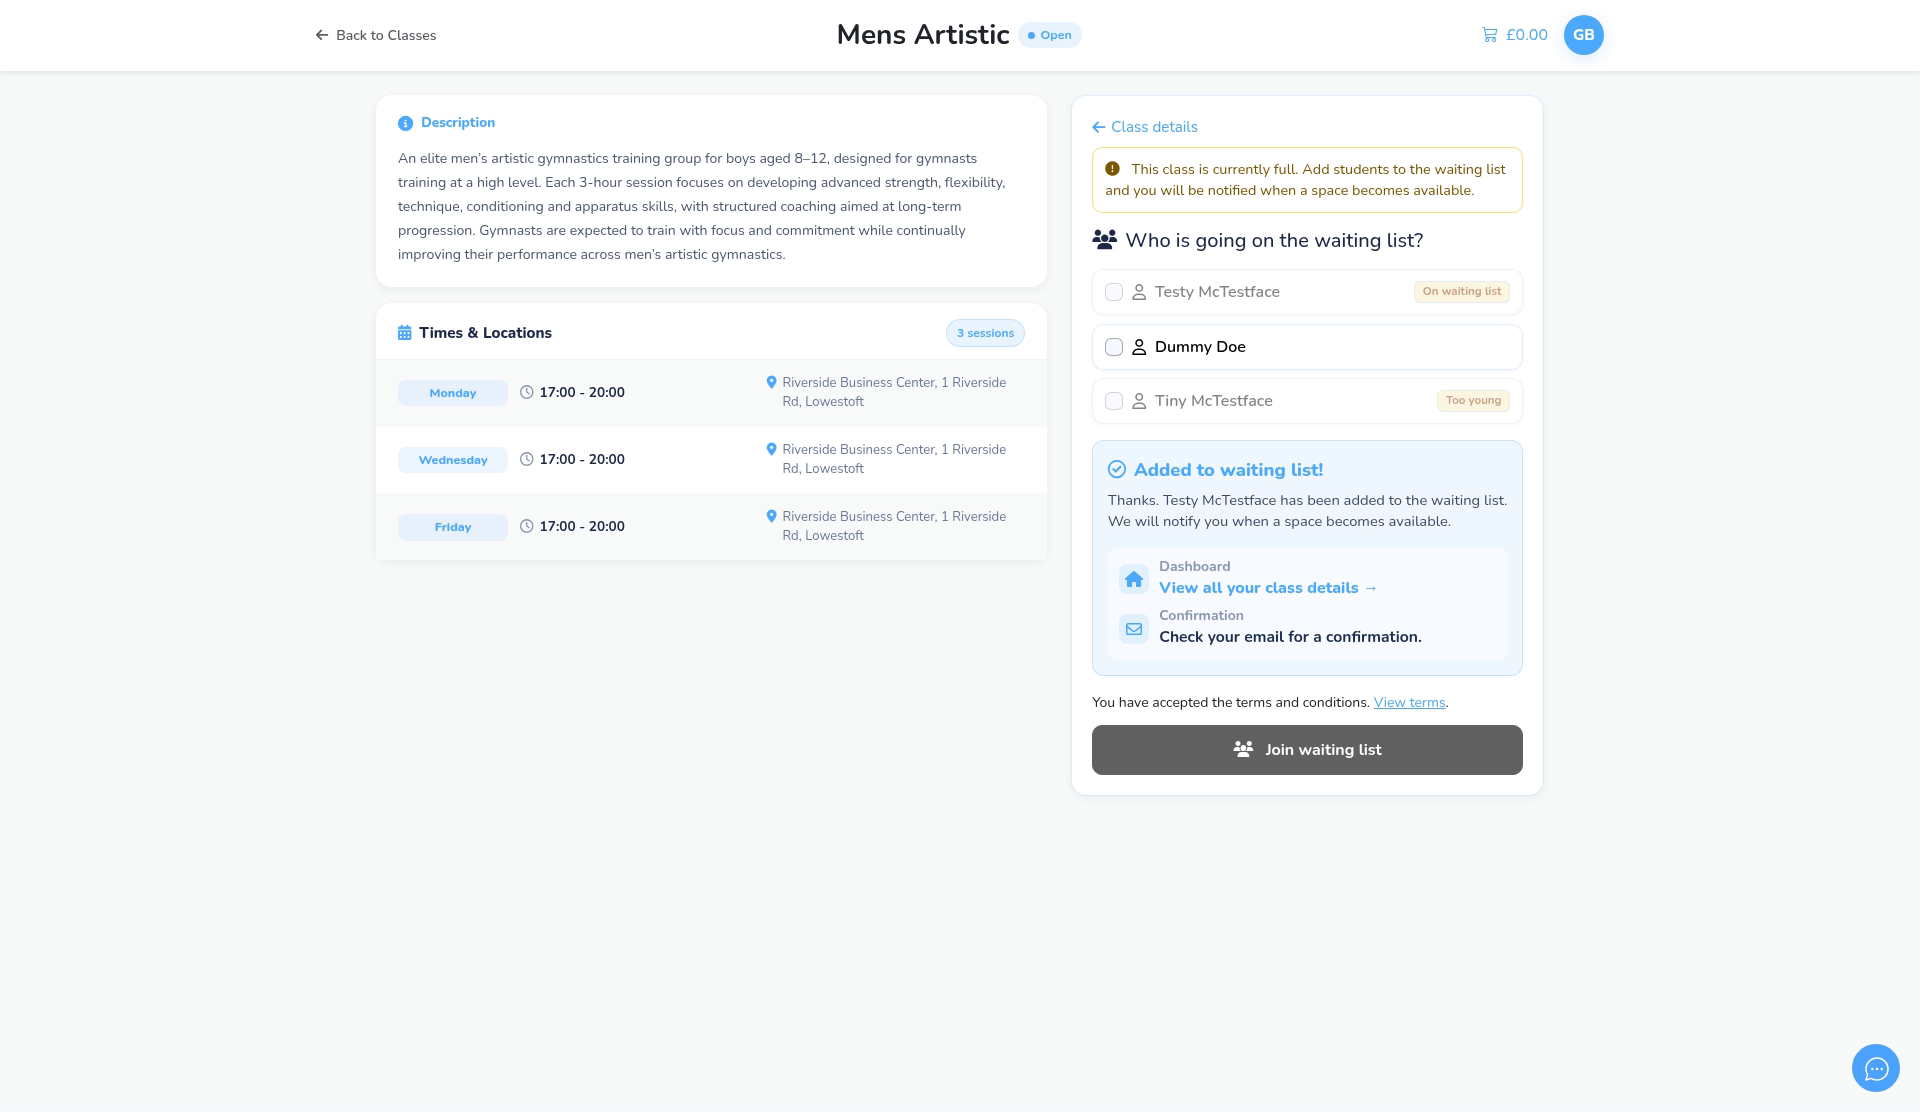
Step 4: Join the waiting list (0:30) #
- The parent clicks Join waiting list and sees Added to waiting list!
- The waiting list email is sent to the parent straight away.
Which template is used #
- Go to Settings Hub > Email Templates. There’s a waiting list template for each group type: Waiting List Booking (subscription groups), Term Waiting List Booking, Pay As You Go Waiting List Booking and Multi Event Waiting List Booking.
- The template used depends on the group’s payment structure in its settings. For subscription groups it’s Recurring subscription.
- The default subscription message is: Hi {ParentFirstName} {ParentLastName}, {StudentFirstName} {StudentLastName} has been added to the waiting list for the class below. {ClassName} {ClassGroupName} {ClassTimesAndLocations} Thank you.
Admin view #
- The child appears in the group’s Waiting list section in Class Management > Classes. From there you can send them an offer when a space comes up.
- Admins can also add a child to a waiting list from the member’s profile; the same email is sent.


