

Table of Contents
When a parent asks to cancel, you accept the request from the Cancellations page. This sets the child’s last class date, optionally ends subscriptions, and emails the parent a confirmation.
Accepting a cancellation #
Step 1: Open the pending requests (0:00) #
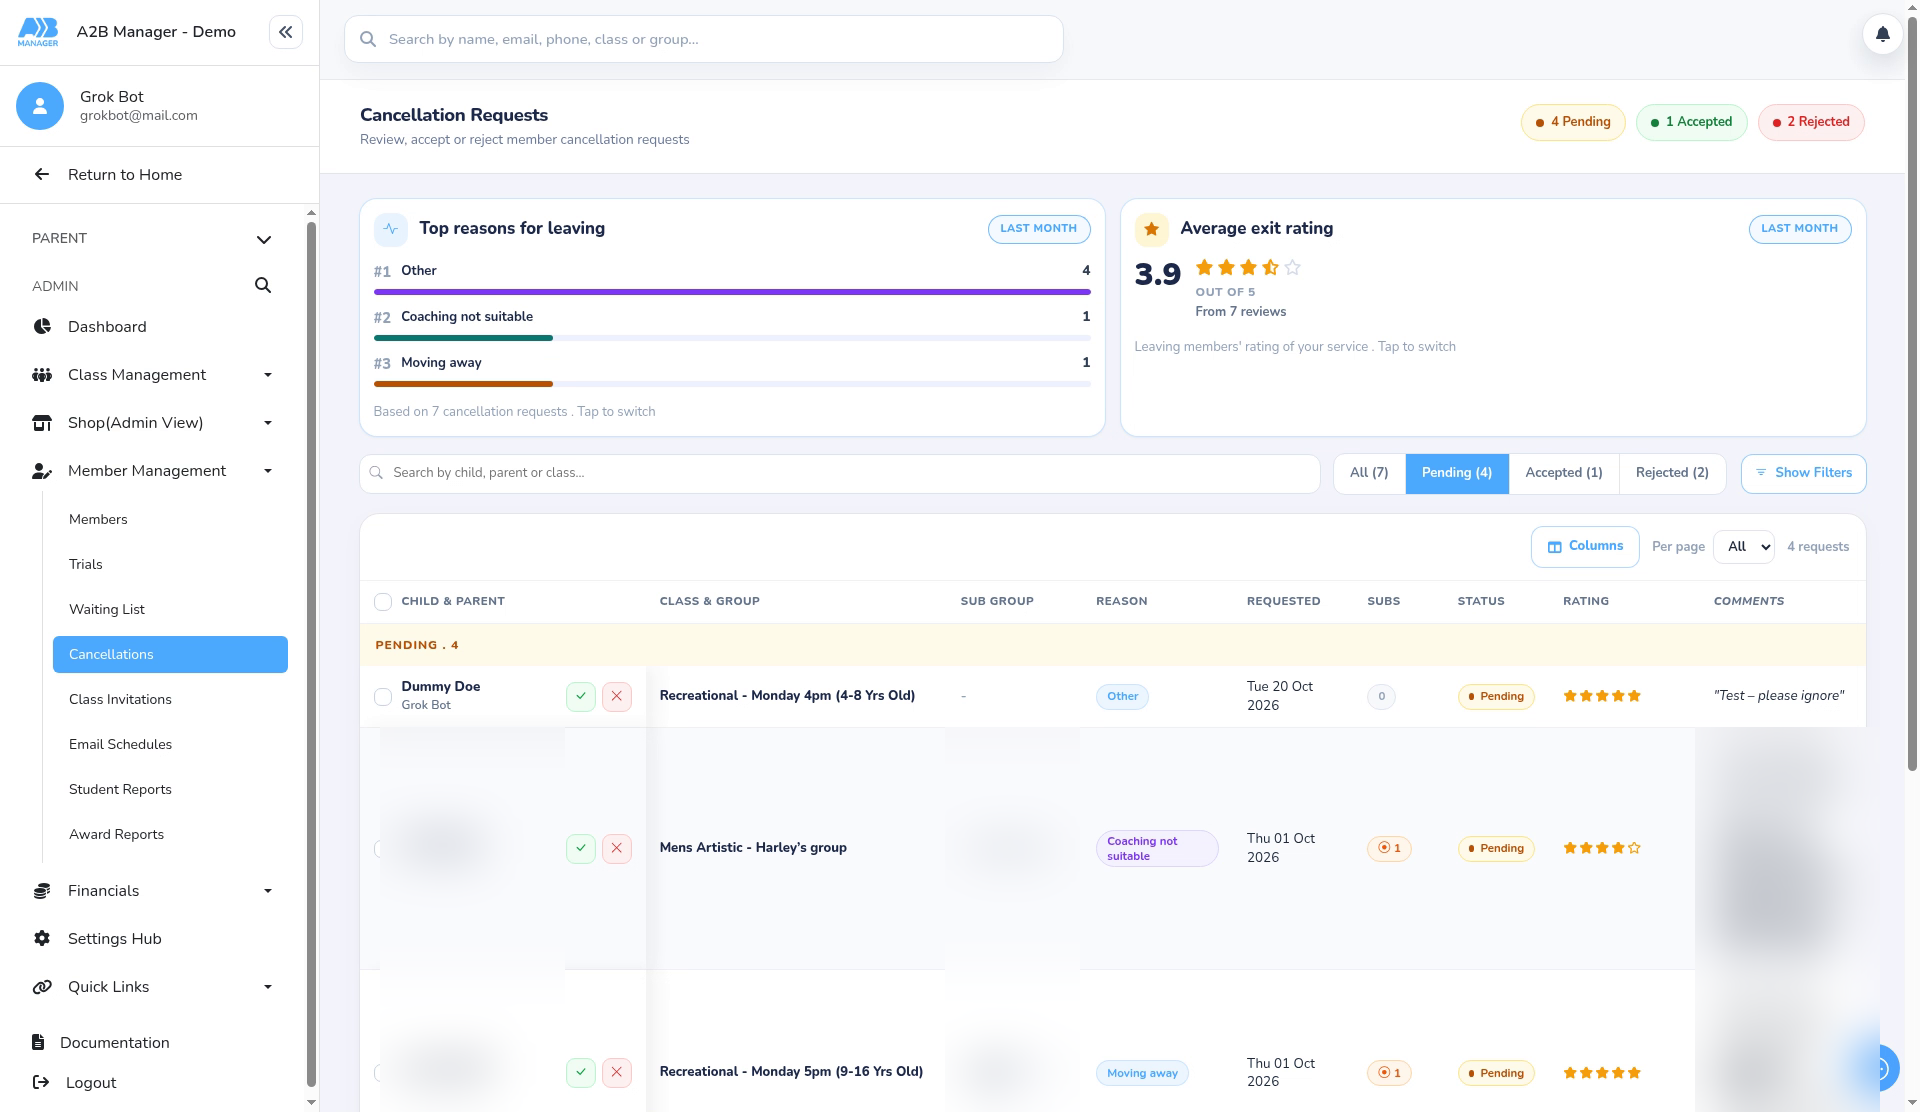
- Go to Member Management > Cancellations and choose Pending.
- Each request shows the child and parent, class and group, reason, rating and comments.
Step 2: Choose the last class date (0:11) #
- Click the ✓ next to the child to open Accept cancellation.
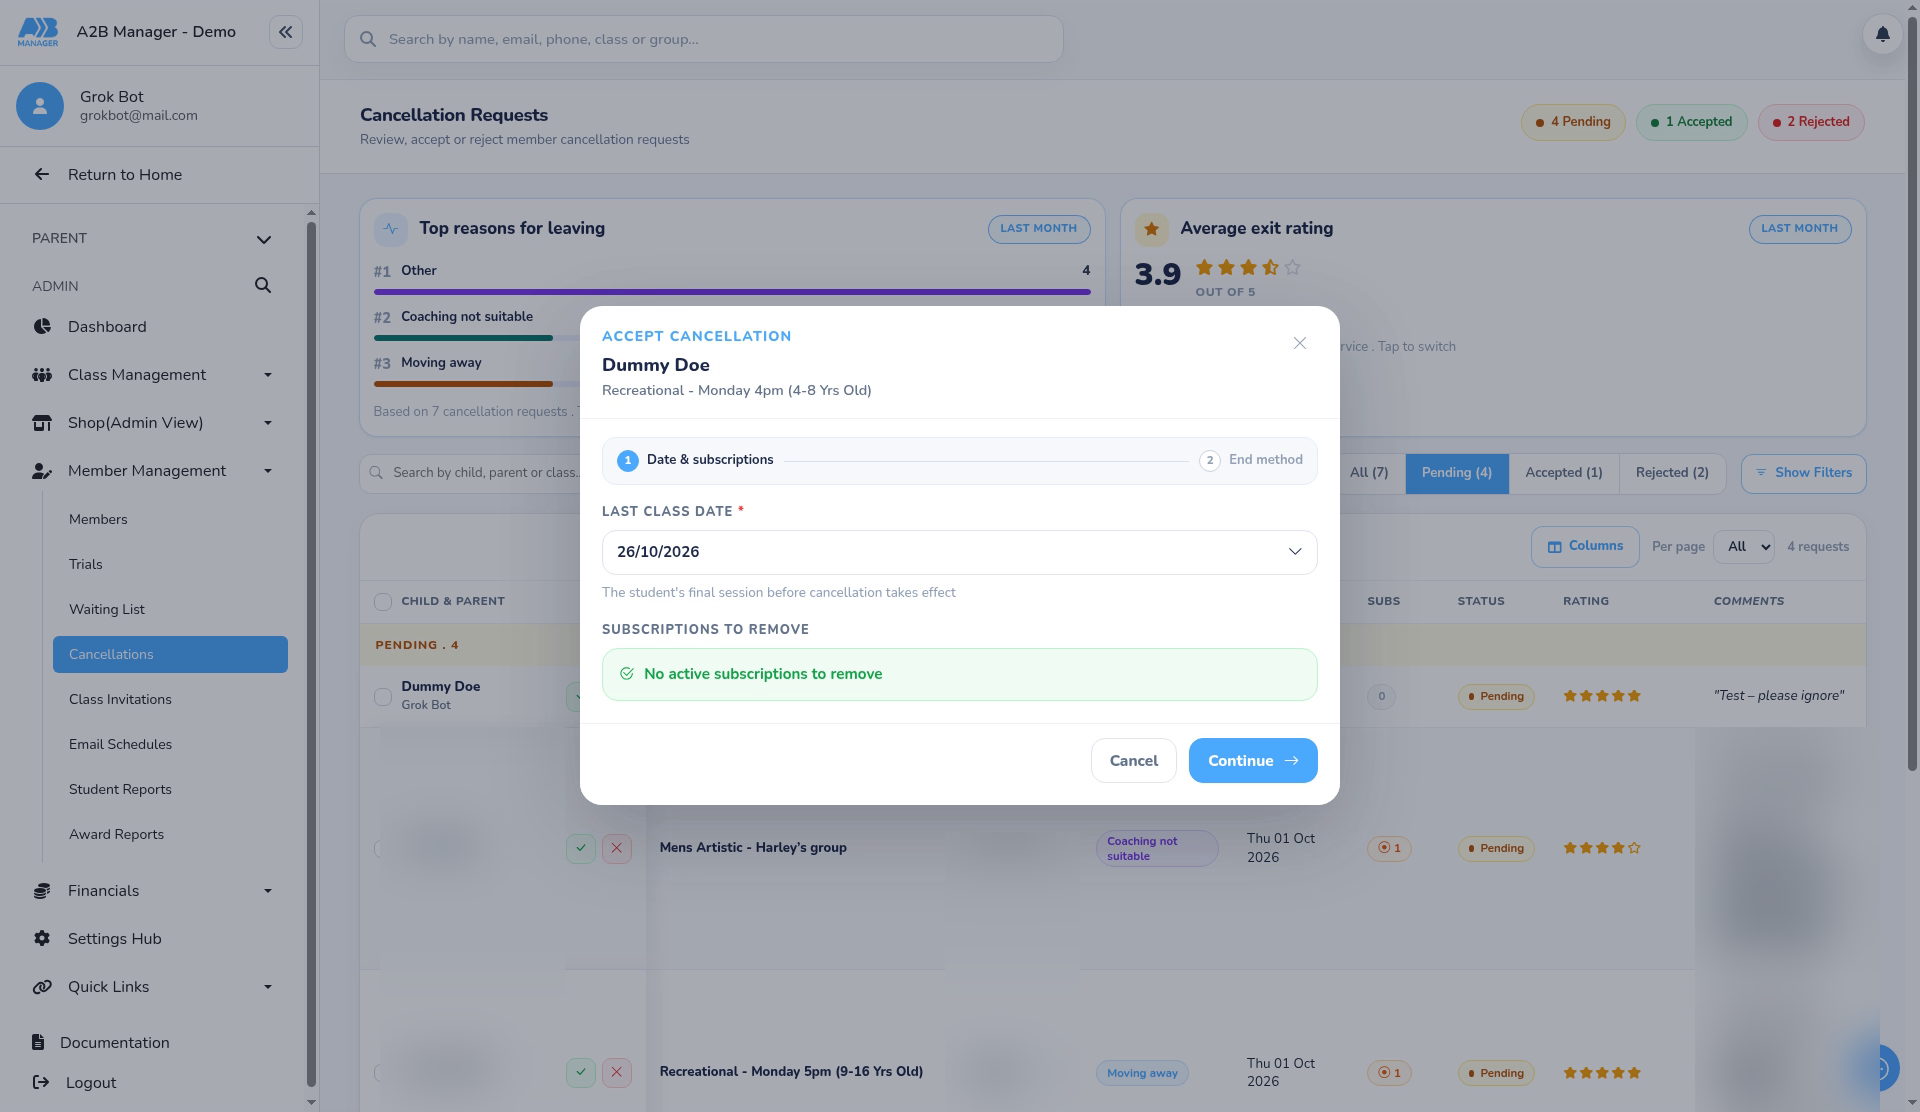
- Under Last class date, pick the child’s final session before the cancellation takes effect. Past dates are marked PAST.
- Subscriptions to remove lists the parent’s active subscriptions. Tick only the ones that should end, then click Continue.
Step 3: Check the summary (0:30) #
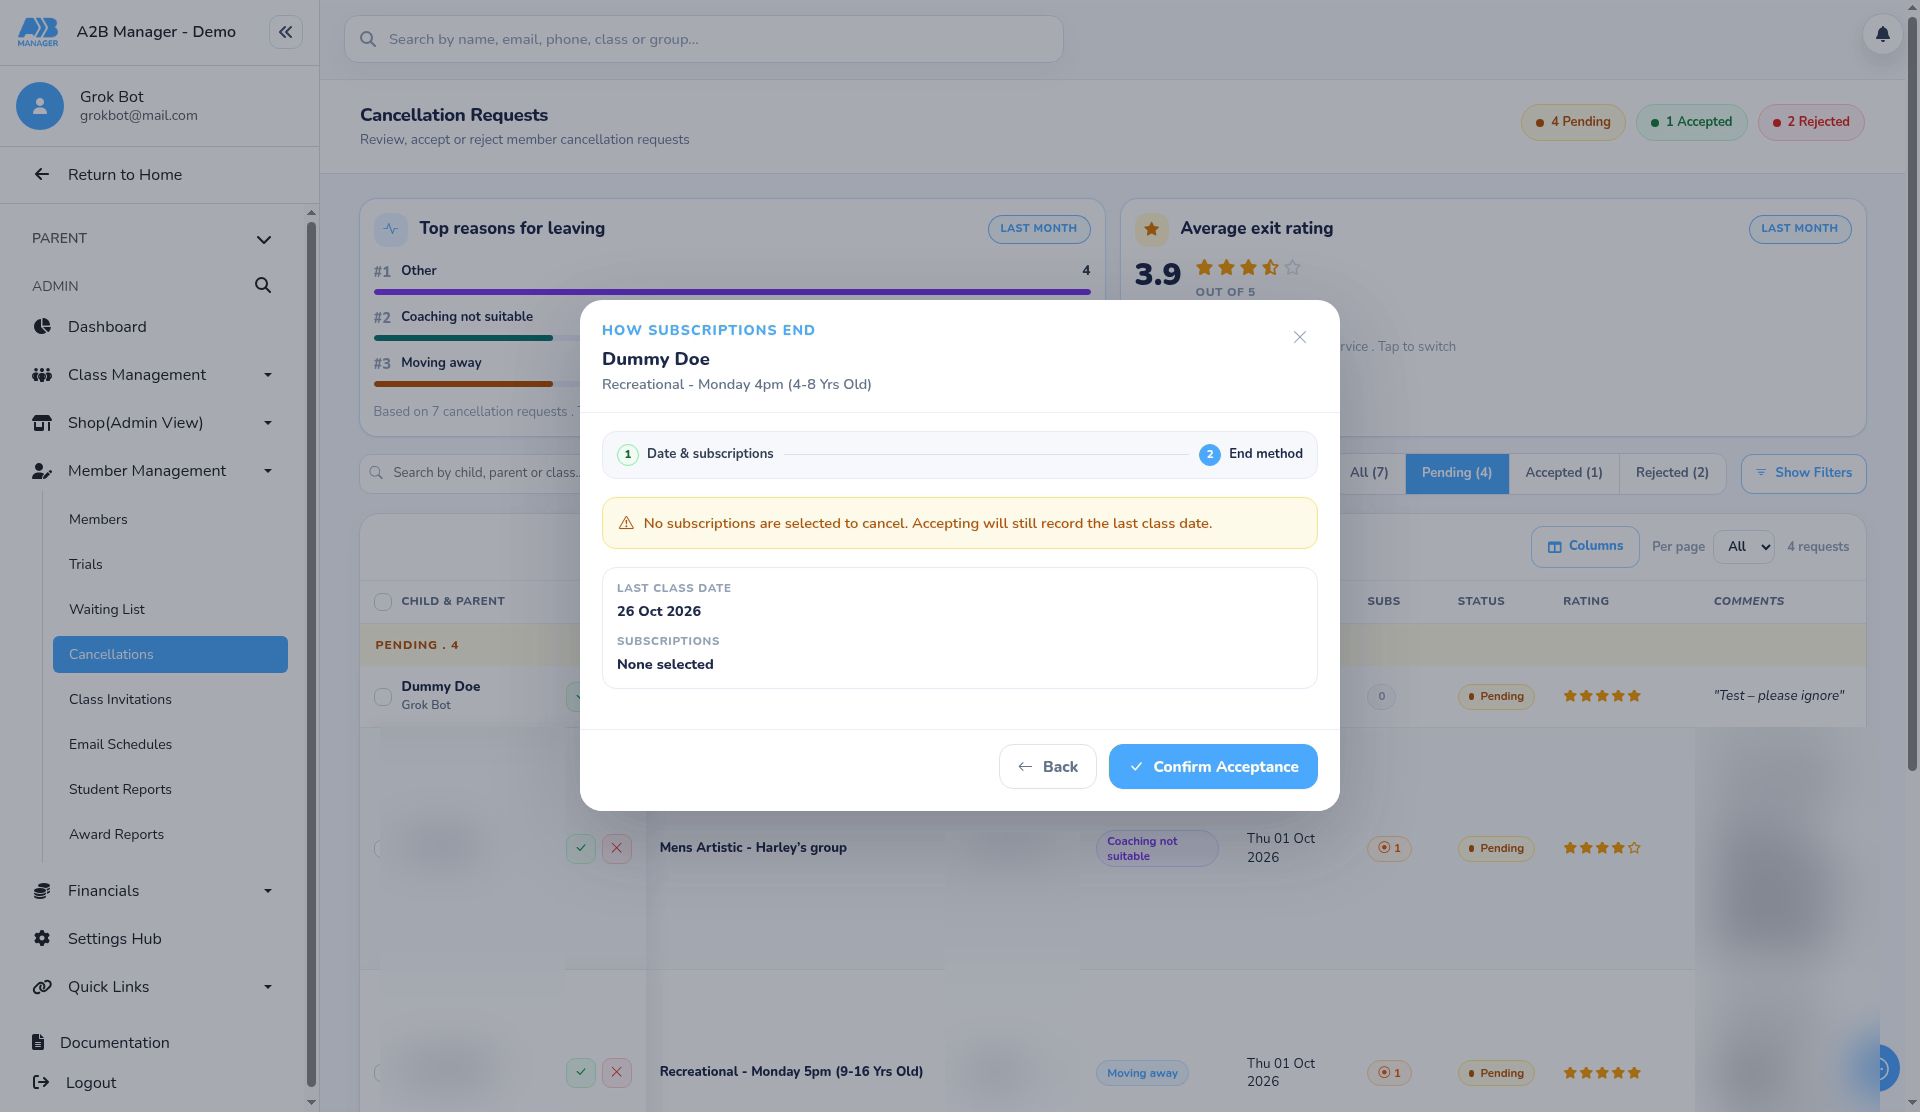
- How subscriptions end shows the last class date and the subscriptions selected.
- If you selected subscriptions, choose how they end (for example after a final payment) and whether to give a refund. Leave the refund at £0.00 for none.
- If no subscriptions are selected, accepting still records the last class date.
Step 4: Confirm (0:44) #
- Click Confirm Acceptance.
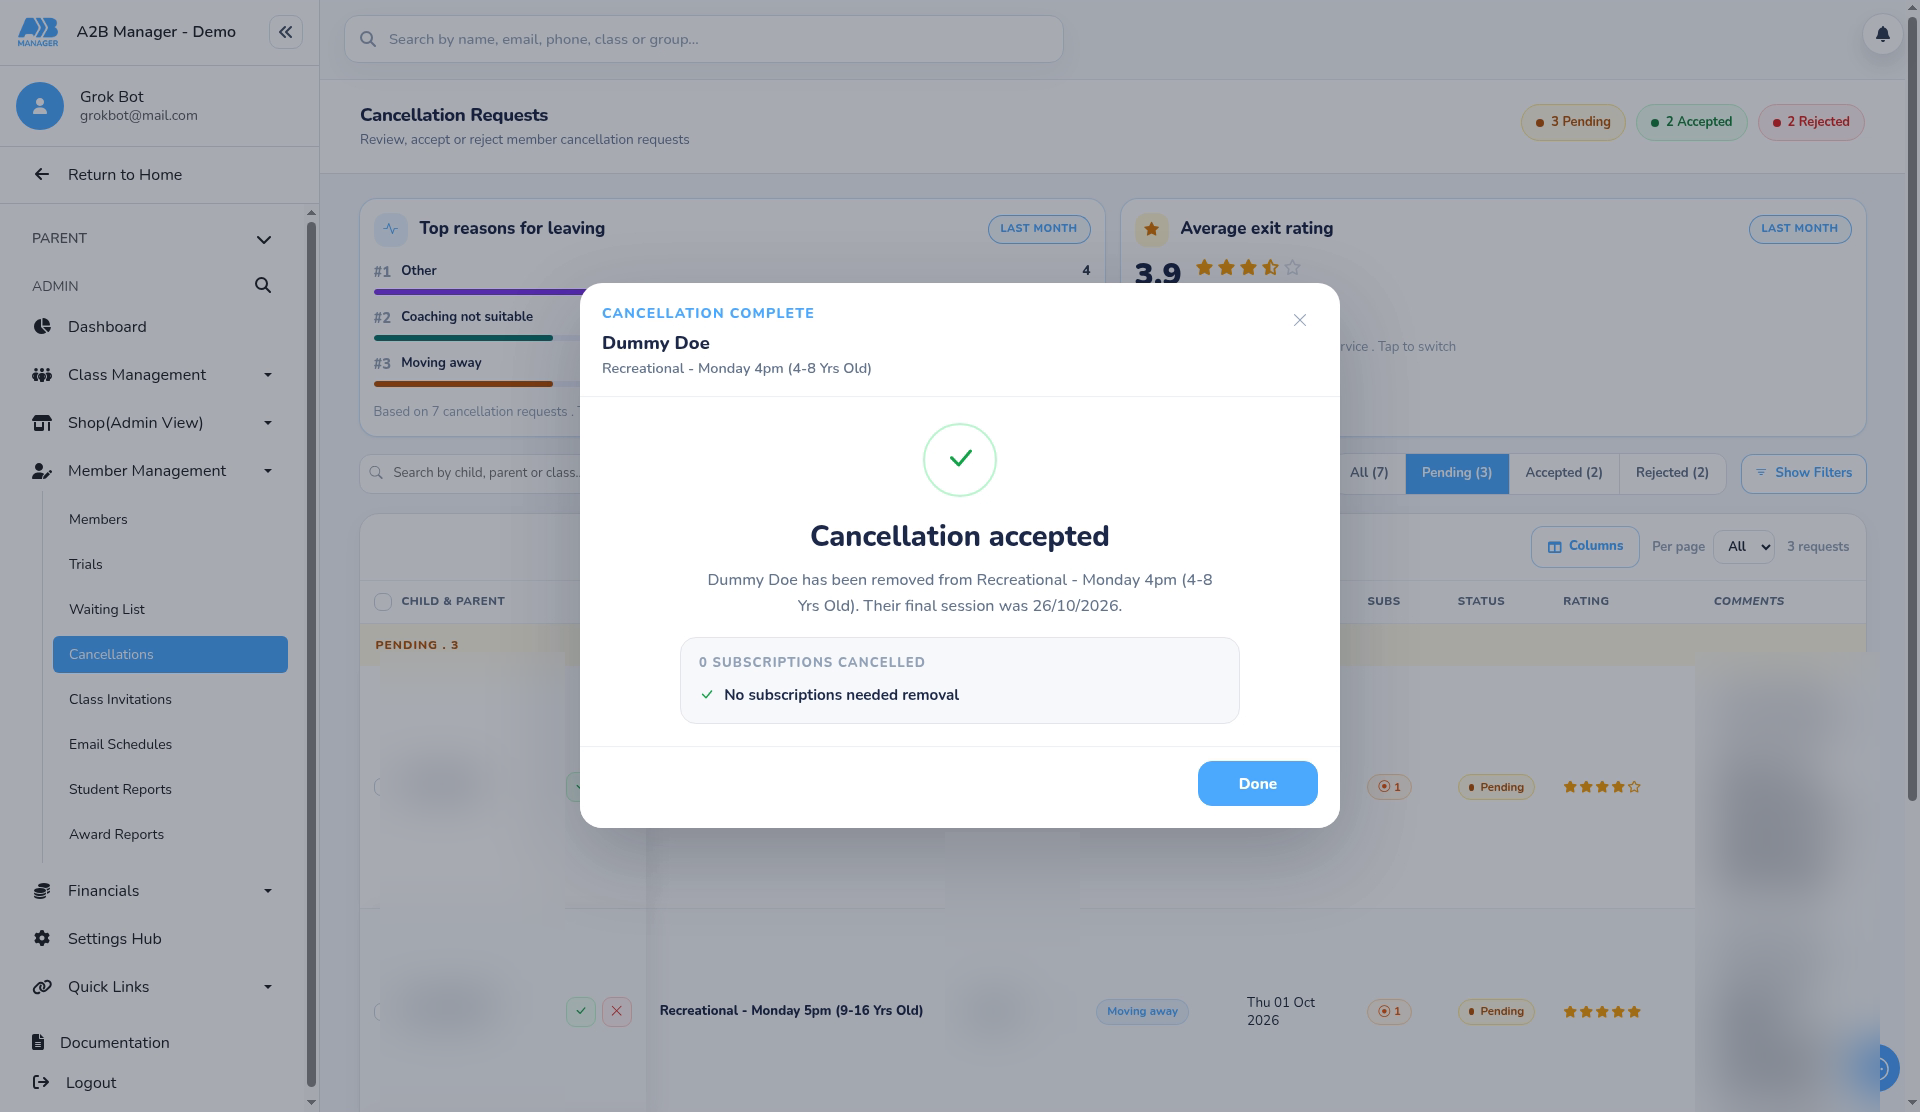
- Cancellation accepted confirms the final session and how many subscriptions were cancelled. Click Done.
The Cancellation Confirmation email #
- Accepting a request sends the Cancellation Confirmation email to the parent.
- Optional: before you start, check the wording under Settings Hub > Email Templates > Cancellation Confirmation. Term groups use Term Cancellation Confirmation.
- The default message is: Dear {ParentFirstName} {ParentLastName}, Cancellation Confirmation: {StudentFirstName} {StudentLastName}, {ClassName}, {ClassGroupName}, Final lesson date: {LastLessonDate}, Payment details: {CancellationPaymentSummary}
Good to know #
- Once a request is accepted, the parent’s class card no longer shows Request Cancellation for that class.
- To keep the child after all, reject the request instead: the child stays enrolled.


