

Table of Contents
- Removing a member from a class
- Step 1: Open the class and tick the member (0:00)
- Step 2: Choose Schedule to leave (0:37)
- Step 3: Decide whether to cancel subscriptions (optional) (0:57)
- Step 4: Choose the last lesson date and check the preview (1:10)
- Step 5: Choose notifications and cancellation numbers (1:34)
- Step 6: Confirm and check the summary (1:50)
- Good to know
Use Schedule to leave on the class’s Class list to set a member’s last lesson. Subscriptions are not cancelled automatically, so you choose whether to stop any billing at the same time.
Removing a member from a class #
Step 1: Open the class and tick the member (0:00) #
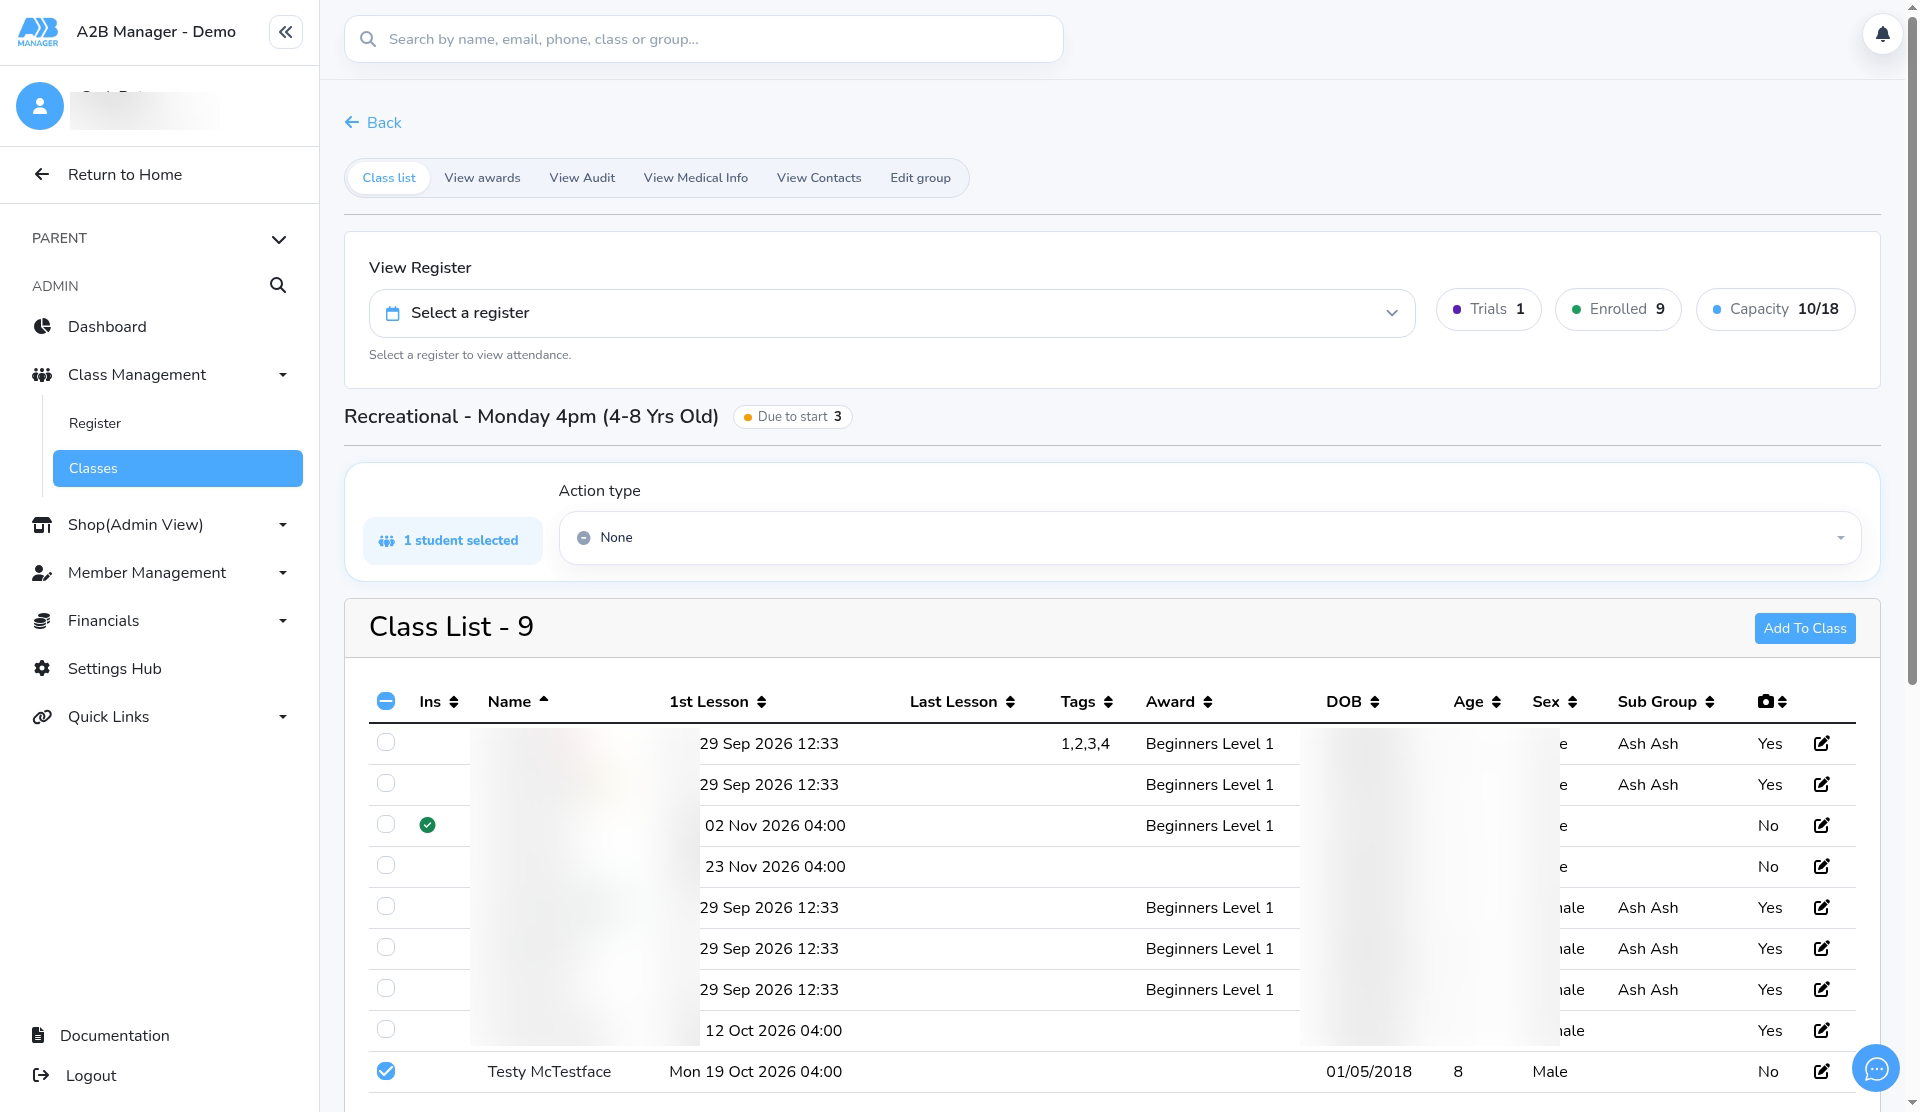
- In the left sidebar, go to Class Management > Classes and open the class.
- Click the Class list tab.
- Tick the checkbox next to the member you want to remove. You can tick more than one.
Step 2: Choose Schedule to leave (0:37) #
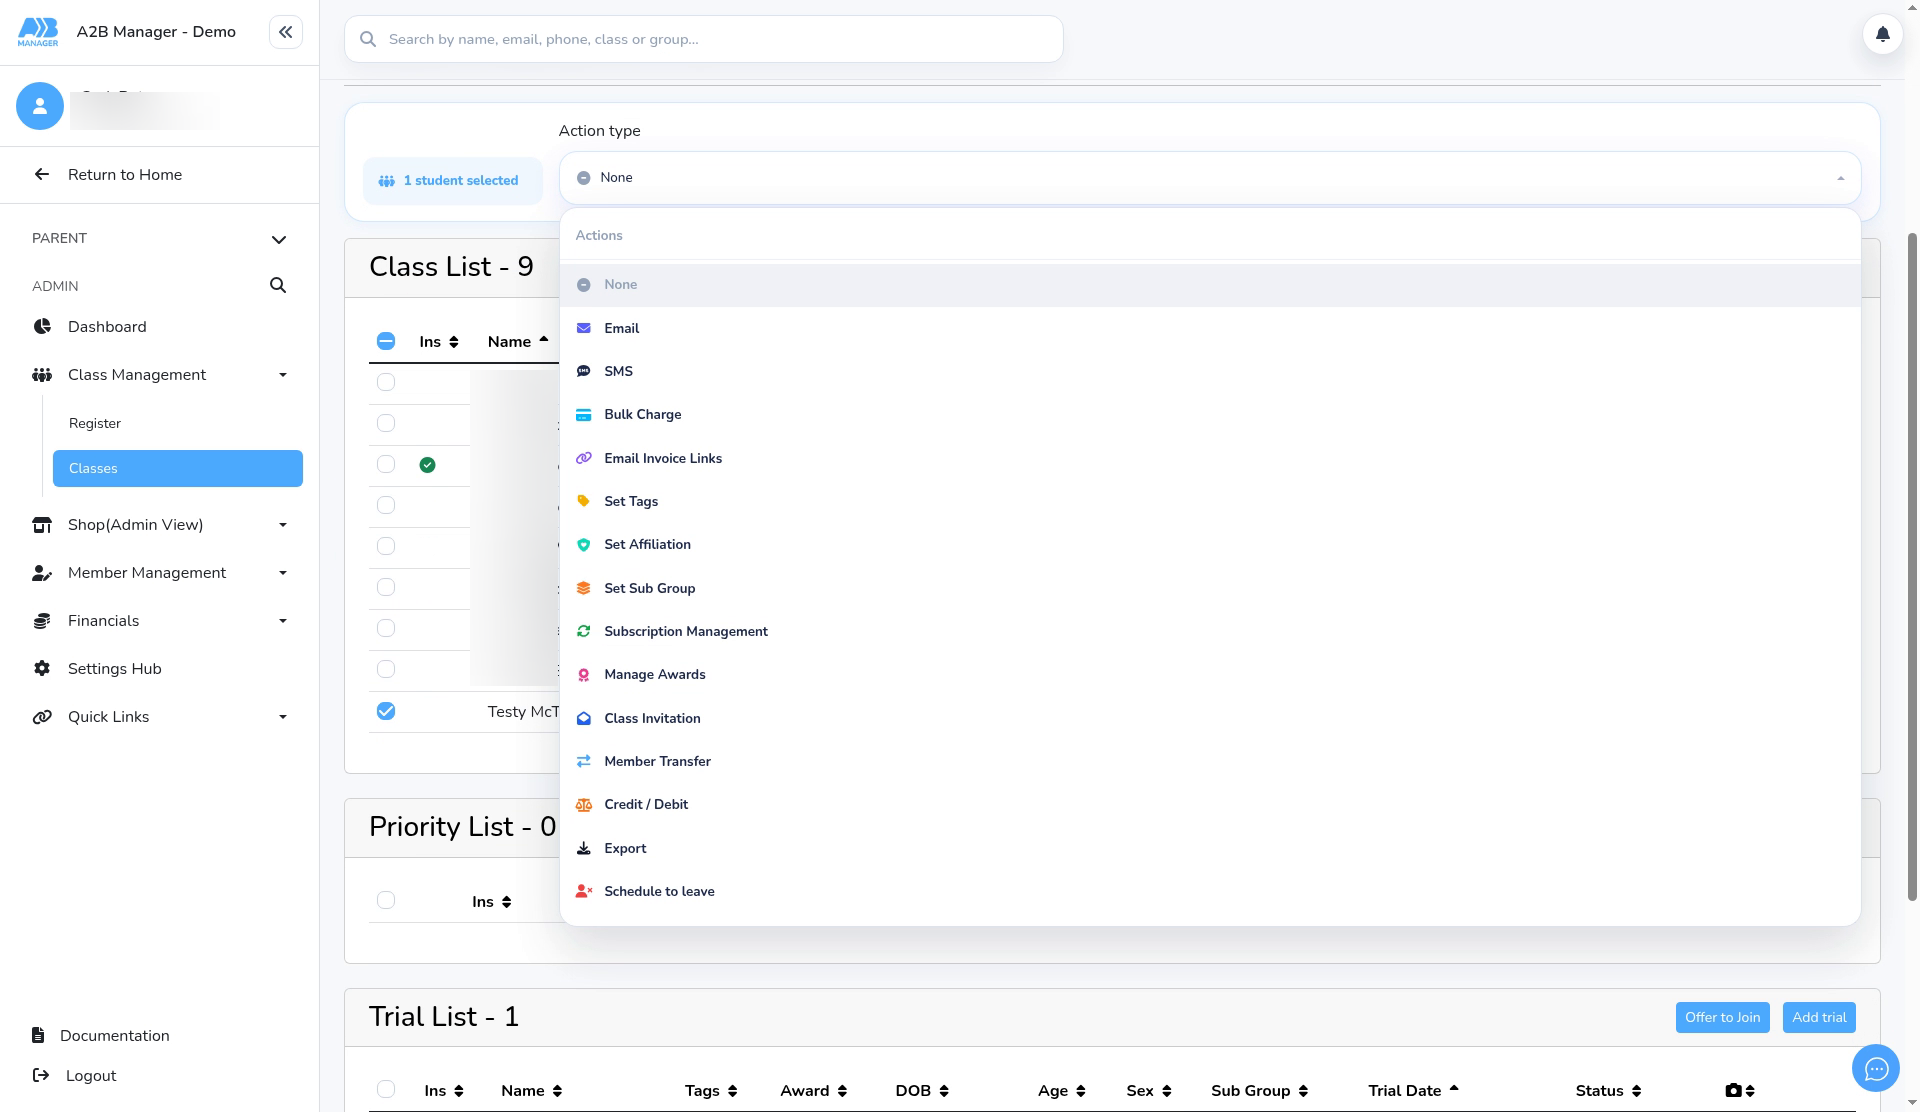
- Open the Action type menu and choose Schedule to leave.
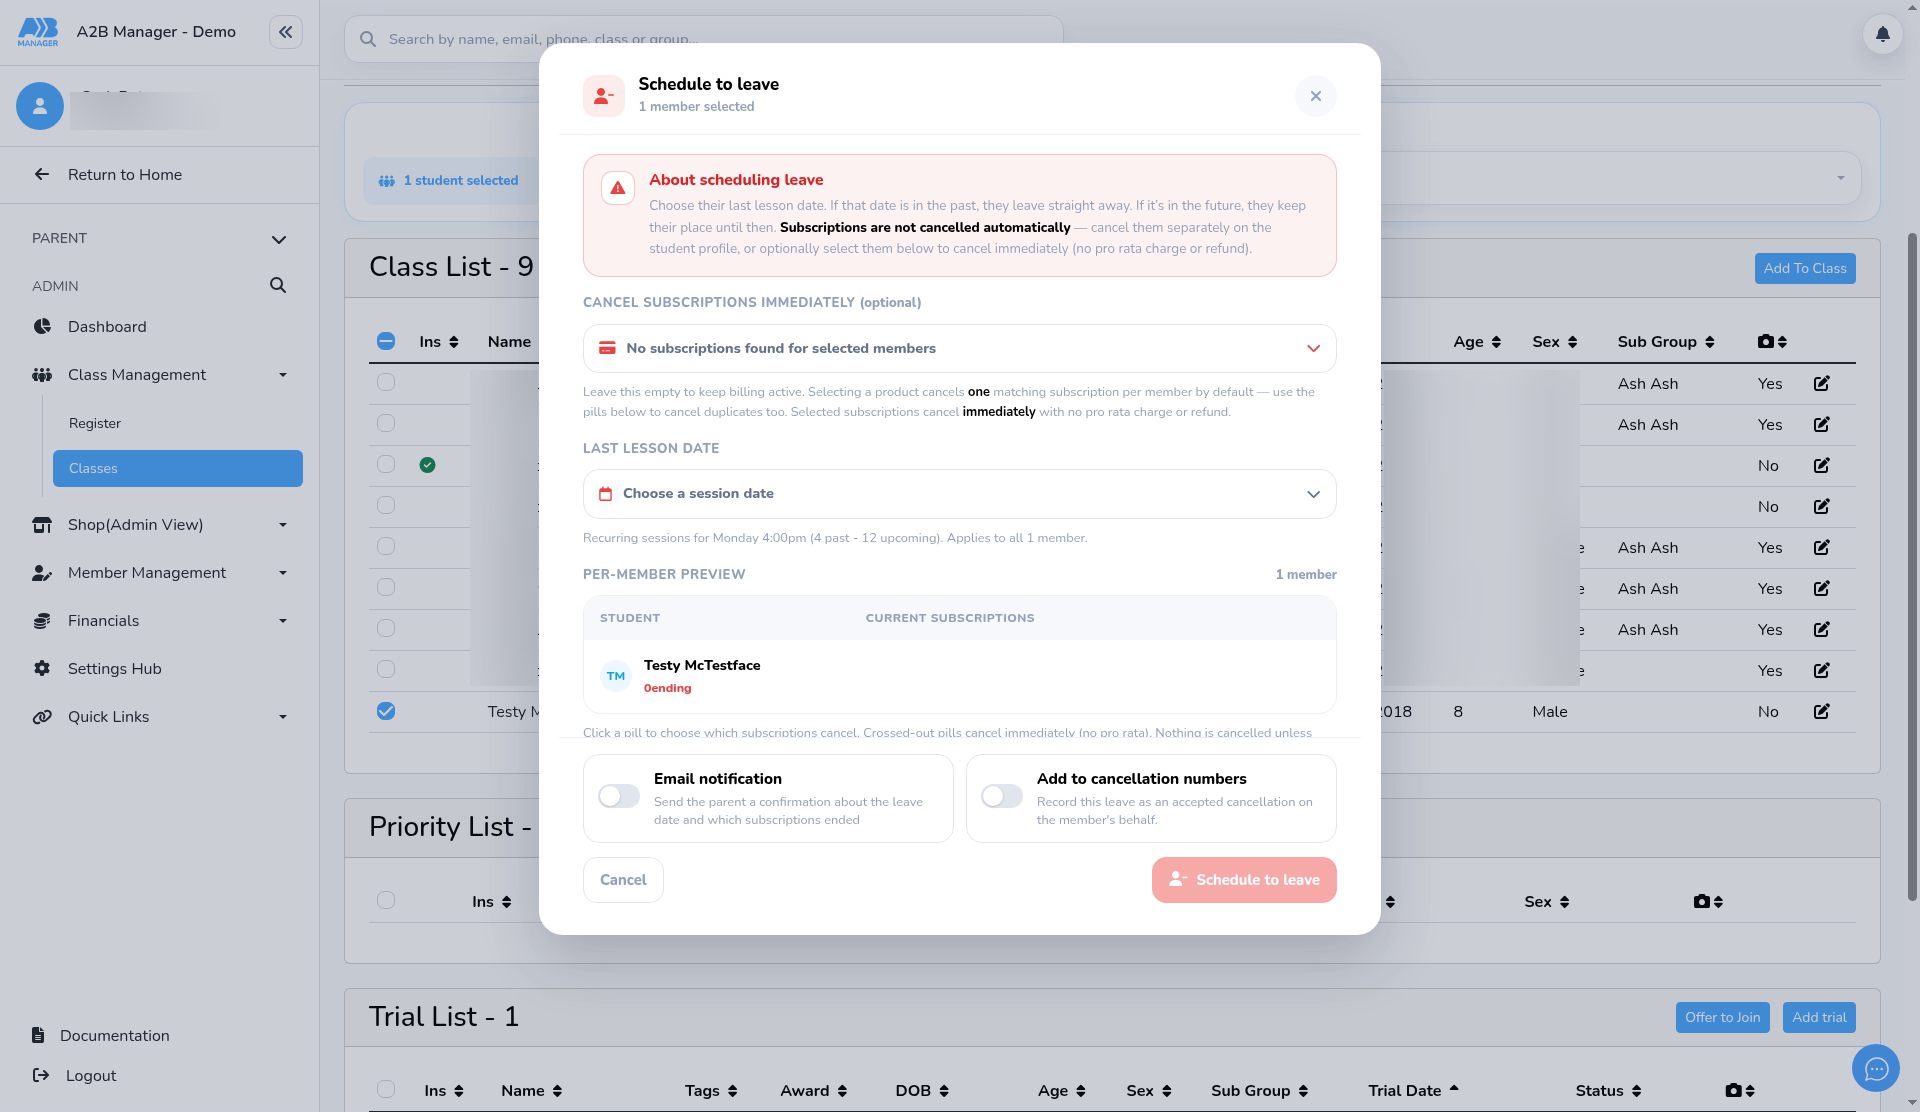
- Read the About scheduling leave note at the top. It reminds you that subscriptions are not cancelled automatically.
Step 3: Decide whether to cancel subscriptions (optional) (0:57) #
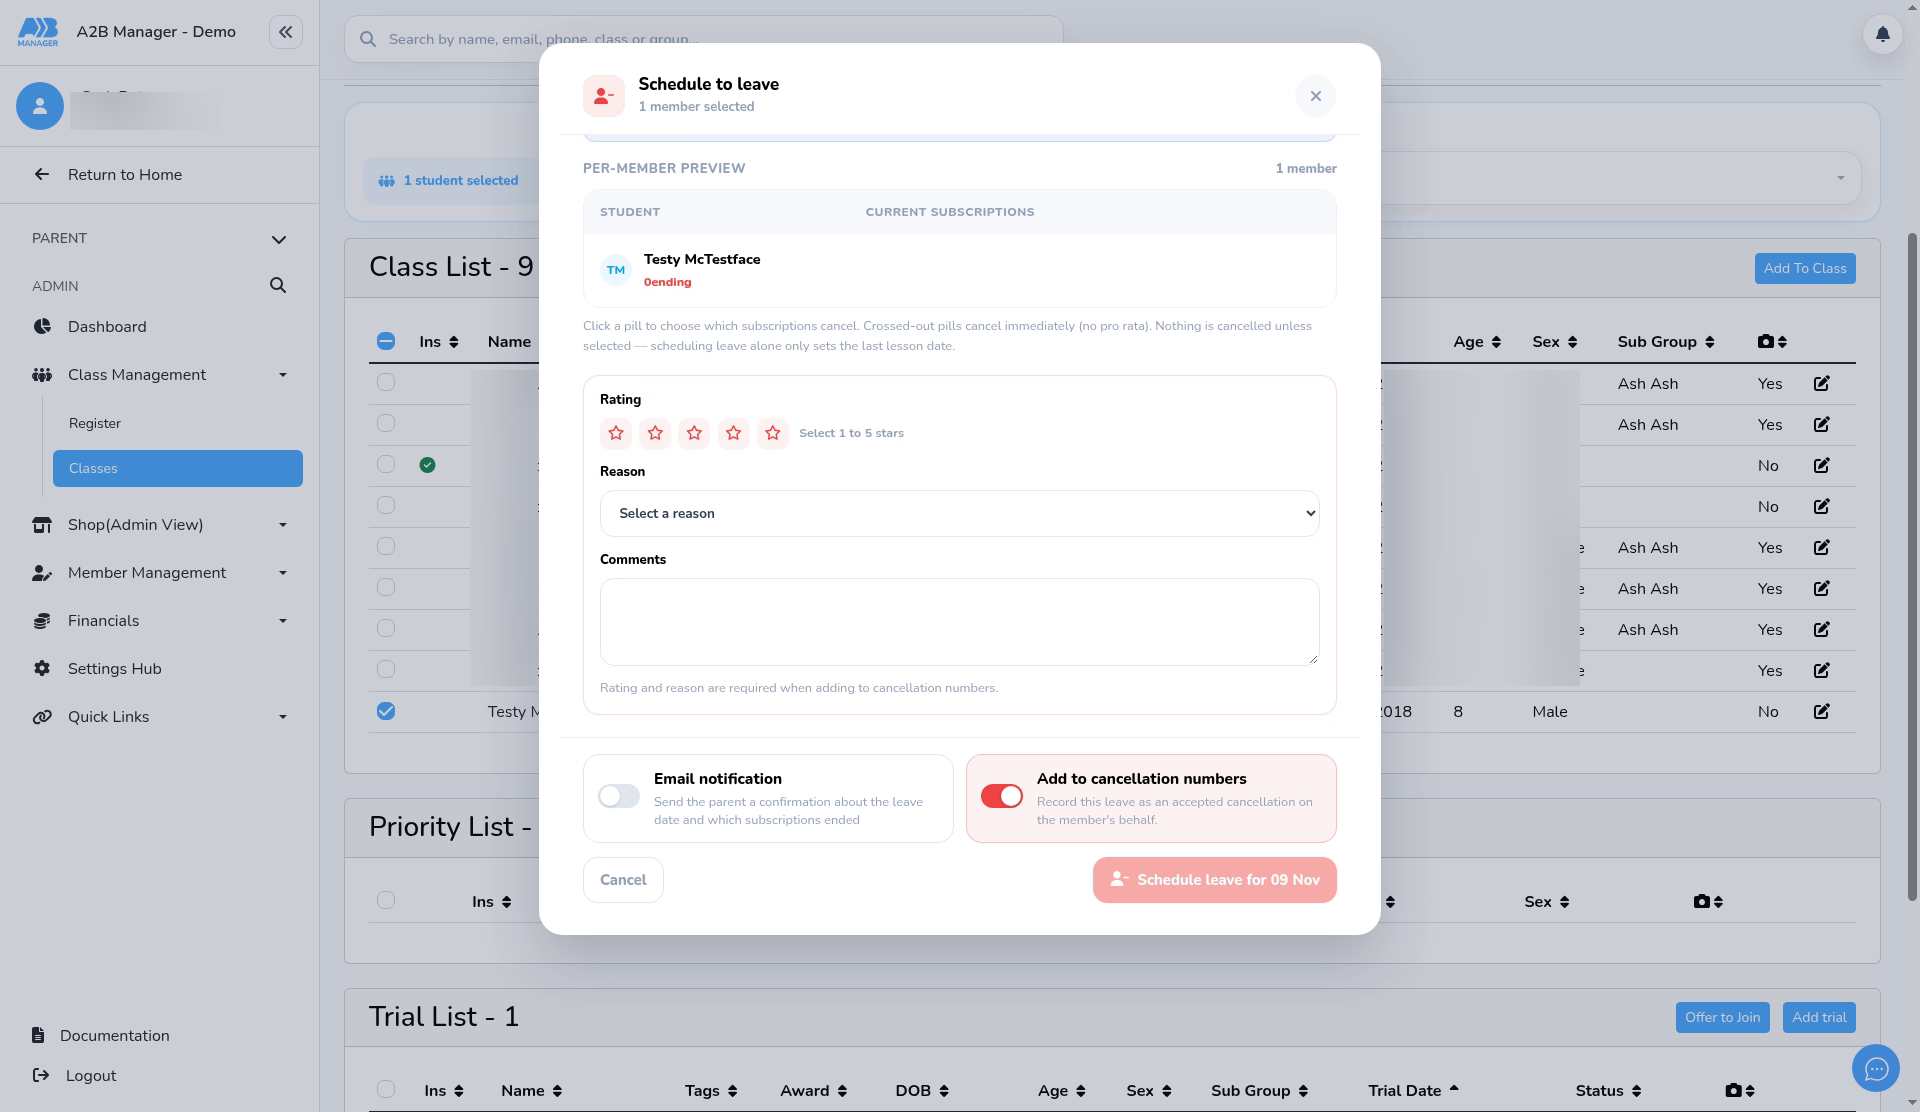
- To stop the member’s billing as well, pick the subscription under Cancel subscriptions immediately (optional).
- Selected subscriptions are cancelled straight away, with no pro rata refund.
- Leave it empty to keep billing running. You can cancel a subscription later from the student’s profile.
Step 4: Choose the last lesson date and check the preview (1:10) #
- Under Last lesson date, choose the member’s final lesson.
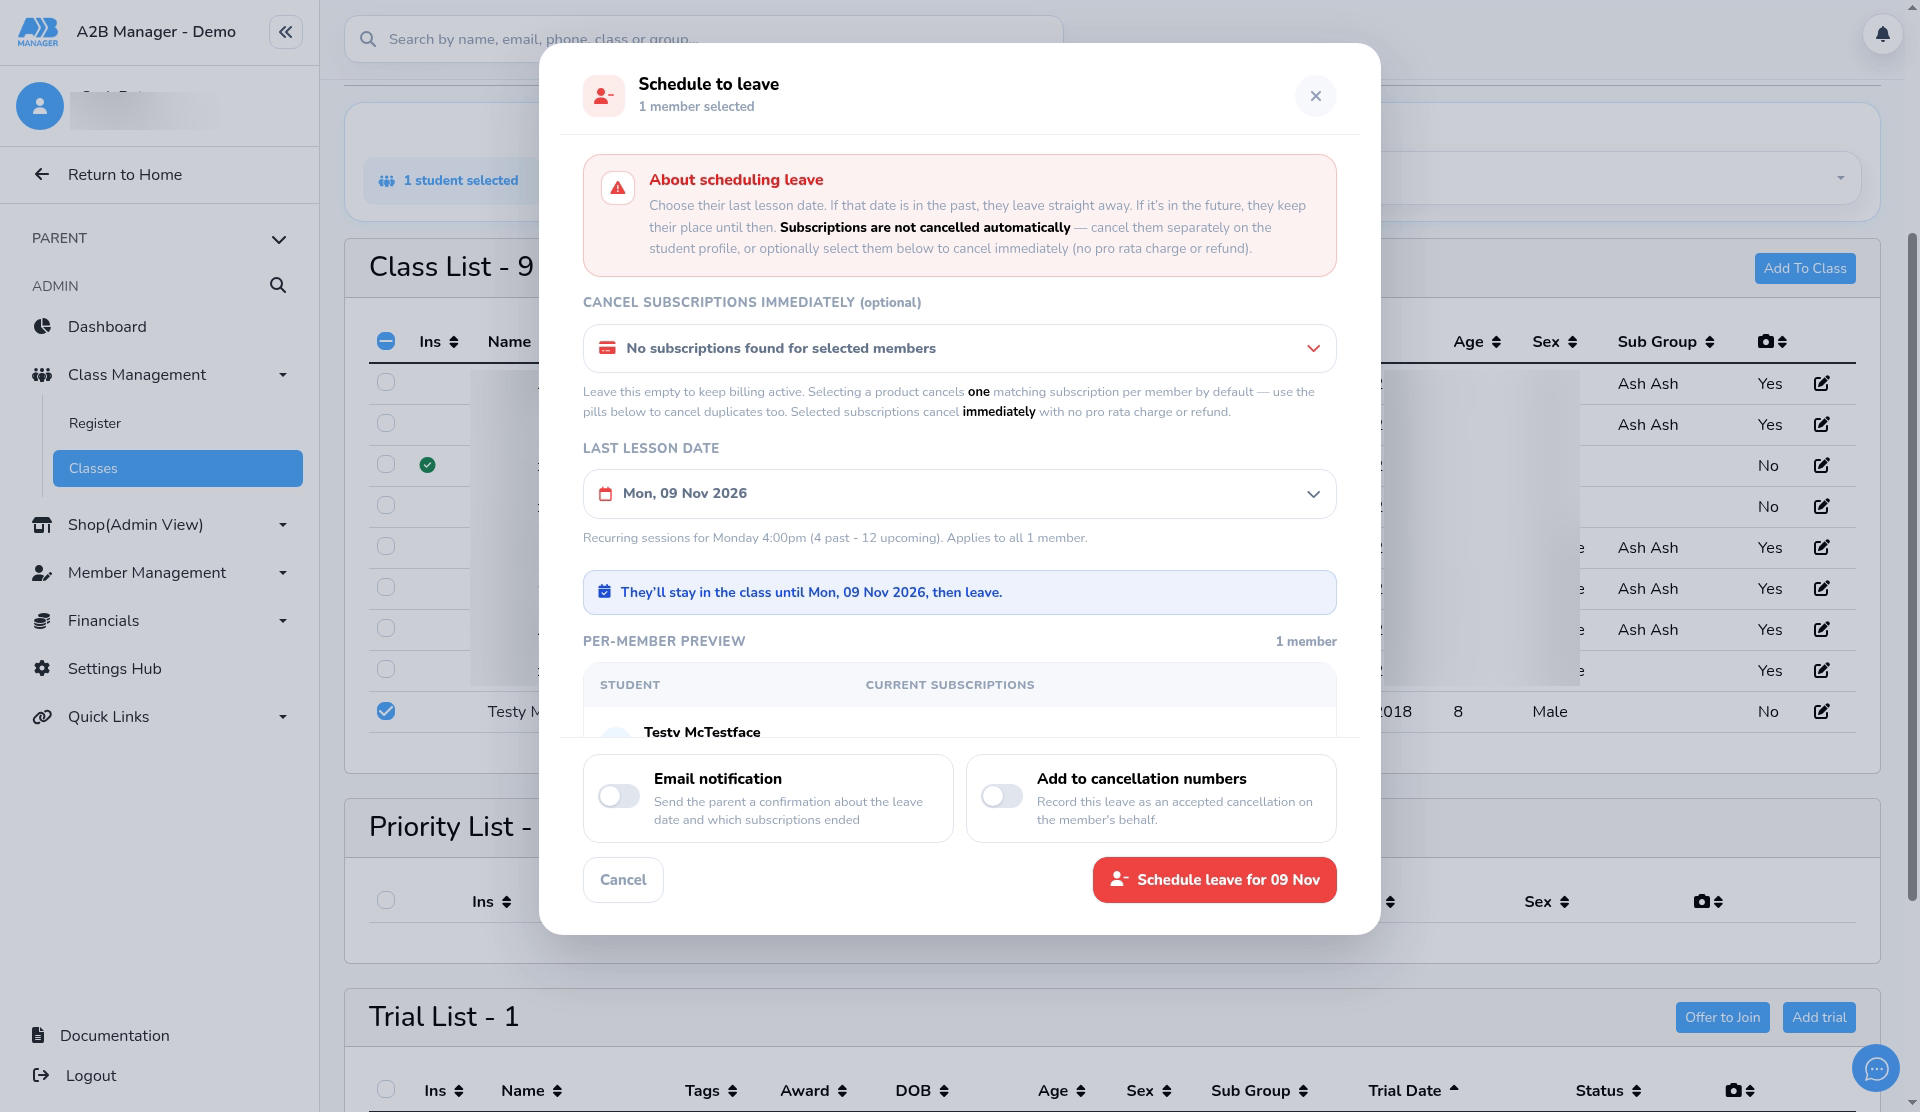
- A past date removes them now. A future date keeps their place until then.
- The button at the bottom changes to match the date, for example Schedule leave for 09 Nov, and a note confirms the date they’ll stay until.
- The Per-member preview shows each member and any subscriptions that will end. Click a subscription to include it or keep it.
Step 5: Choose notifications and cancellation numbers (1:34) #
- Turn on Email notification to send the parent a confirmation of the leave date and any subscriptions that ended. It’s off by default.
- Turn on Add to cancellation numbers to record this as a cancellation. You’ll need to give a Rating and a Reason, and you can add comments. It’s off by default.
Step 6: Confirm and check the summary (1:50) #
- Click the button at the bottom. Its label matches your choice, for example Schedule leave for 09 Nov or Leave now.
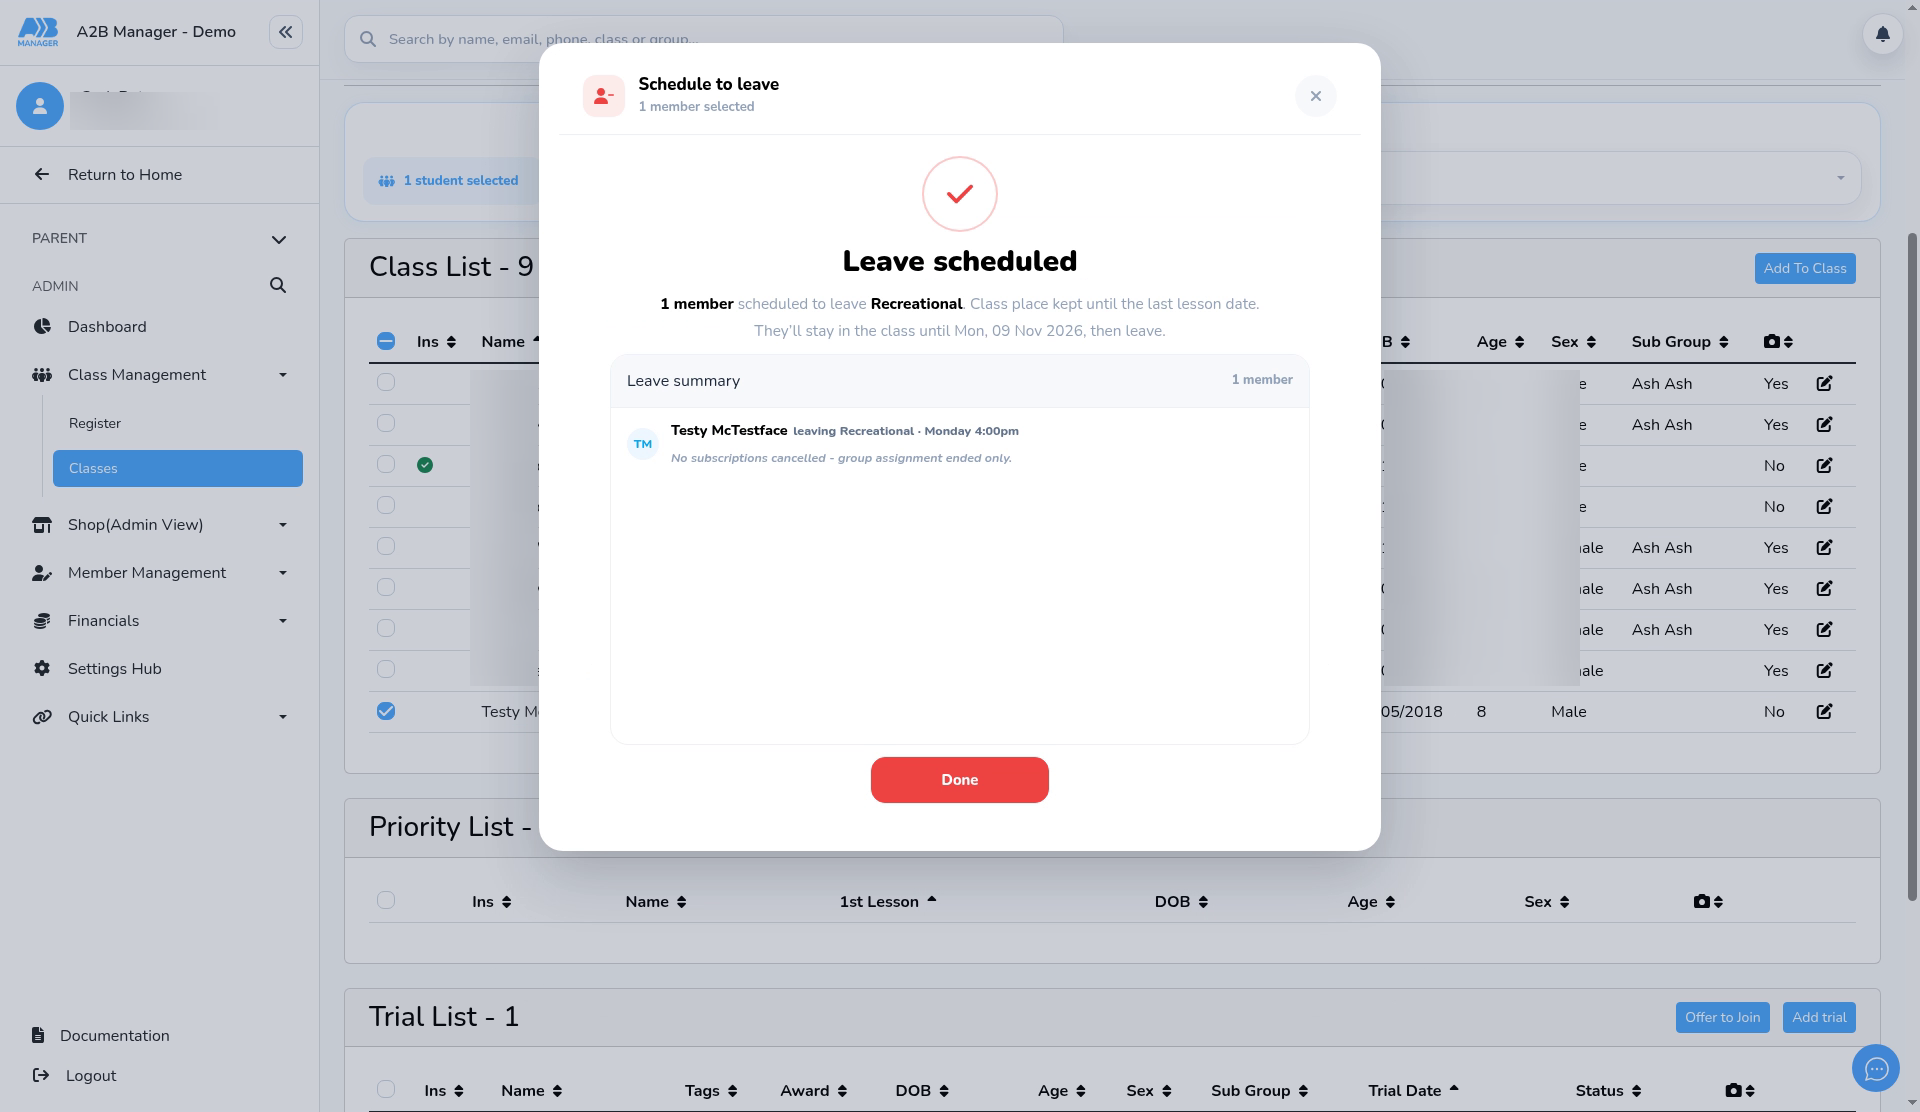
- A Leave summary shows who is leaving and which subscriptions ended. Click Done.
Good to know #
- Several members at once: if you tick more than one member, the change runs in the background and a notification appears at the top right when it’s finished.
- Changing the date: run Schedule to leave again on the same member to change a future last lesson date.
- Multi-event classes: you choose the sessions the member is leaving instead of a single date.
- Birthday parties: any parties booked on sessions the member loses are cancelled.
- Moving to another class? Use Transfer a Member to a New Class instead.
Tip: Older versions of this guide said that removing a member cancels their subscriptions. It no longer does. Select the subscription in step 3 if you want billing to stop.


