

Table of Contents
Move a member from one group to another from their profile. You choose their last lesson in the current group and the date they start in the new one.
Transferring a member #
Step 1: Open the member’s classes (0:00) #
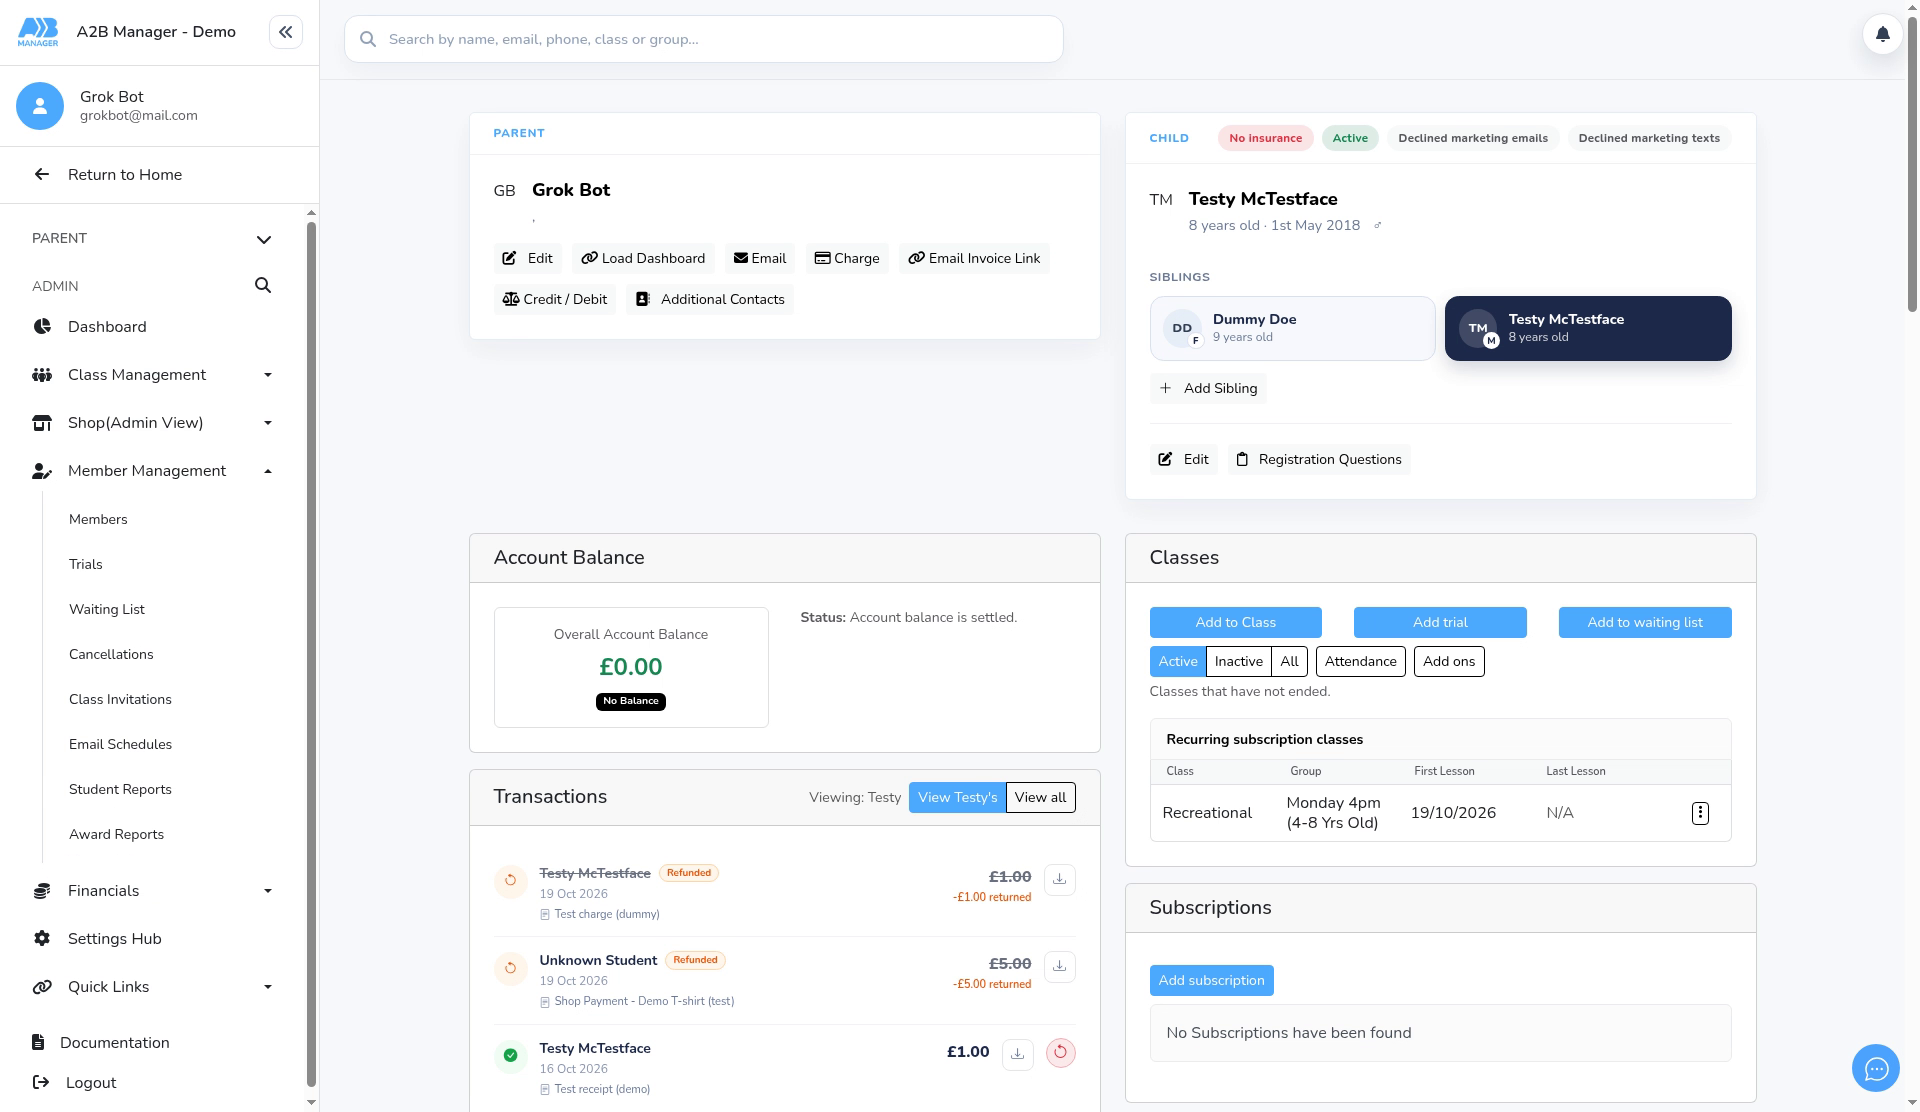
- Open the member’s profile. Their current classes are listed under Classes.
Step 2: Start the transfer (0:09) #
- Click the three dots next to the class they’re leaving and choose Transfer.
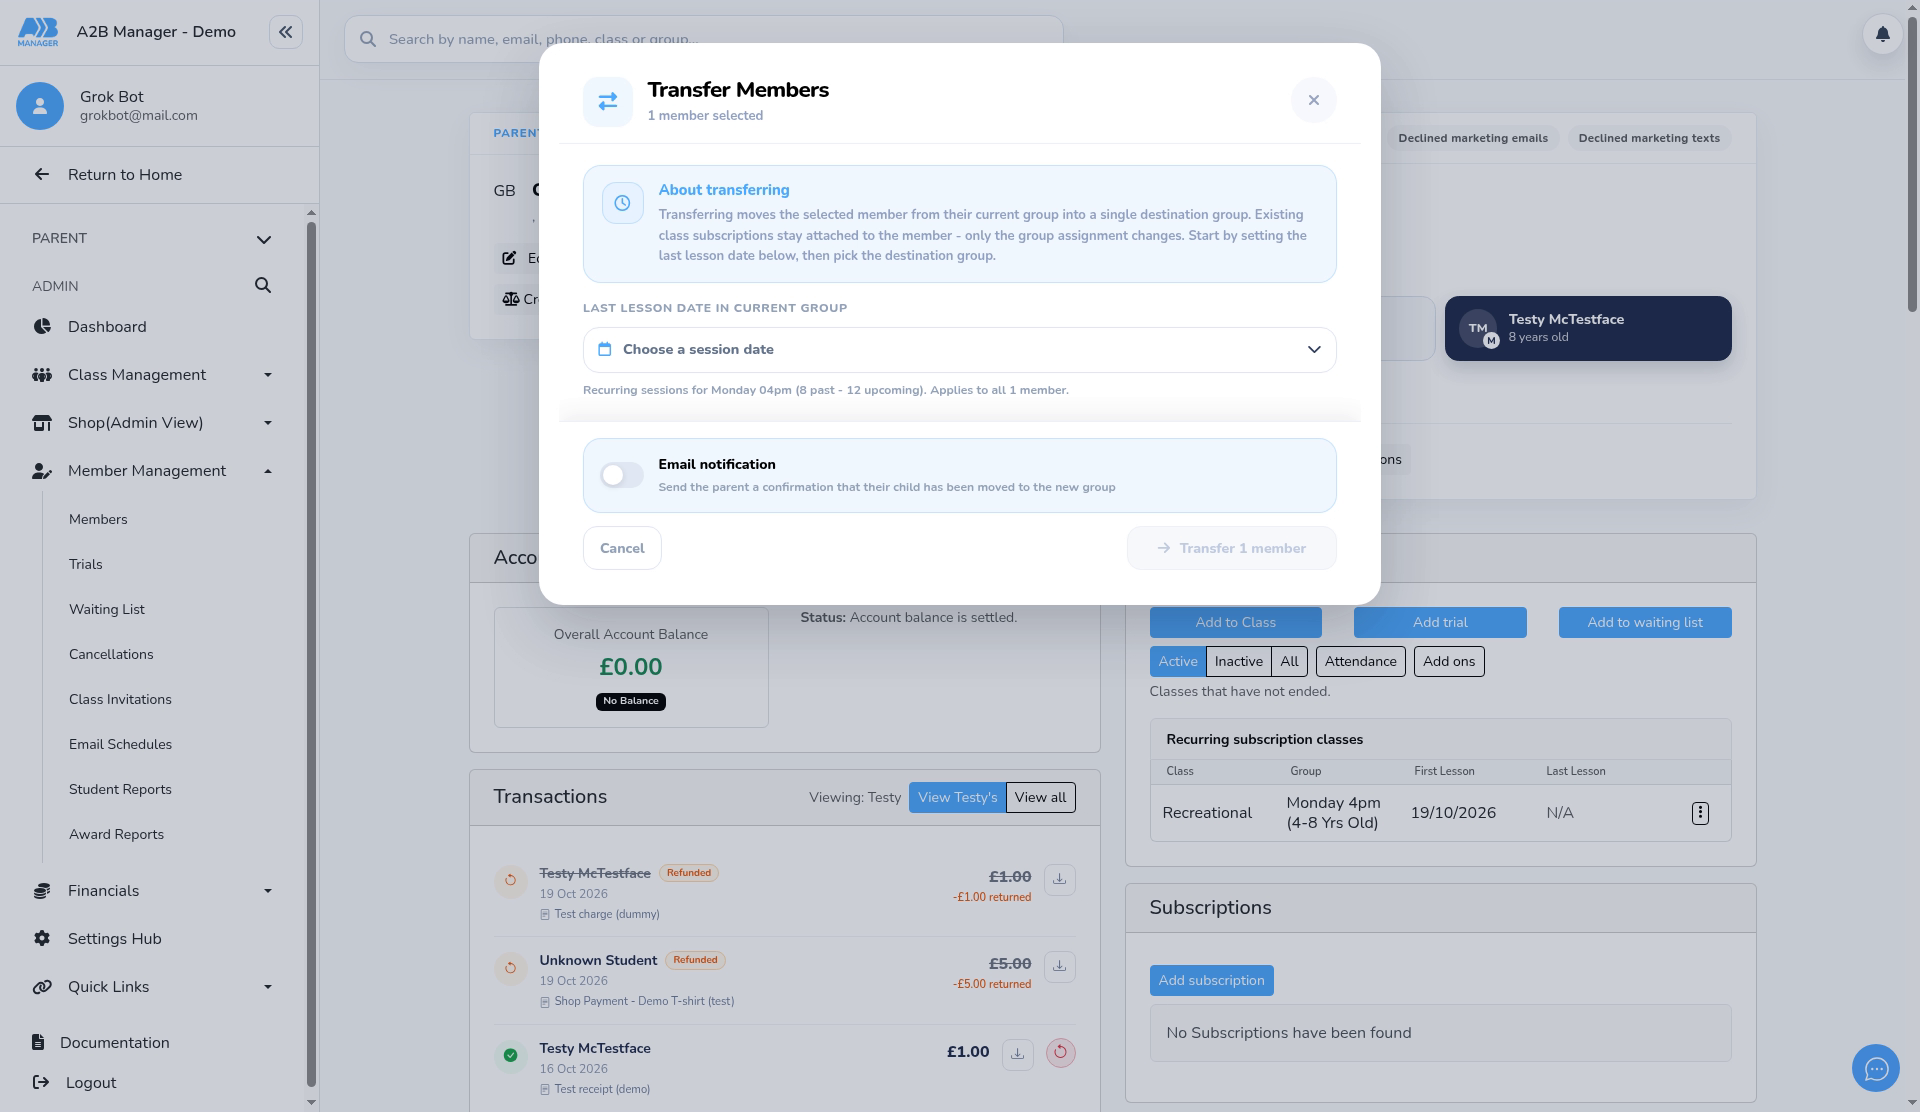
- The Transfer Members window opens, with a short note about transferring.
Step 3: Choose the last lesson date (0:32) #
- Under Last lesson date in current group, pick their last session from the upcoming sessions.
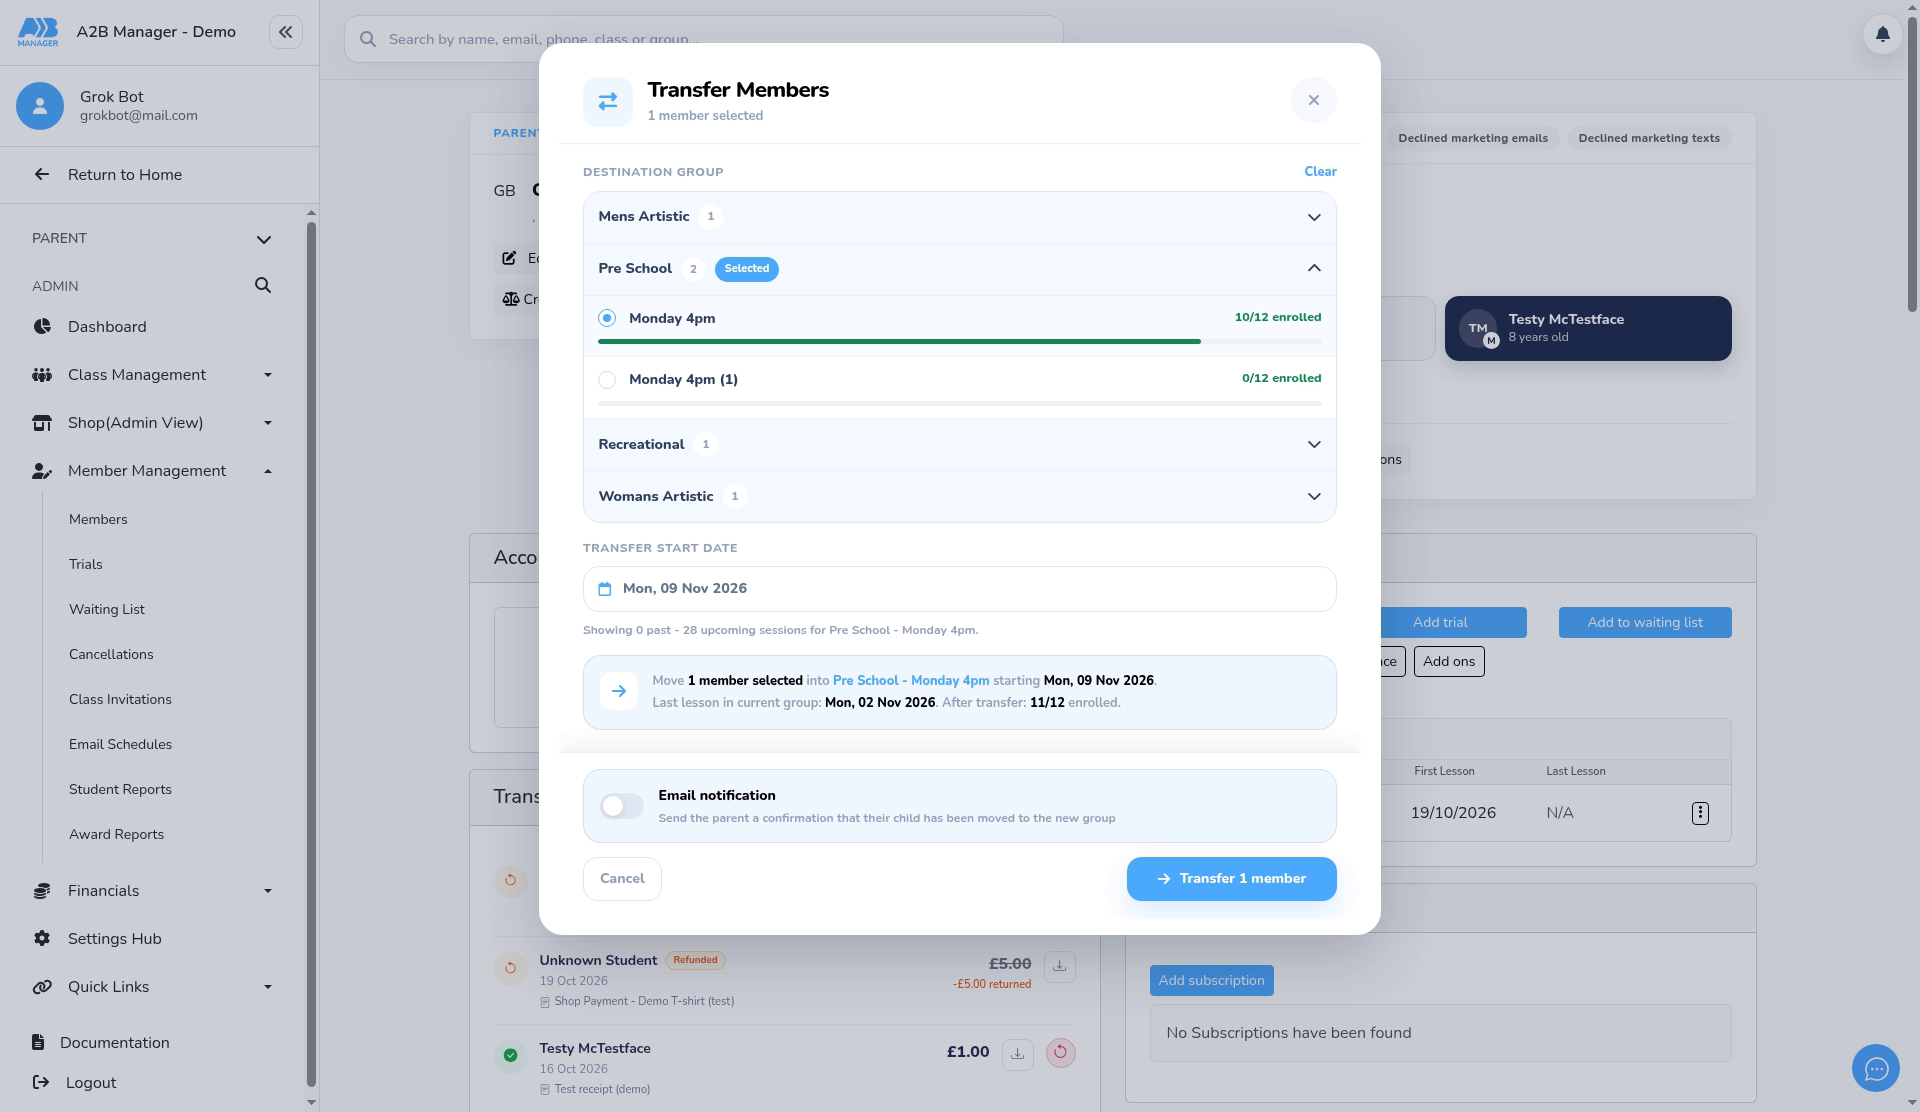
Step 4: Pick the new group (0:48) #
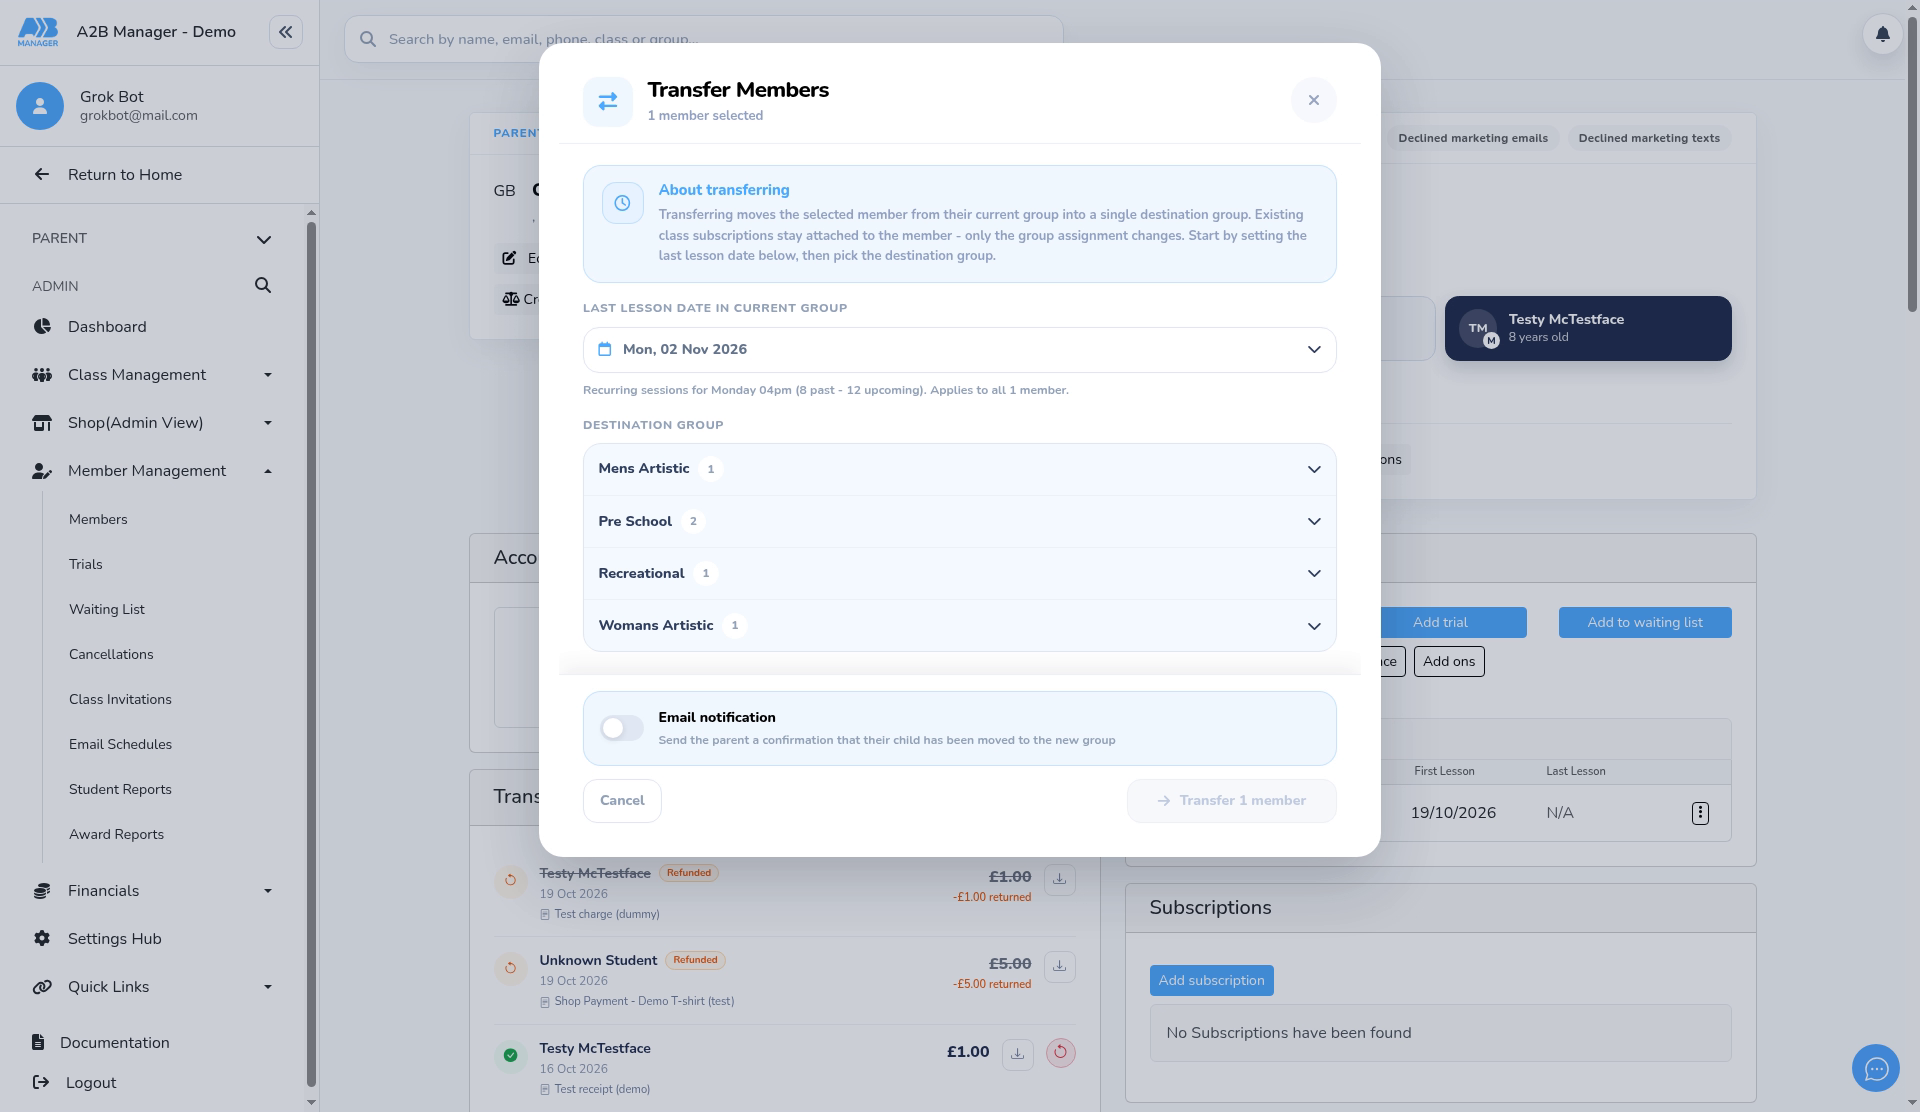
- Under Destination group, open a class and pick the group. Each group shows how many places are taken, for example 10/12 enrolled.
- Click Clear to choose a different group.
Step 5: Check the start date, summary and email, then transfer (1:16) #
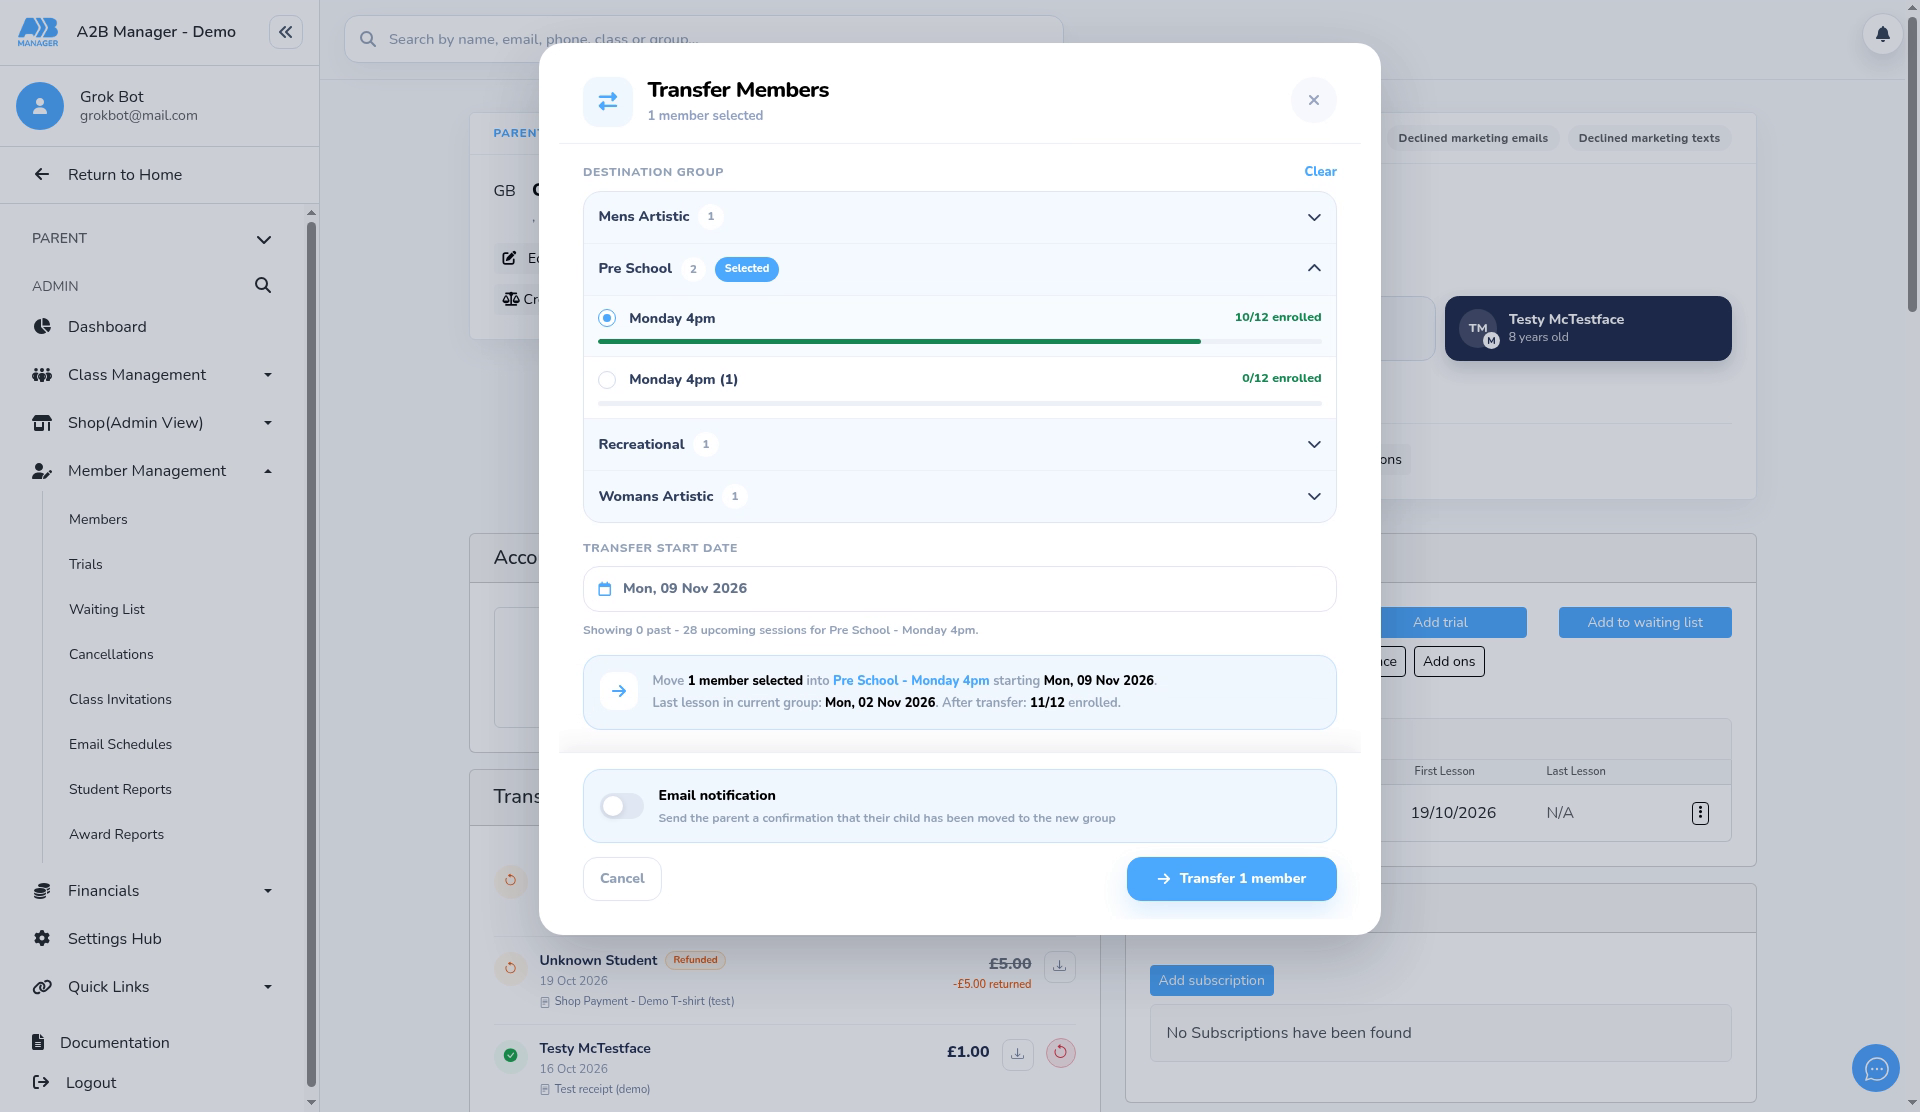
- Transfer start date defaults to the next session after their last lesson. Pick another date if they can’t make it.
- Check the summary: who is moving, which group, the start date and their last lesson.
- Turn on Email notification to send the parent a confirmation.
- Click Transfer 1 member.
Good to know #
- The member’s existing class subscriptions stay attached. Only the group they’re in changes.
- Transfer only appears for classes that have started, have no last lesson date set, aren’t a trial, and are paid by term or recurring subscription.
- When the transfer is done you’ll see Member transferred with the start date and last lesson date. Click Done.


