
Table of Contents
A recurring pay-as-you-go (PAYG) class lets parents book and pay for individual sessions, such as a weekly parent and toddler class or a birthday party slot. You set it up in three parts: the class, a Recurring PAYG group, and the session time with its capacity and price.
Setting up a recurring PAYG class #
Step 1: Create the class (0:00) #
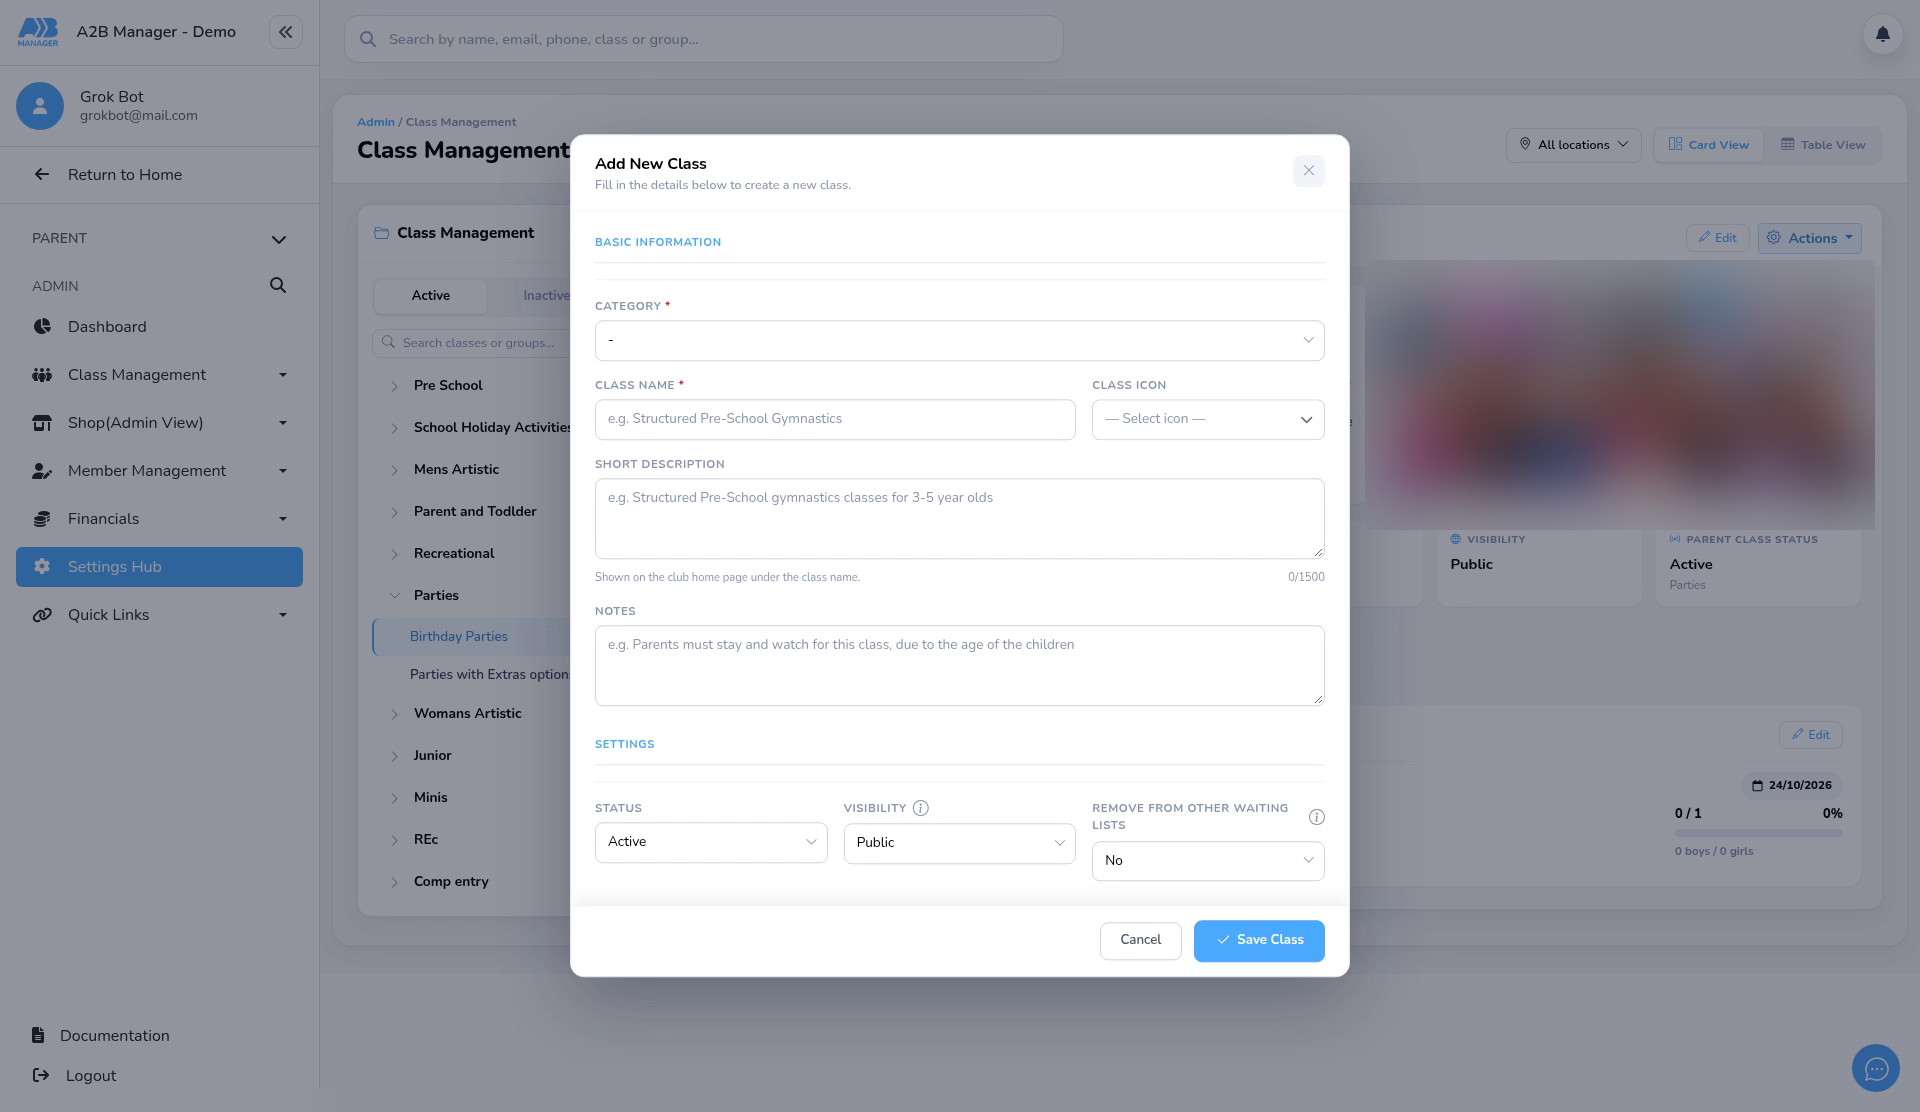
- Go to Settings Hub > Add/Edit Classes and click + New Class.
- Choose the Category and enter the Class Name (both required), for example Parent and Toddler.
- Add a Class Icon, a Short Description and any Notes for parents.
- Set Status to Active and Visibility to Public, and choose whether joining removes the child from other waiting lists. Then save.
Step 2: Add a Recurring PAYG group (0:14) #
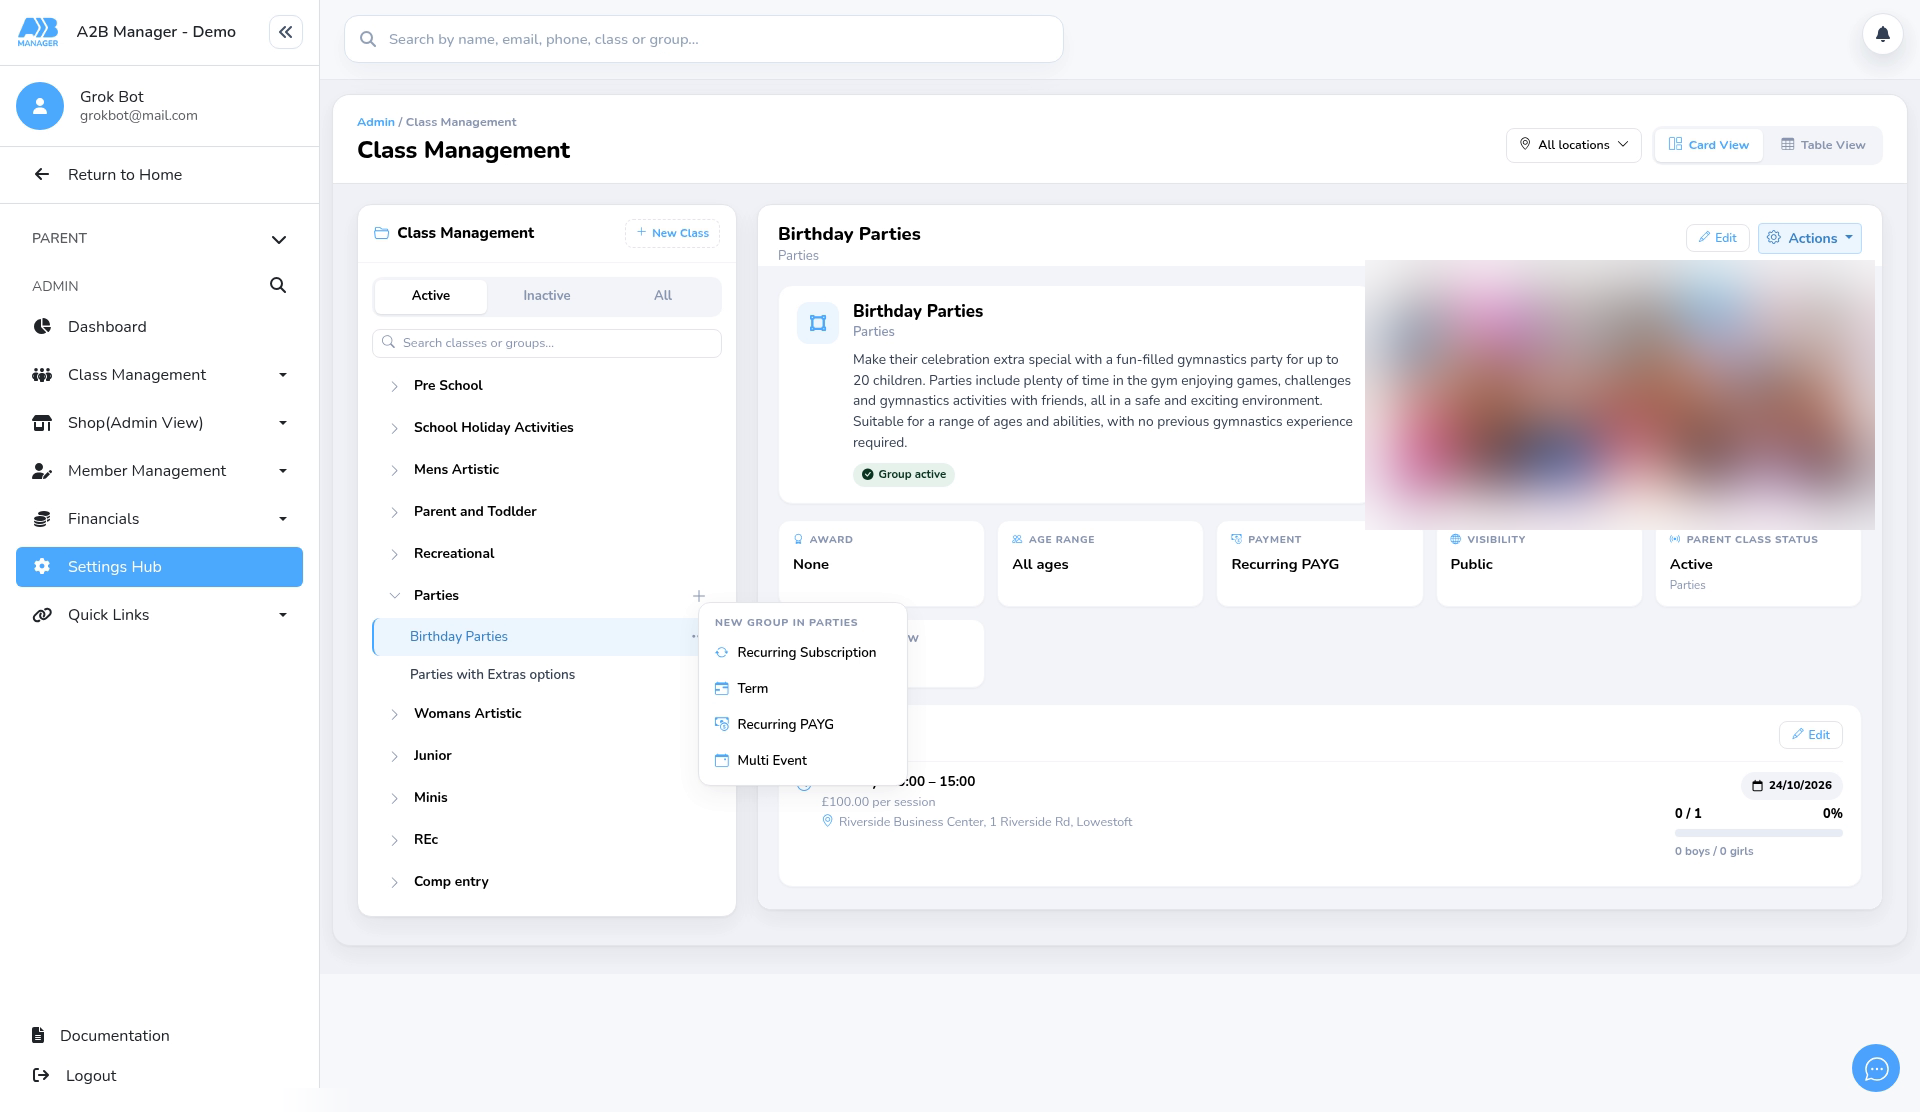
- Click + next to the class and choose Recurring PAYG (shown as PAYG in the payment filter).
- Name the group after its day and time, for example Monday 9am.
Step 3: Set up the group (0:23) #
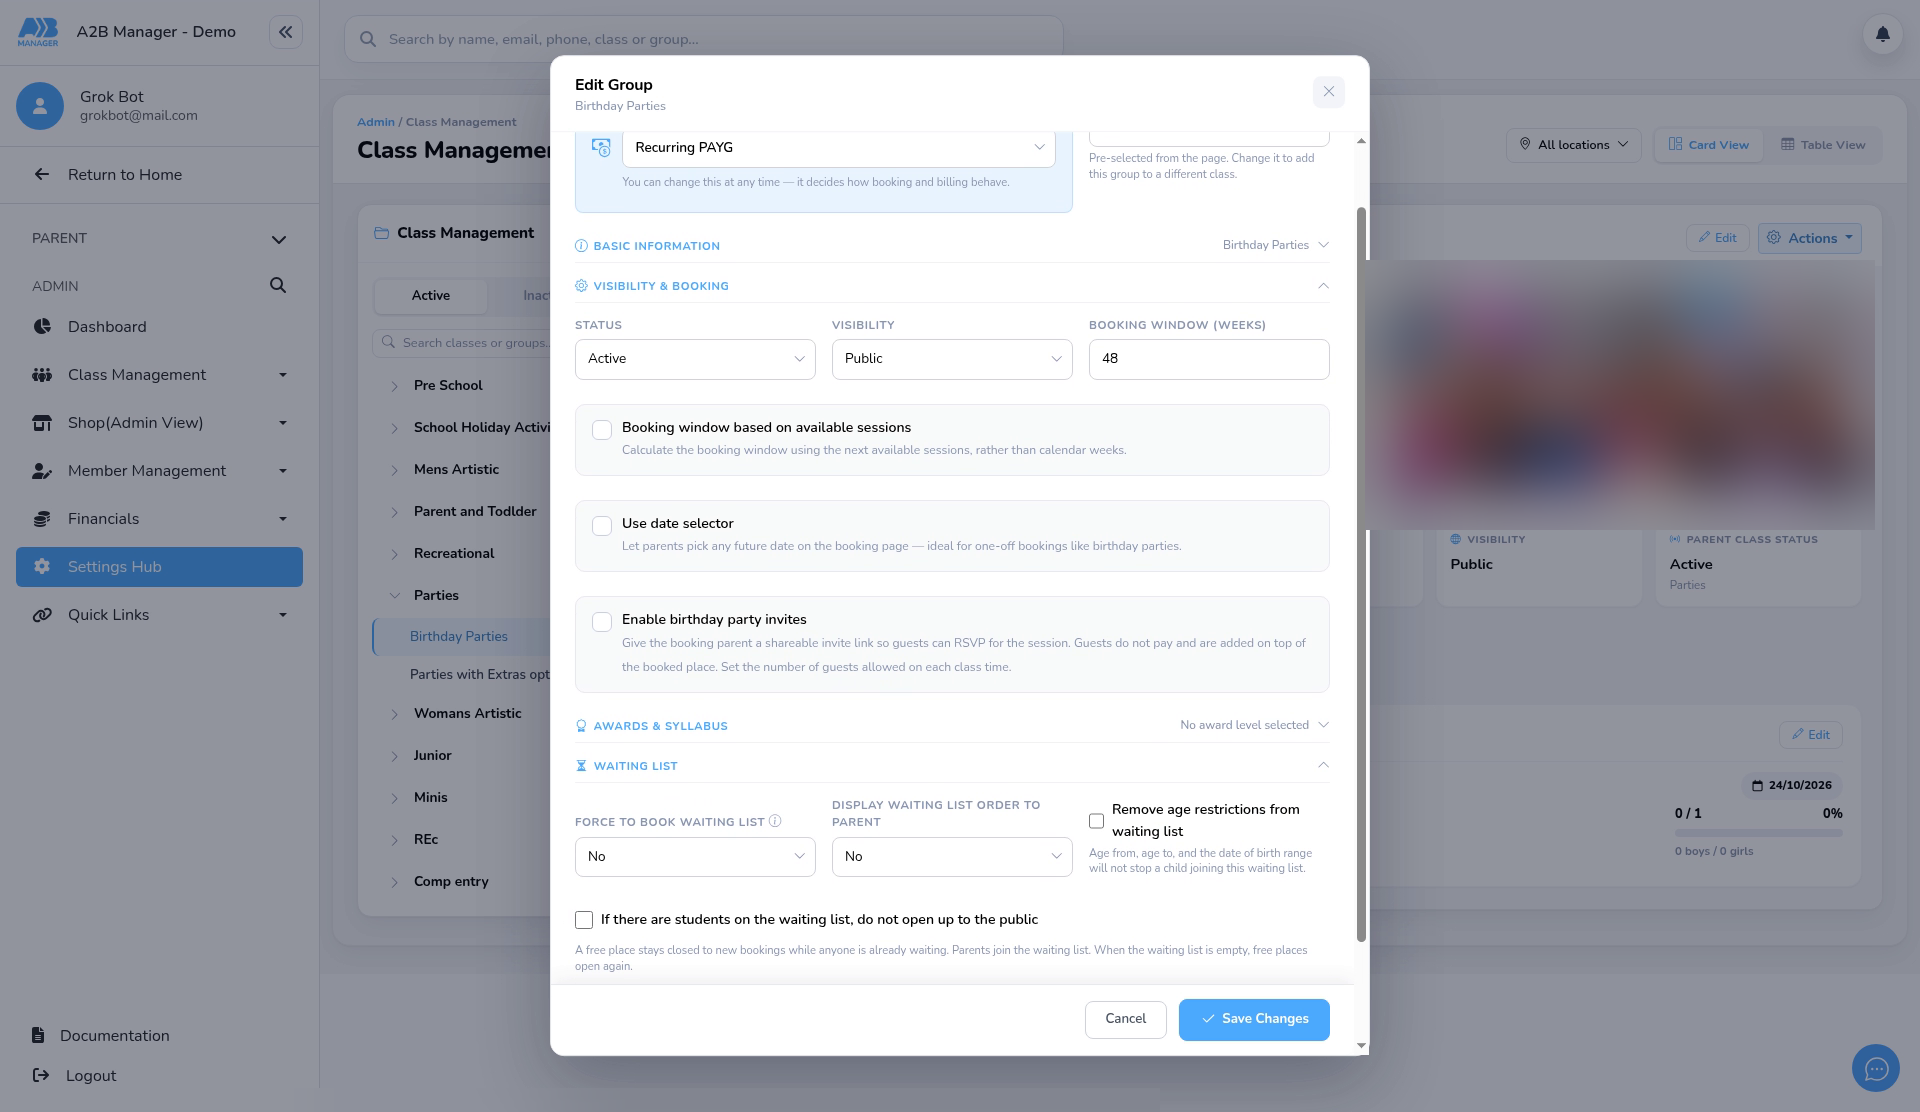
- In the group, click Edit. Under Basic Information add a Long Description (shown when parents click More Info).
- Visibility & Booking: set Status, Visibility and the Booking Window in weeks (how far ahead parents can book), for example 4.
- Use date selector lets parents pick any future date on the booking page, which suits one-off bookings like birthday parties.
- Enable birthday party invites gives the booking parent a shareable invite link so guests can RSVP.
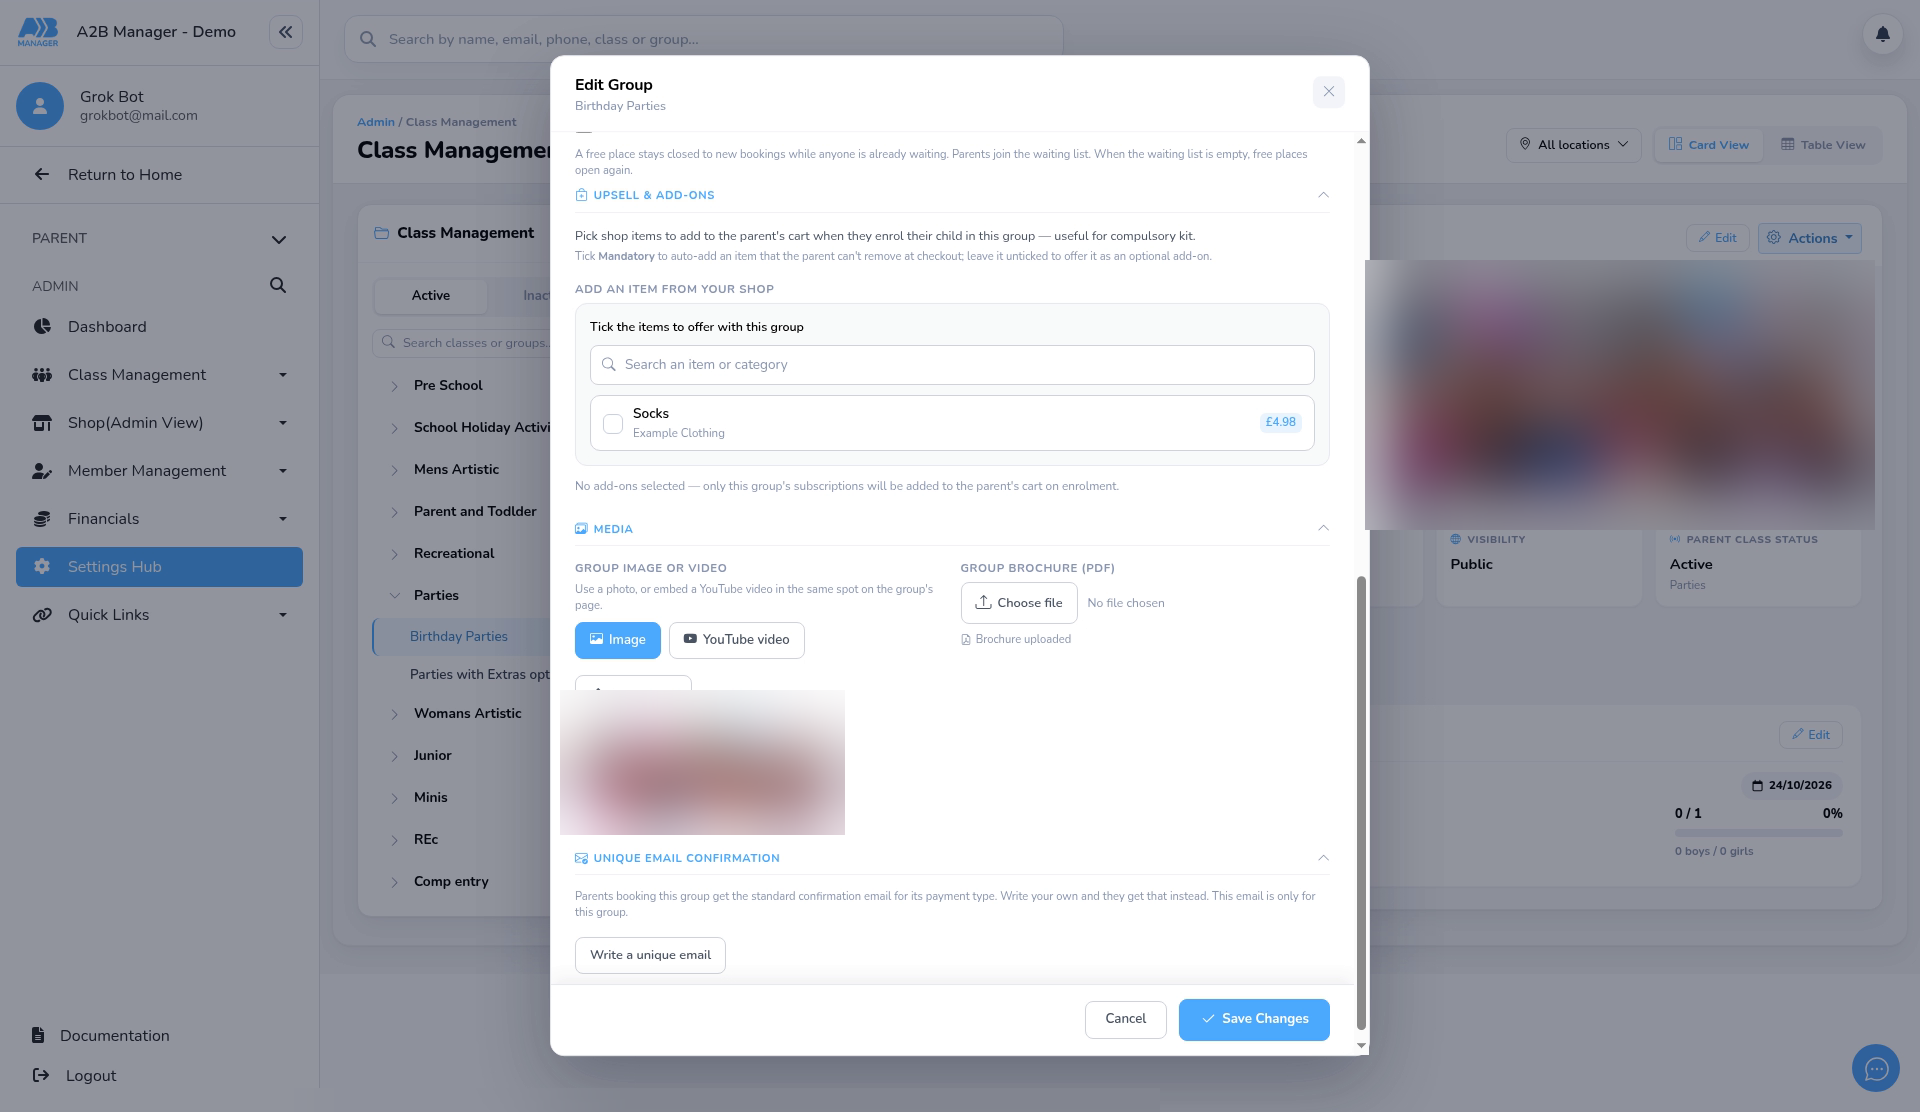
- Waiting List and Upsell & Add-ons (shop items such as socks, optionally mandatory) are optional.
- PAYG groups don’t have Trials, Capacity & Ages or Subscriptions sections: capacity, ages and price are set on each time (step 5).
Step 4: Media and confirmation email (1:03) #
- Media: add a group image or YouTube video, and a brochure (PDF).
- Unique email confirmation: parents get the standard confirmation email unless you click Write a unique email to give this group its own. Save the group first. See Add new email templates.
- Click Save Changes when you’re done.
Step 5: Add the session time and price (1:28) #
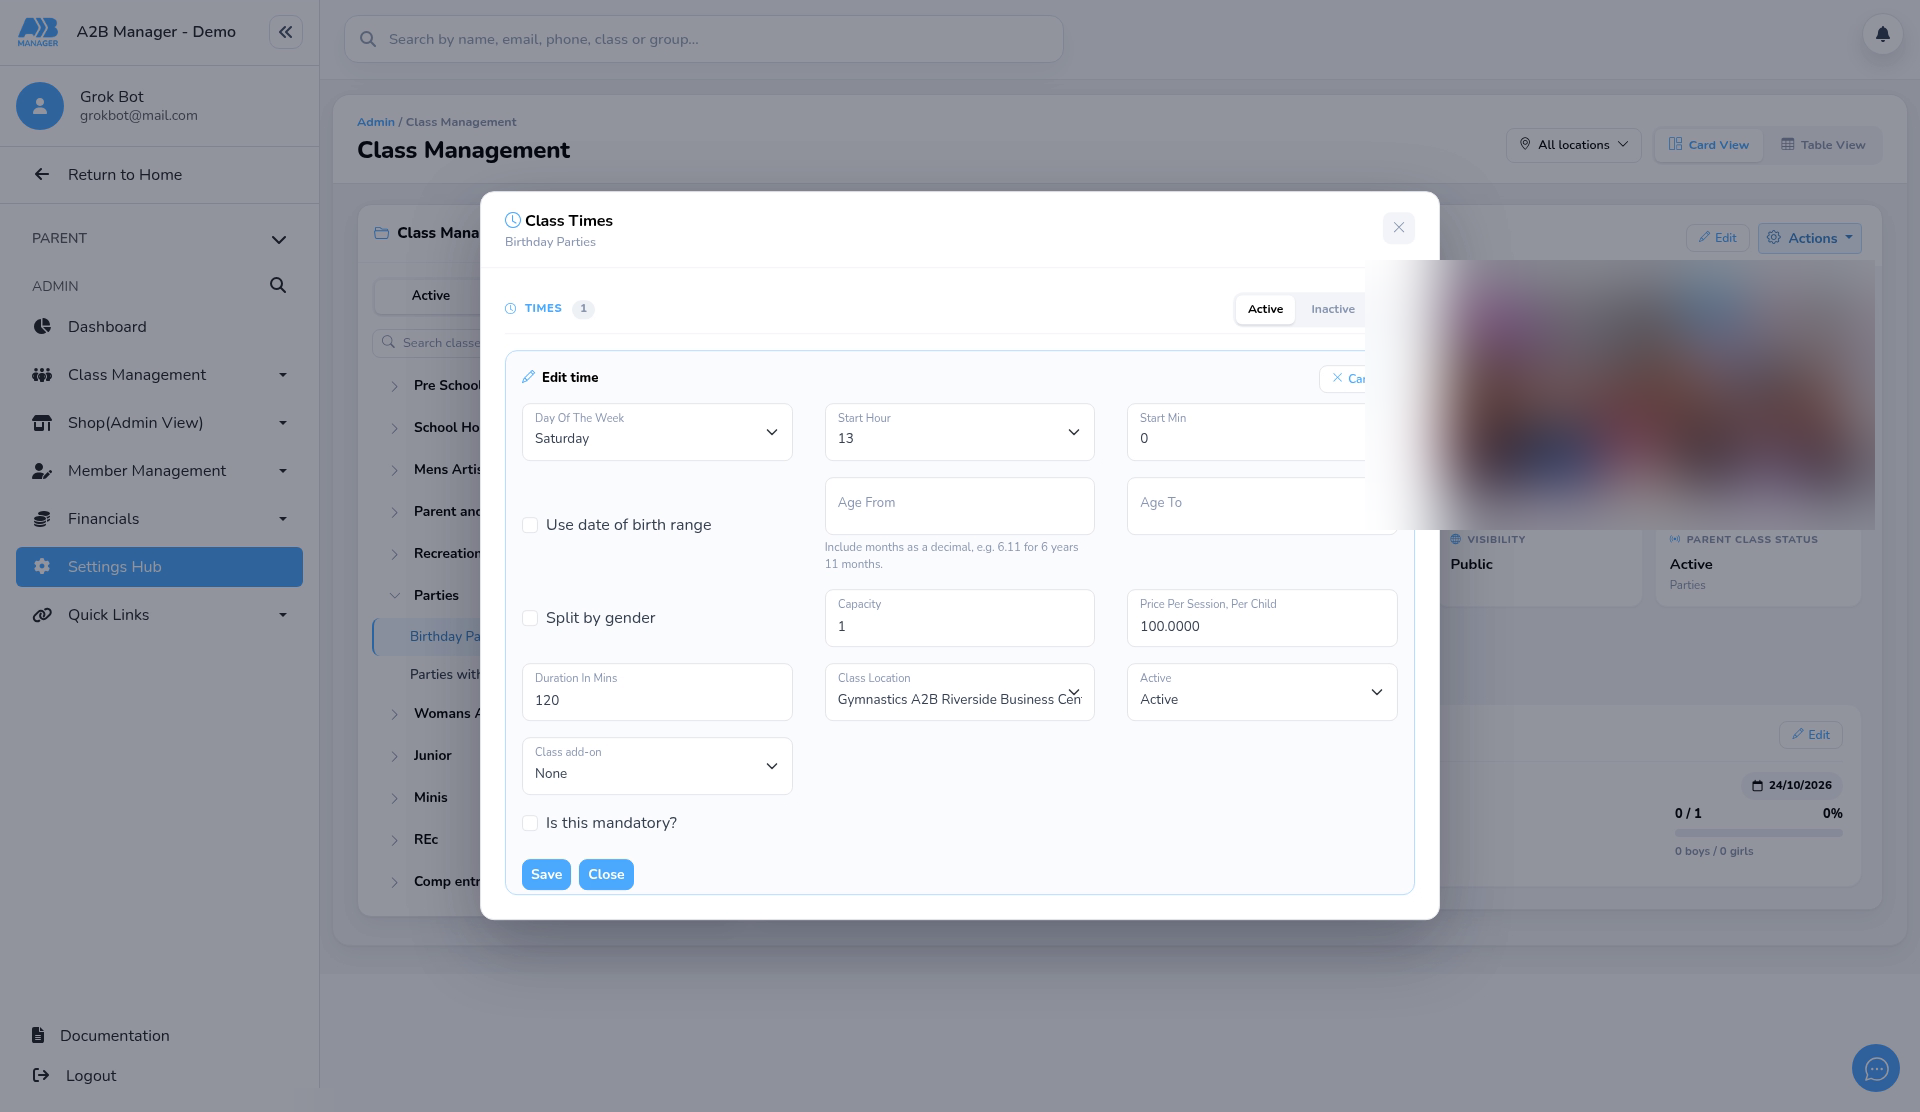
- On the Times card, click Edit, then add or edit a time.
- Set the Day, start time, Duration, Location and Active.
- Set Age From / Age To (or tick Use date of birth range) and the Capacity (or Split by gender).
- Enter the Price Per Session, Per Child, for example £10, add a Class add-on if needed, then save.
Step 6: Check the booking page (1:49) #
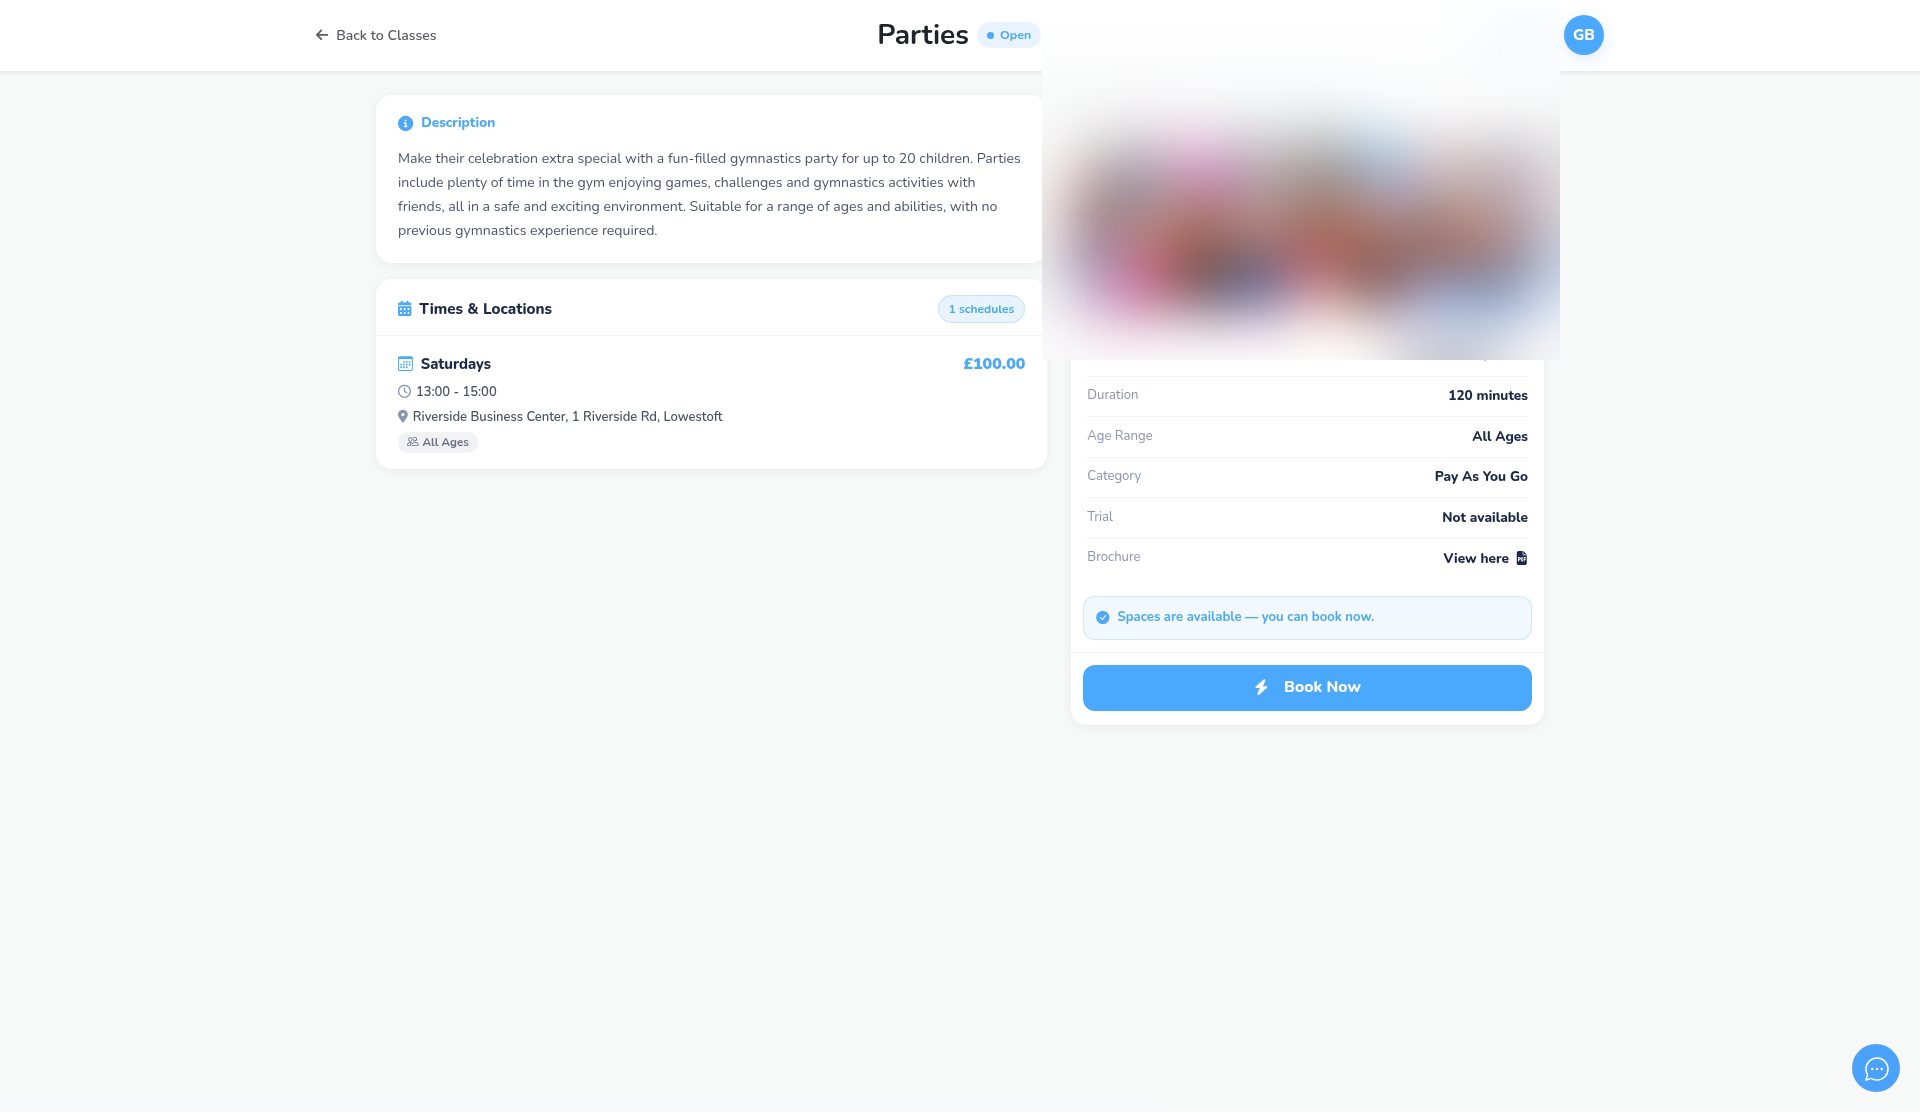
- Open the class from your club’s booking page, click More Info, then Book Now.
- Choose the child and tick the sessions they want. Only dates inside the booking window are listed.
- The basket shows the number of sessions times the price, for example 2 sessions × £10.00 = £20.00 to pay today. See How parents book PAYG style classes.
Optional: use the date selector for bookings far ahead #
- Edit the group, turn on Use date selector under Visibility & Booking, and save.
- On the booking page, parents first choose a date (today or later), then pick from the sessions around it. This suits birthday parties and other bookings far in advance.
FAQs #
- Can I run more than one session a week? Yes, add another time to the same group, each with its own capacity and price.
- Can I remove a group? Groups can’t be deleted; use Deactivate.


