
Table of Contents
Stripe products are the subscription prices your club charges, for example £25 a month or £250 a year. You create them in the Settings Hub, without opening Stripe. Then you link a product to a class group, so members who join that group are put on the subscription. This guide shows you how to add products, check them, link one to a class group and add it to a member.
Before you start #
- You do all of this as a club admin.
- Saving a product doesn’t charge anyone or put anyone on it. Members only go on a subscription when they book, or when you add it to them.
Add your products #
Step 1: Open Stripe Products (0:00) #
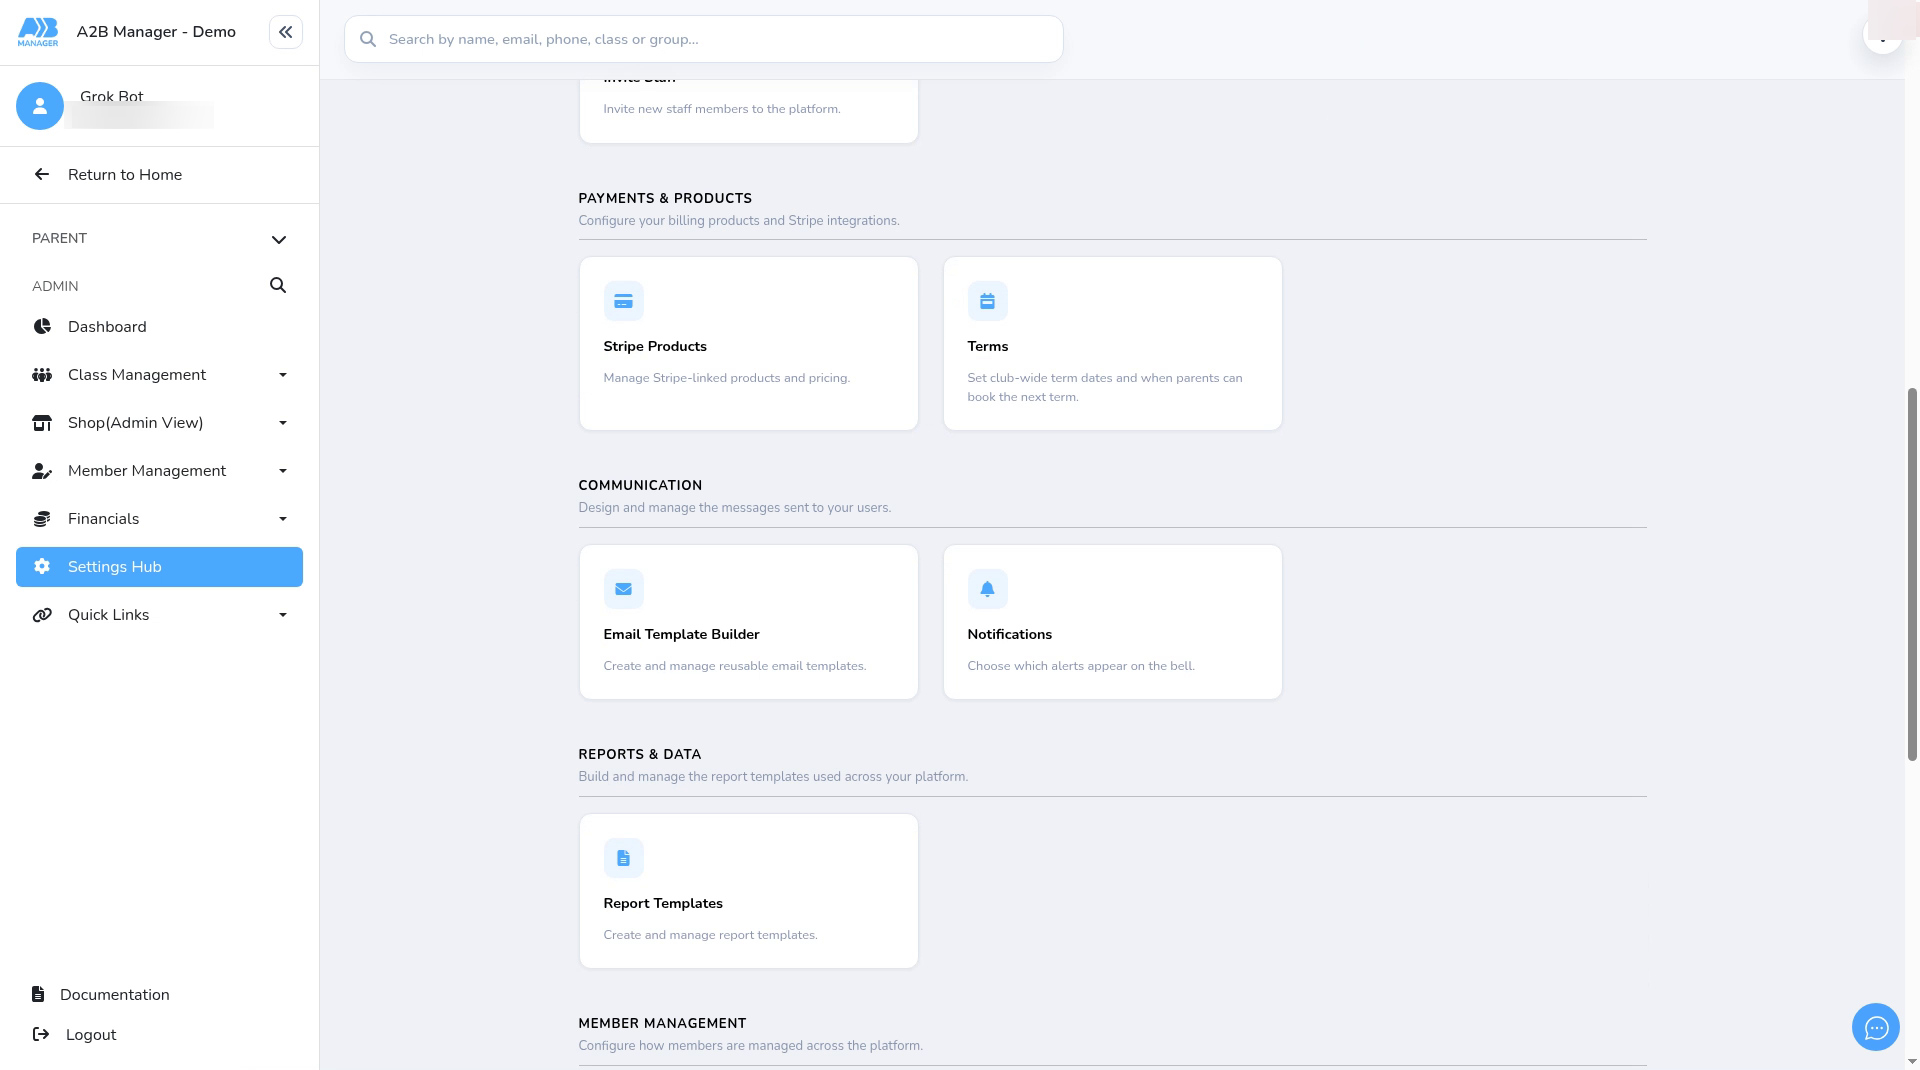
- Go to Settings Hub.
- Under Payments & Products, click Stripe Products.
Step 2: See the products you already have (0:11) #
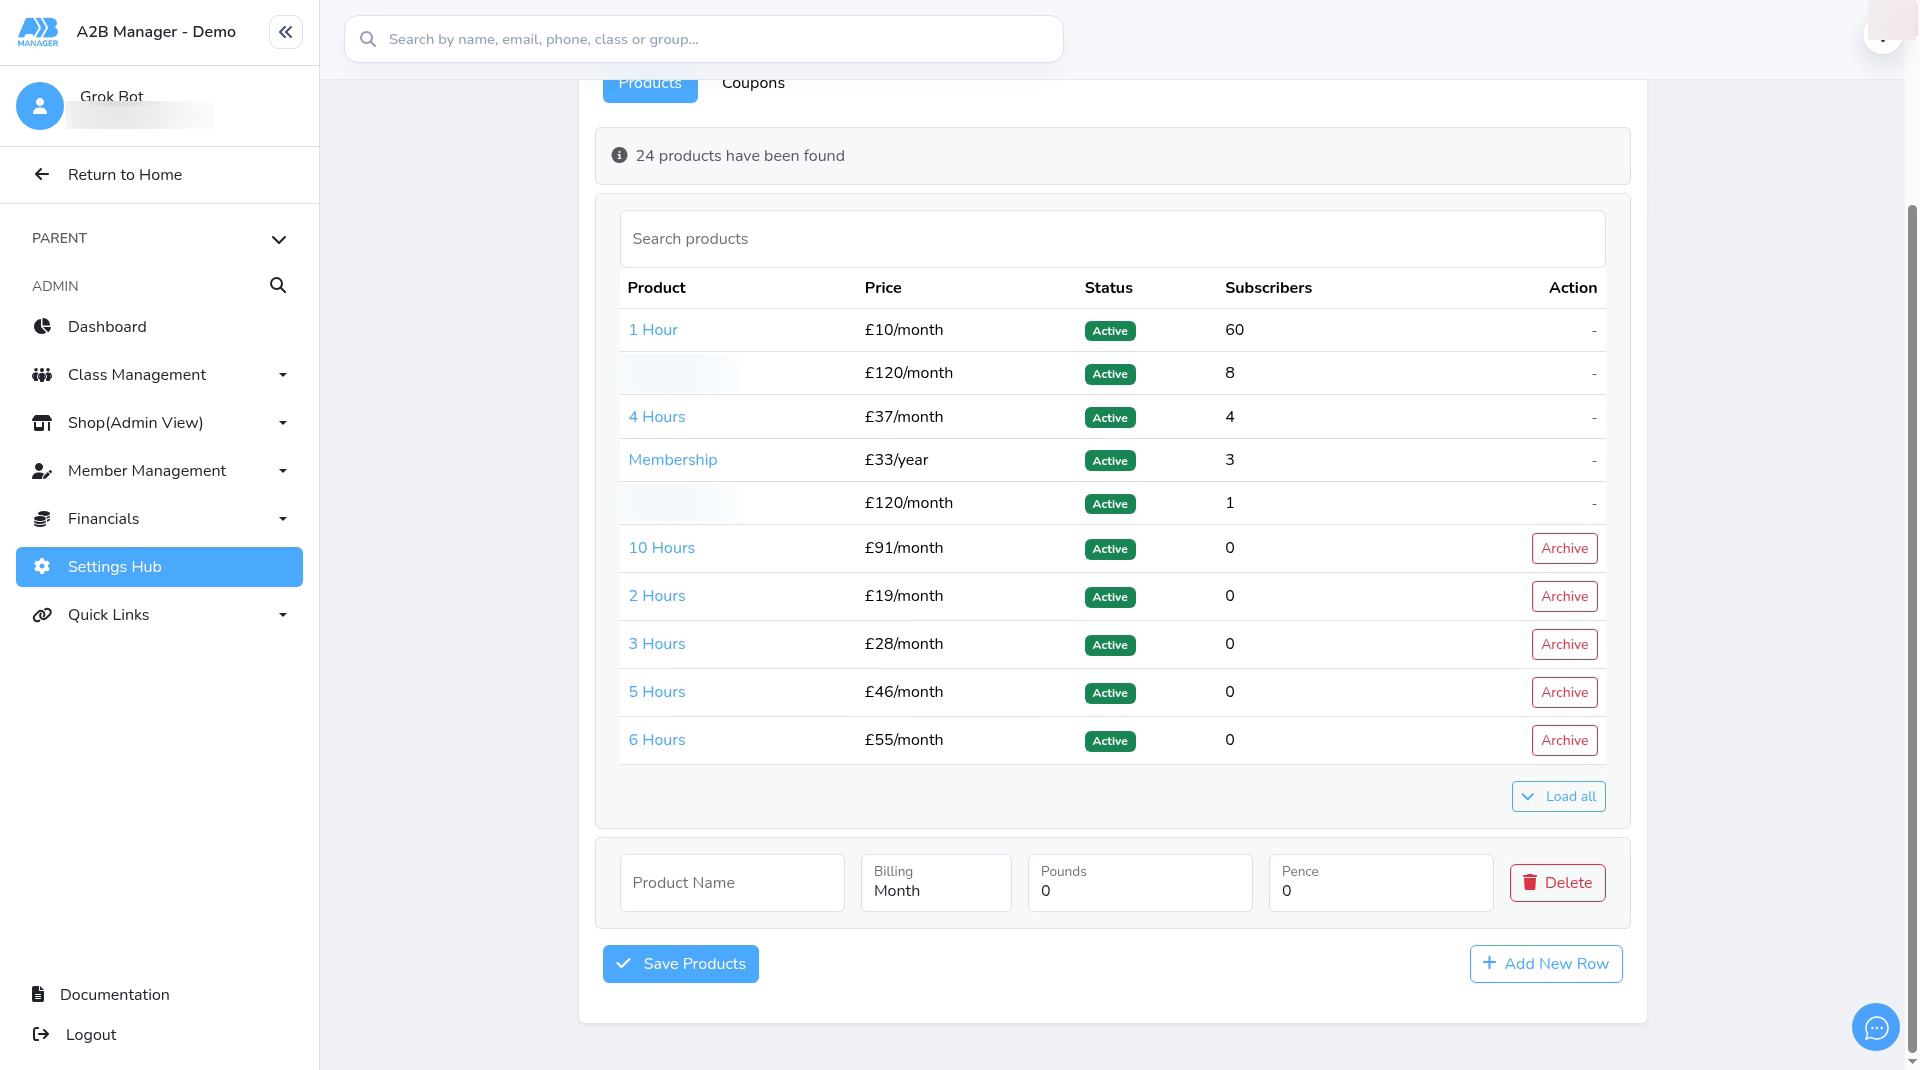
- Click Load Products. You’ll see how many products were found.
- The list shows each product’s Price, Status and number of Subscribers.
- Use Search products to find one quickly.
Step 3: Fill in a product row (0:23) #
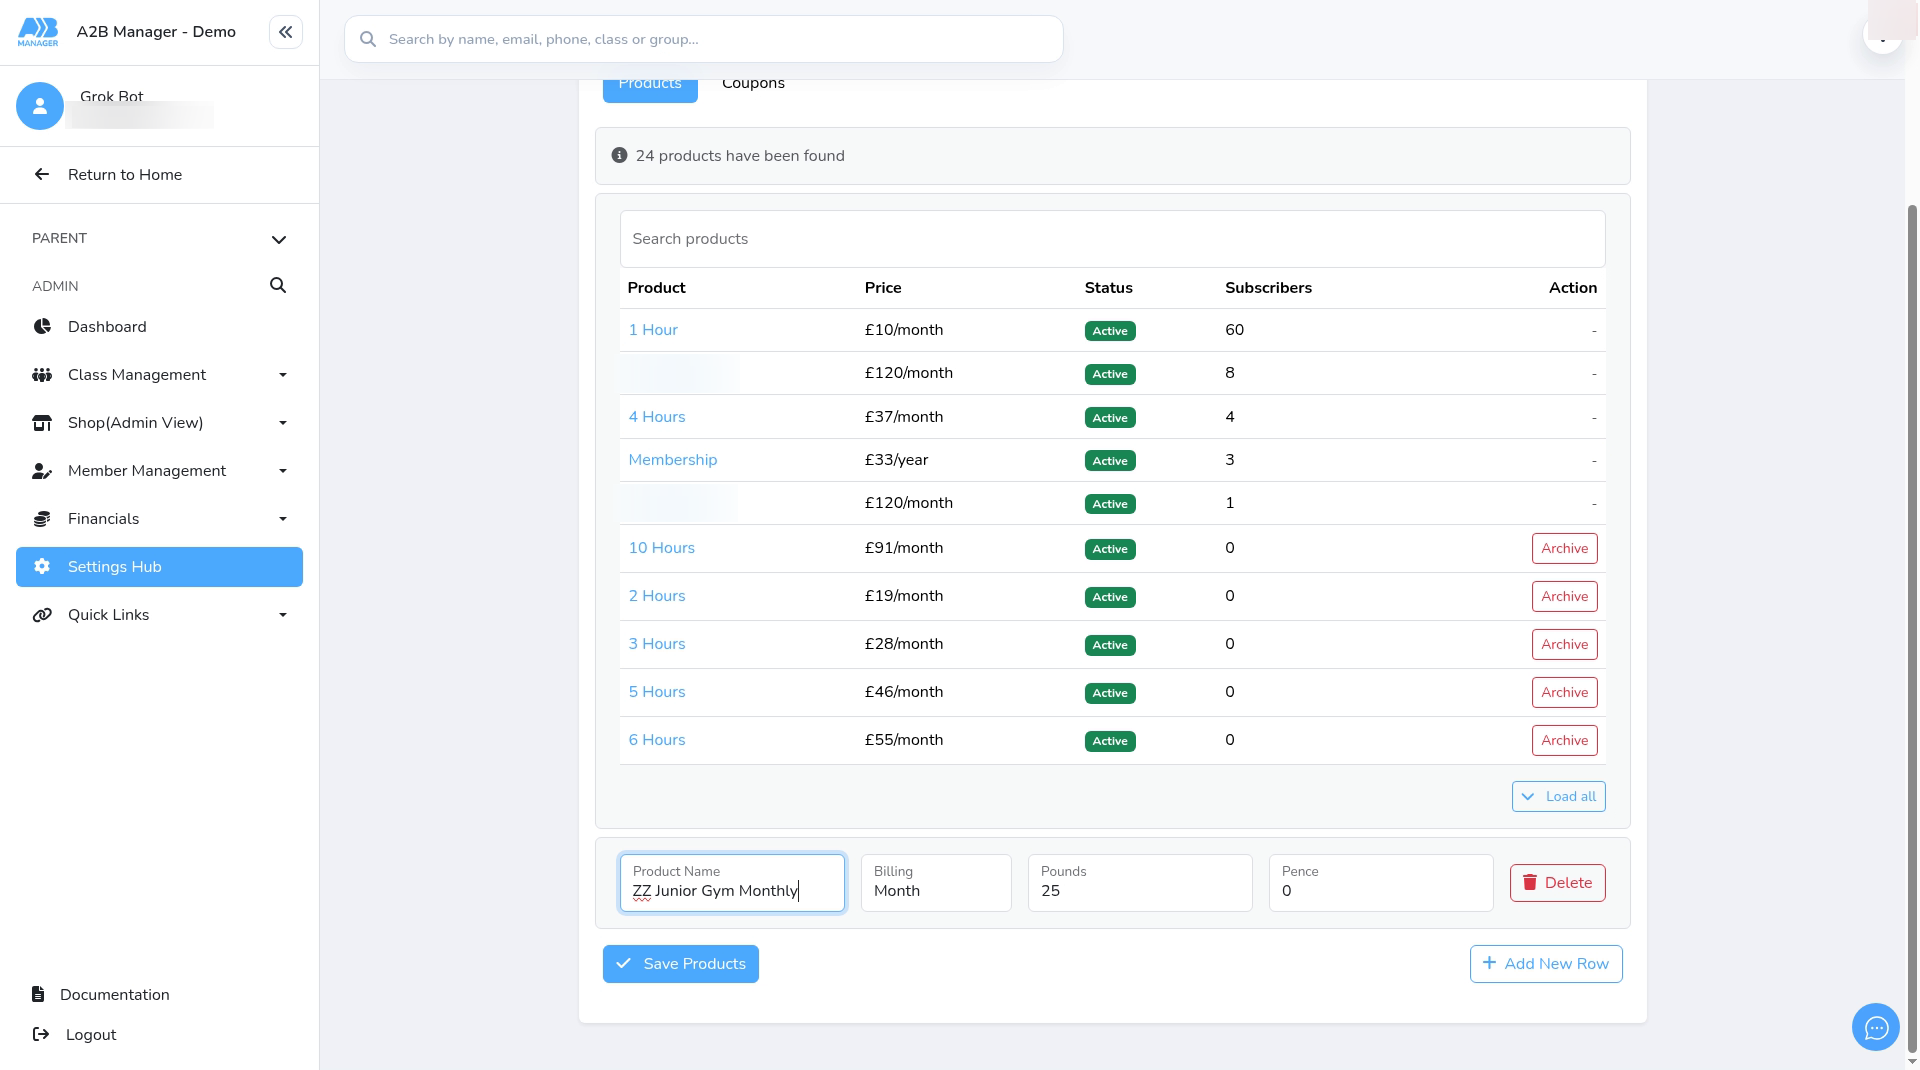
- Below the list there’s an empty row. Type a Product Name that parents will recognise, for example Junior Gym Monthly.
- Choose the Billing. This is how often the member is charged.
- Enter the price in Pounds and Pence. Pence go from 0 to 99. For £25.00, enter 25 pounds and 0 pence.
Step 4: Add more rows (0:32) #
- To add another product, click + Add New Row.
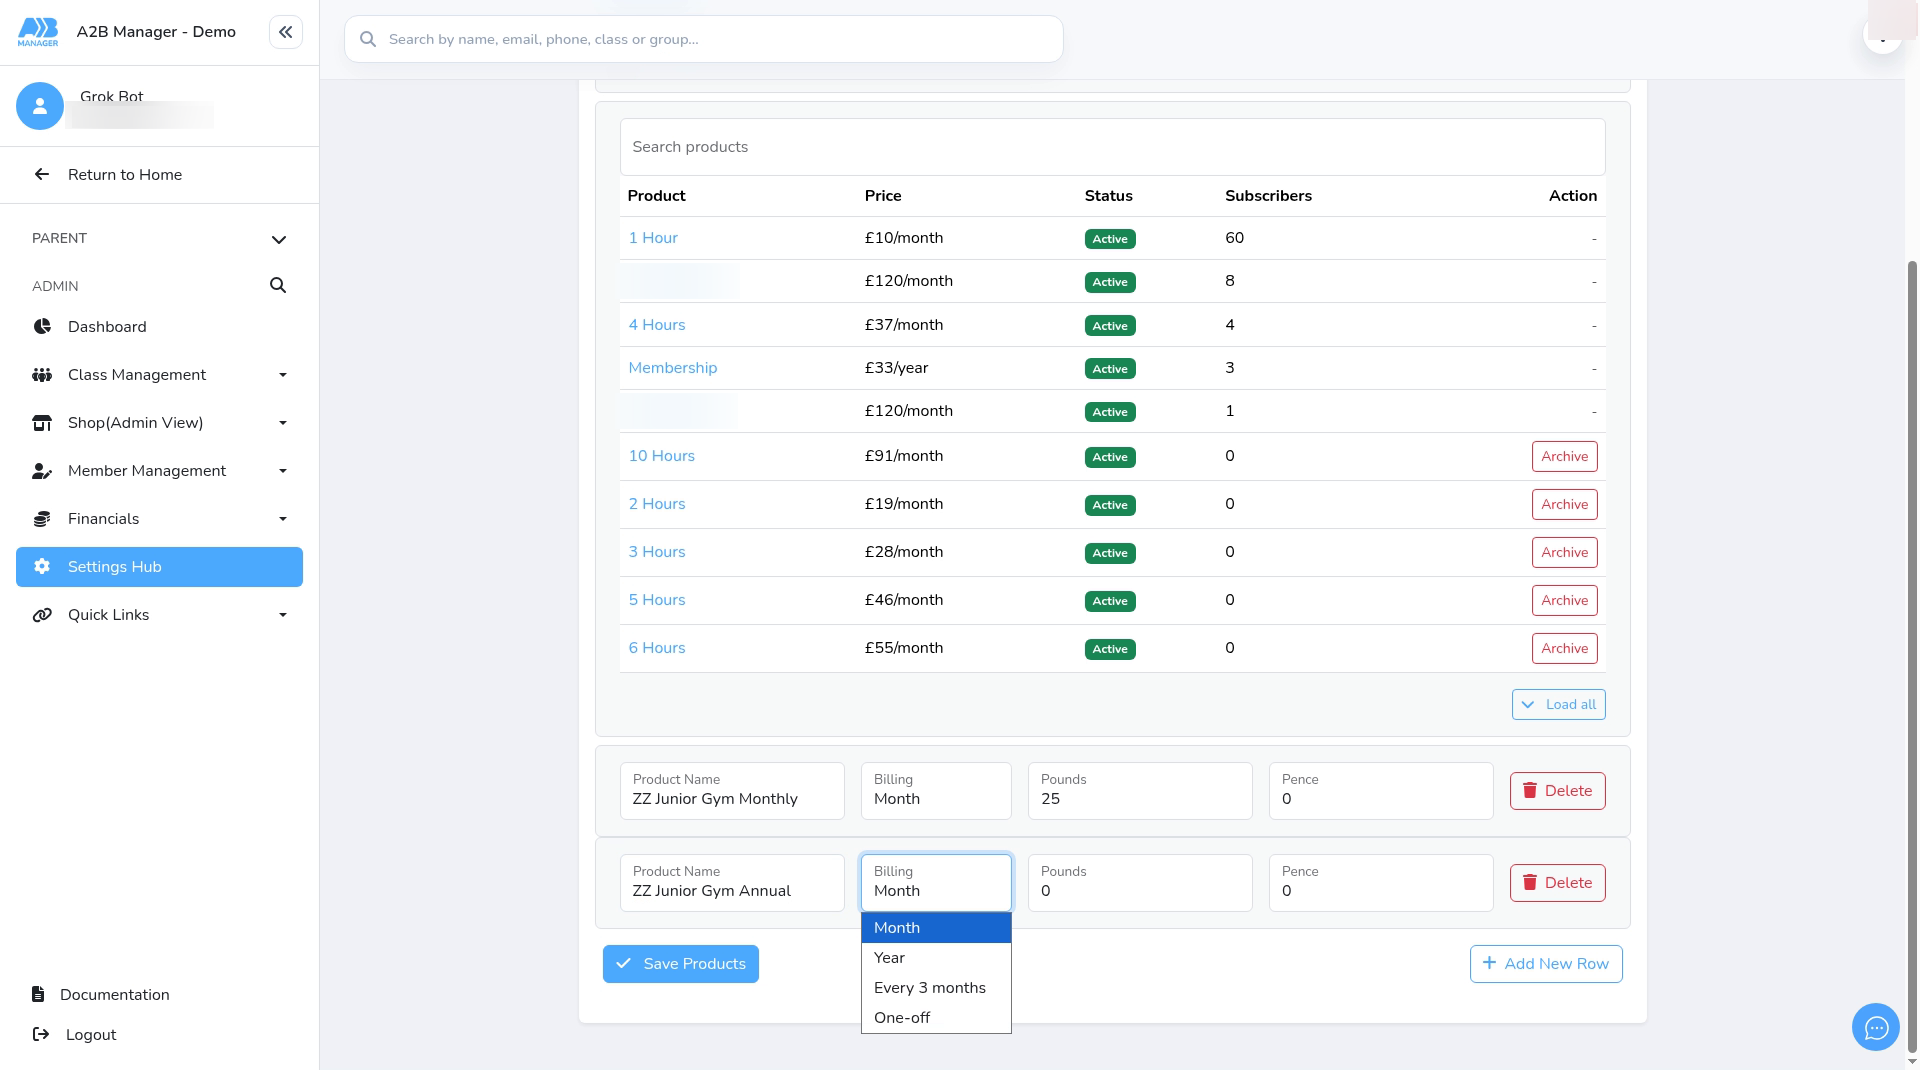
- Give it a name and choose its Billing: Month, Year, Every 3 months or One-off.
- Enter its price, for example 250 pounds and 0 pence for a yearly product.
- If you add a row you don’t need, click its Delete. This only removes the row. It doesn’t delete a saved product.
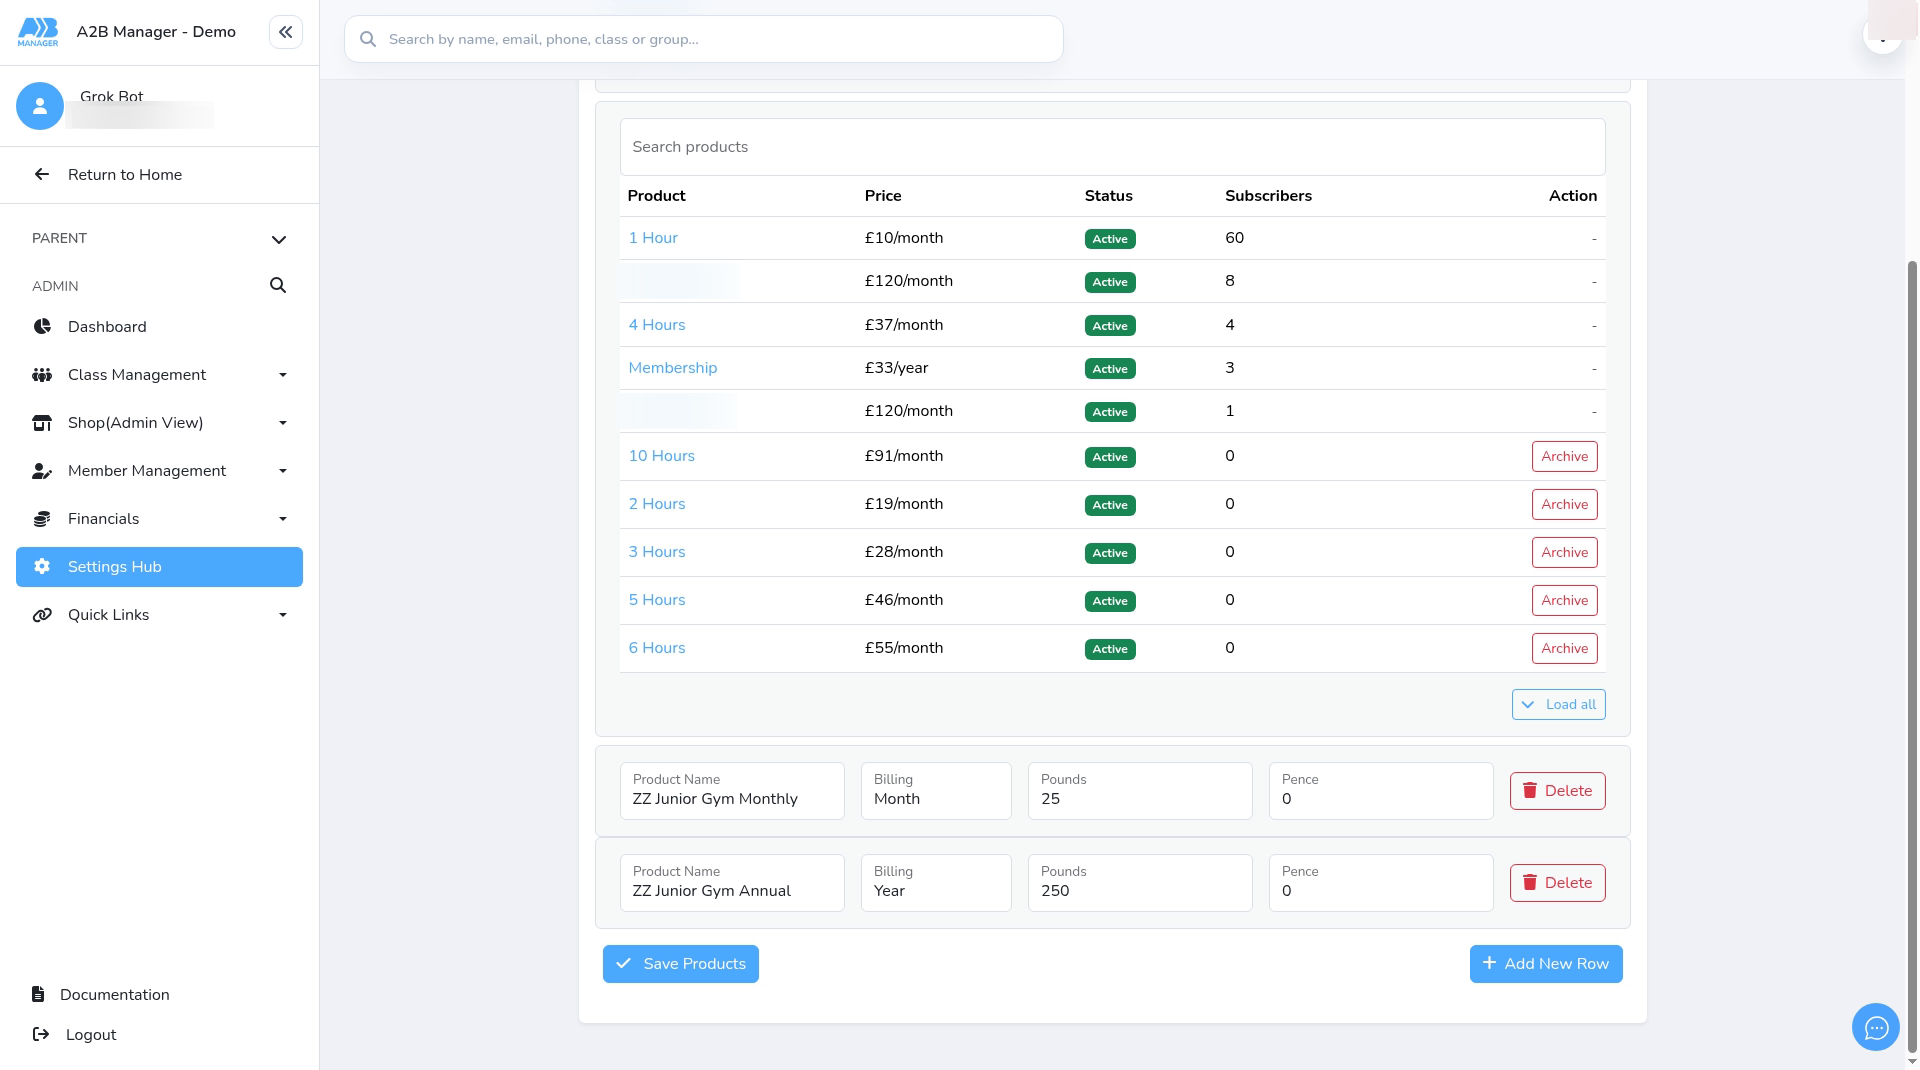
Step 5: Save your products (1:07) #
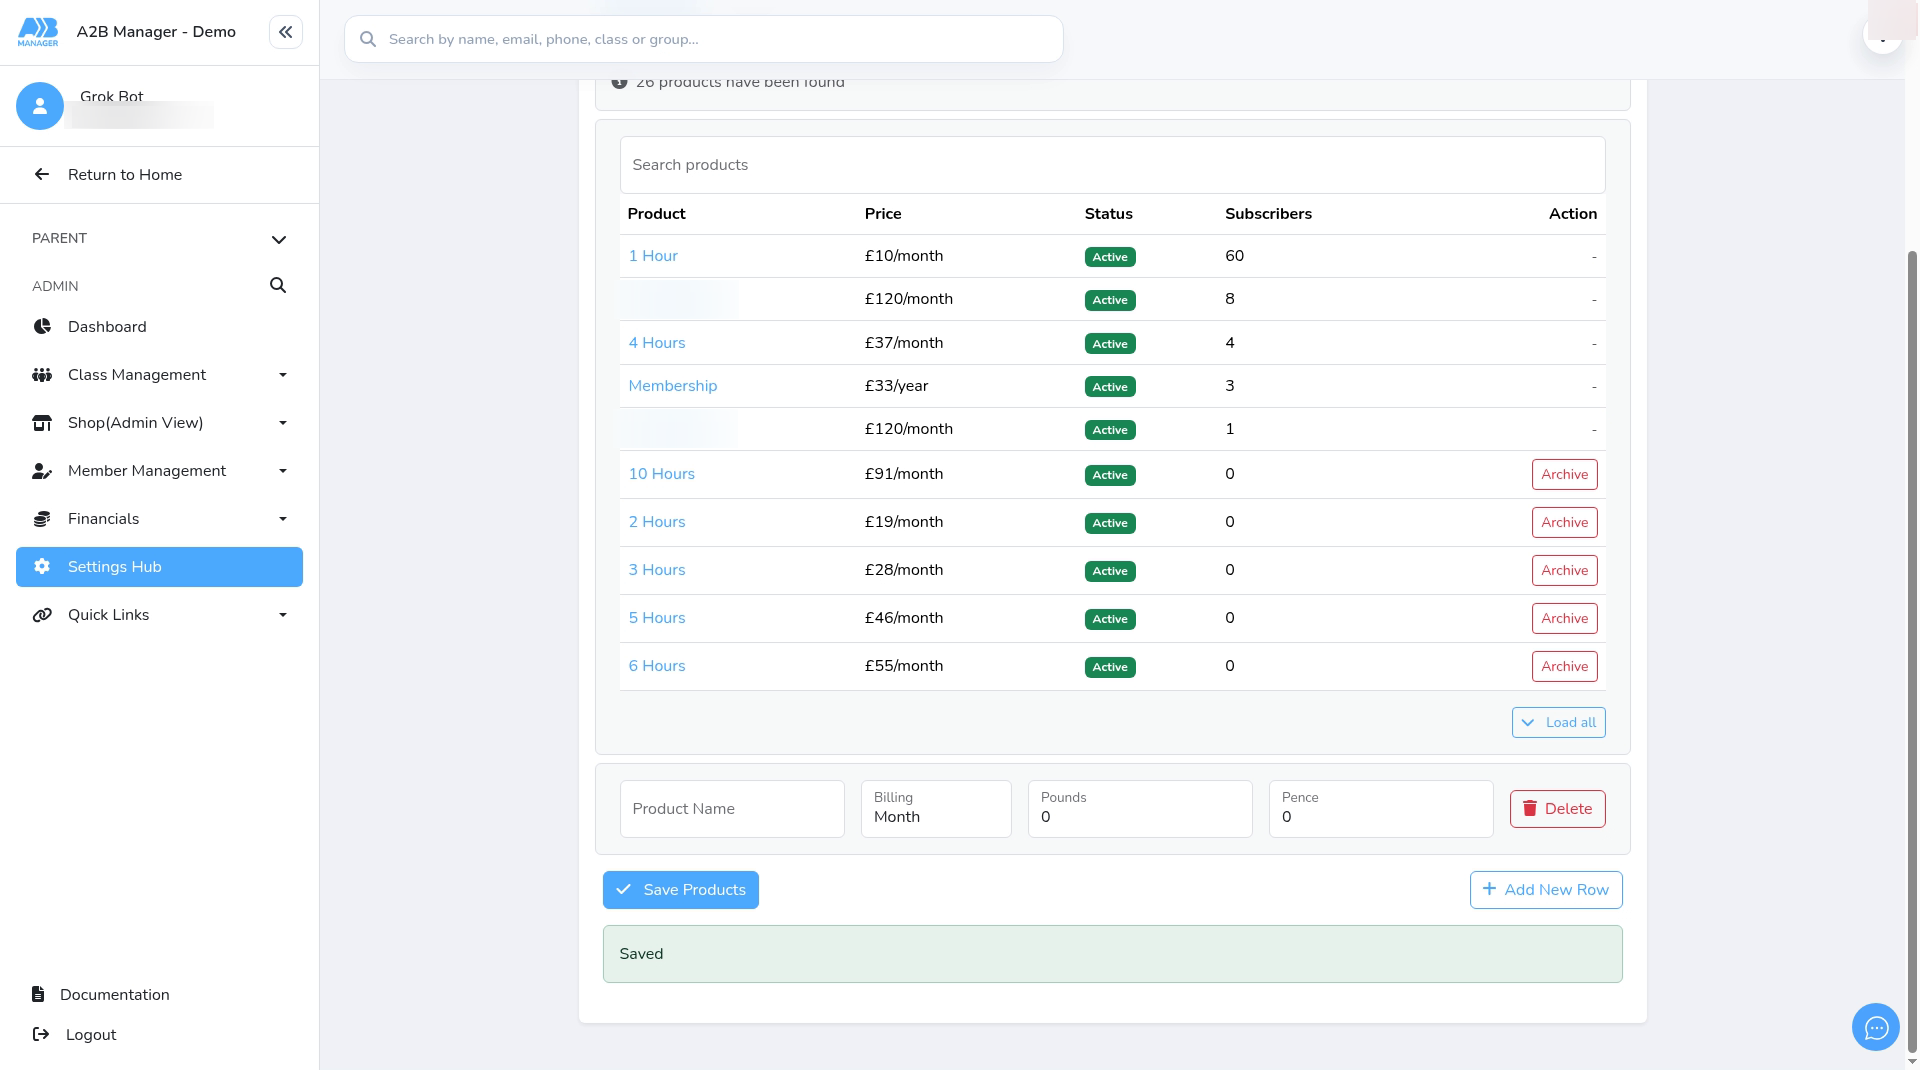
- When the rows are right, click Save Products.
- You’ll see Saved.
Step 6: Check the new products in the list (1:20) #
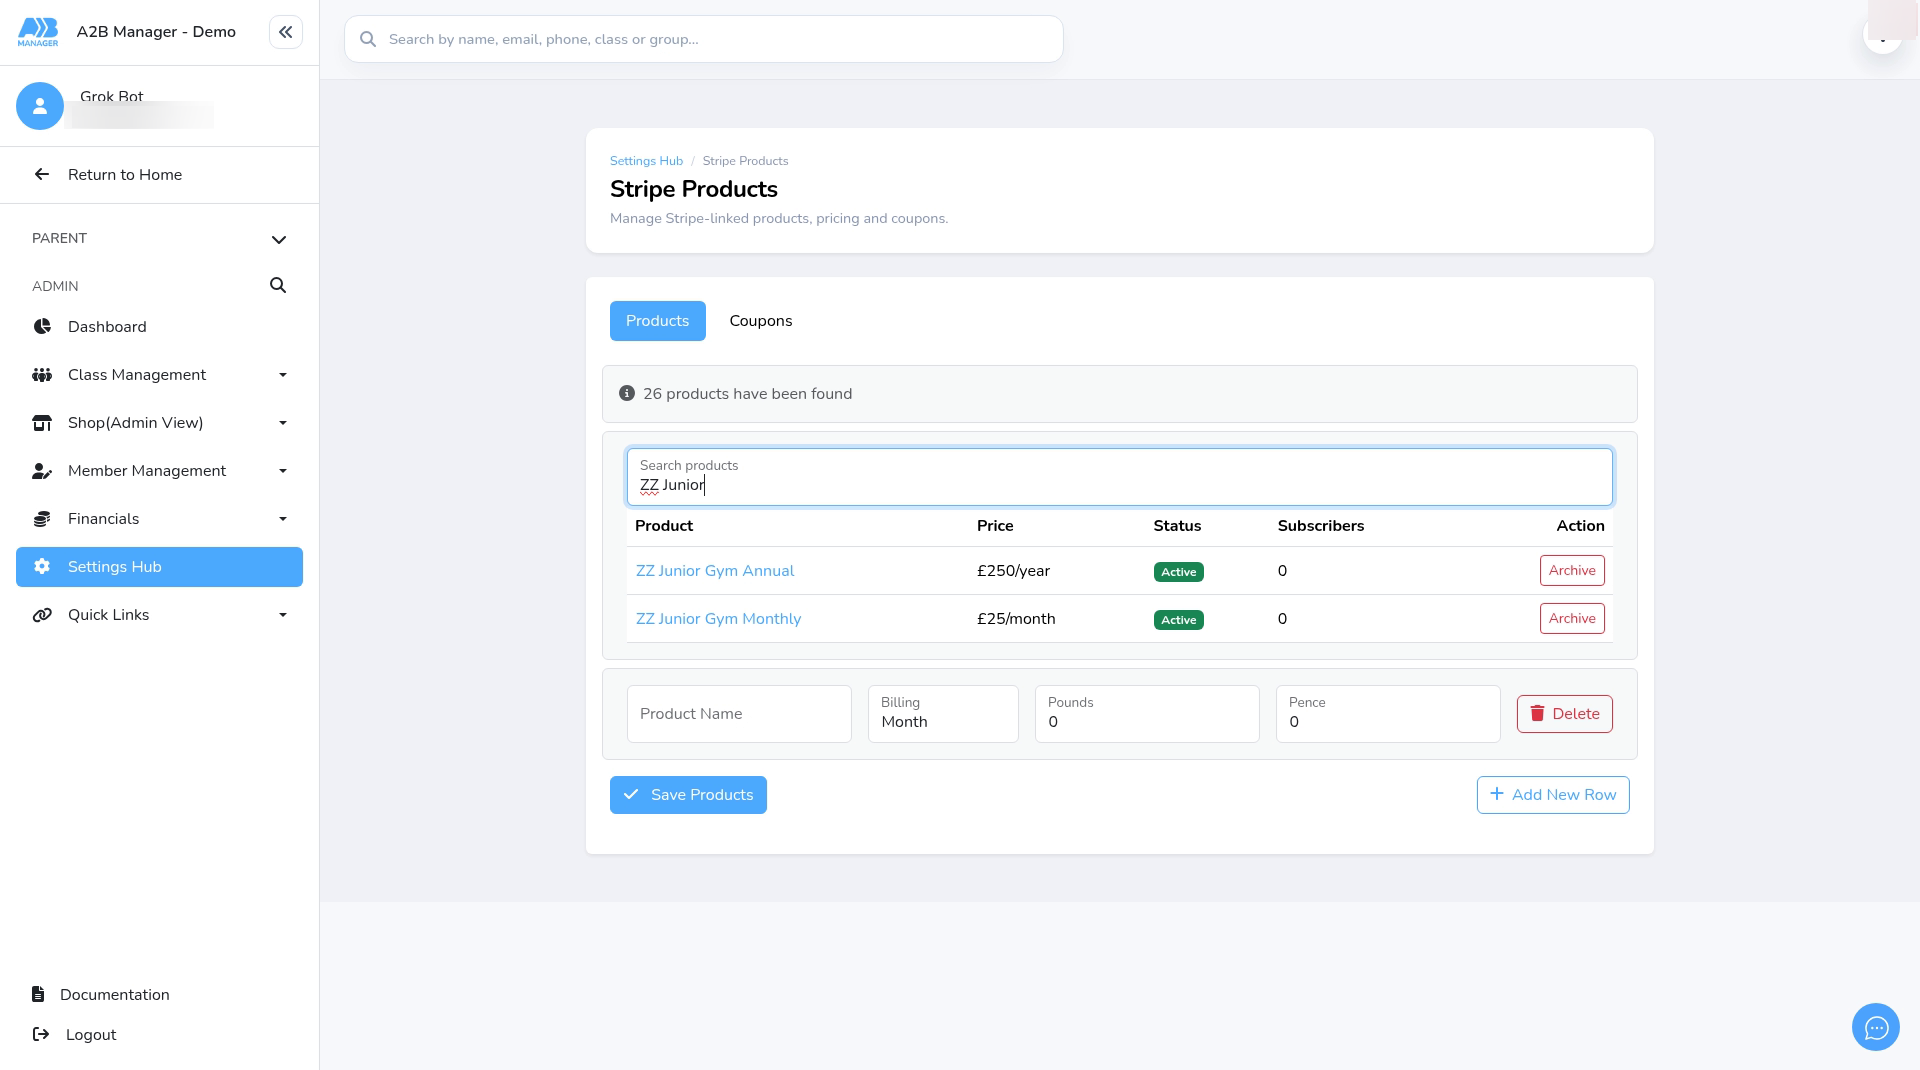
- Click Load Products again and search for your new products.
- Check that each name and price is right. Each new product shows as Active with 0 subscribers.
- Archive only shows on a product that nobody is subscribed to. You can’t edit or delete a product on this page, so if a price is wrong, add a new product with the right price.
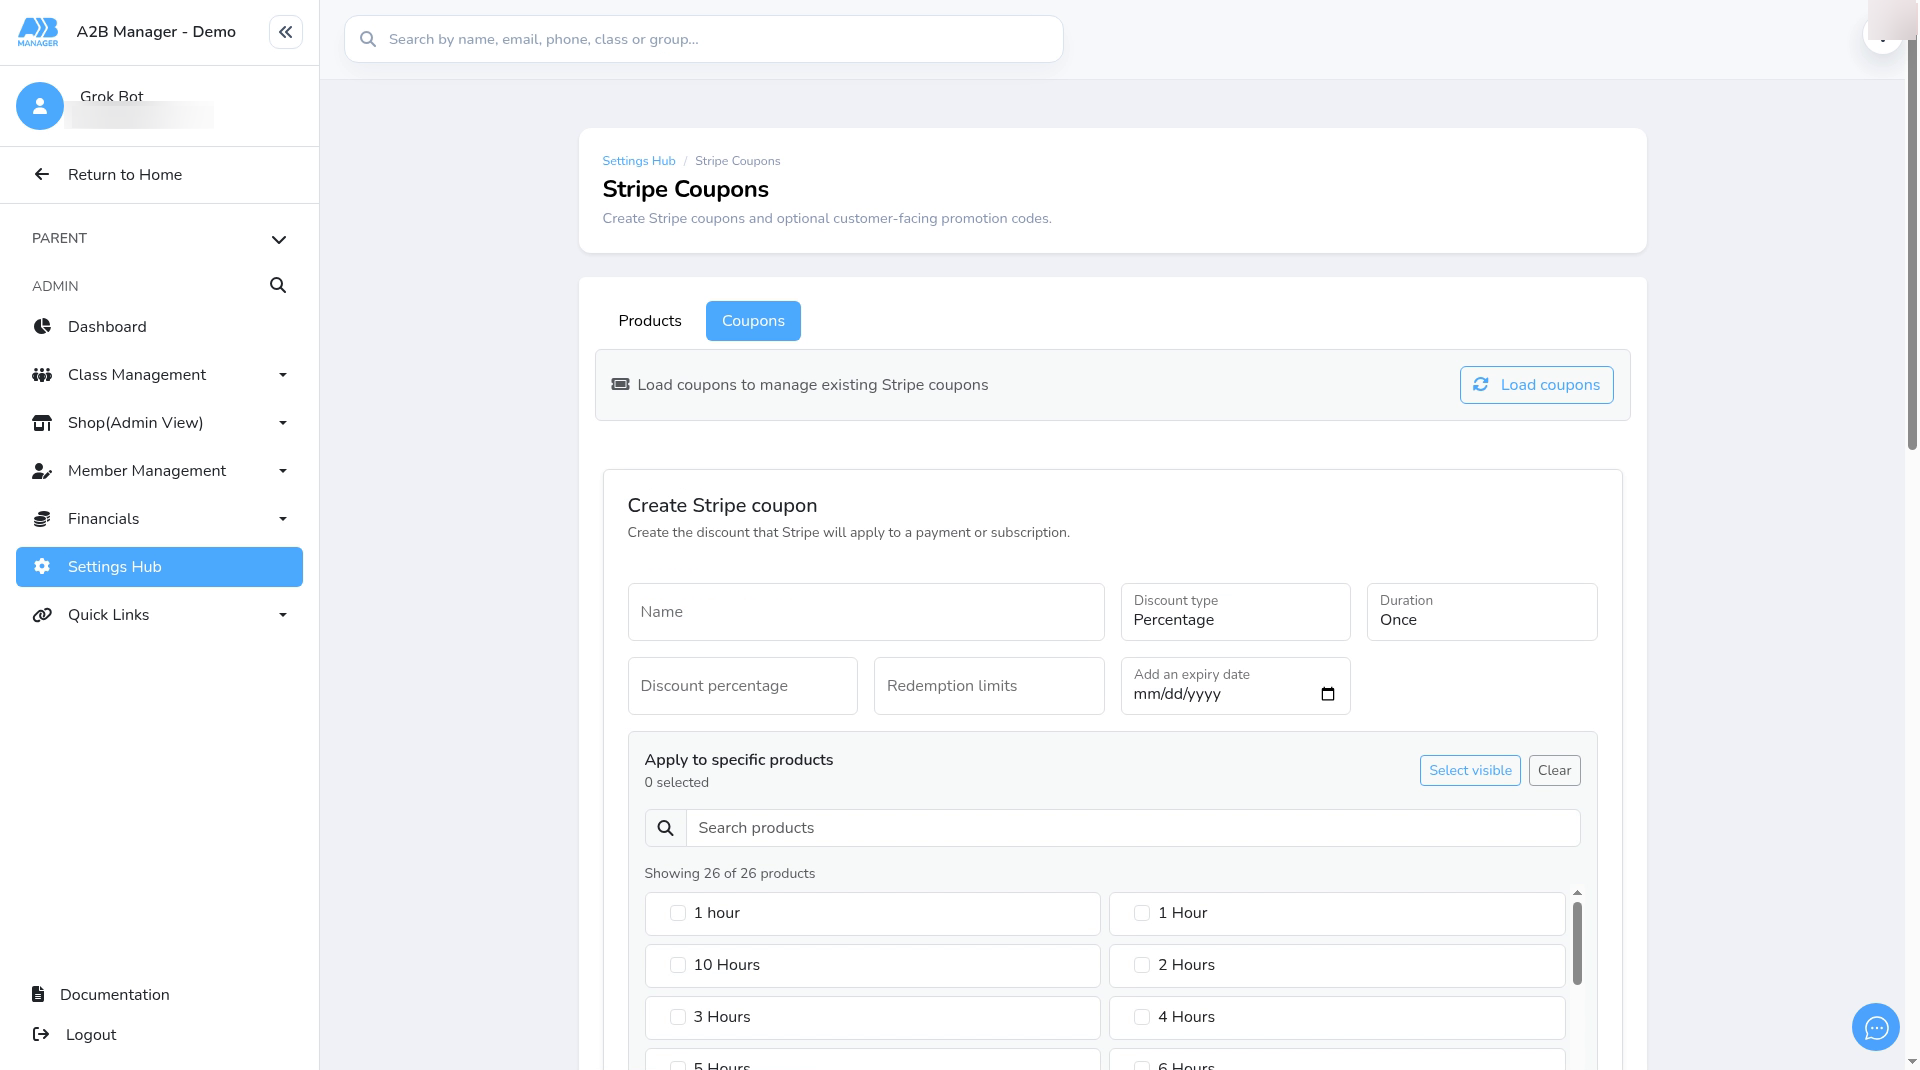
Step 7: Coupons (1:42) #
- Discounts are set up on the Coupons tab of the same page.
Link a product to a class group #
Step 8: Link the product to a class group (1:53) #
- Go to Settings Hub > Add/Edit Classes.
- Choose the class, then click its group.
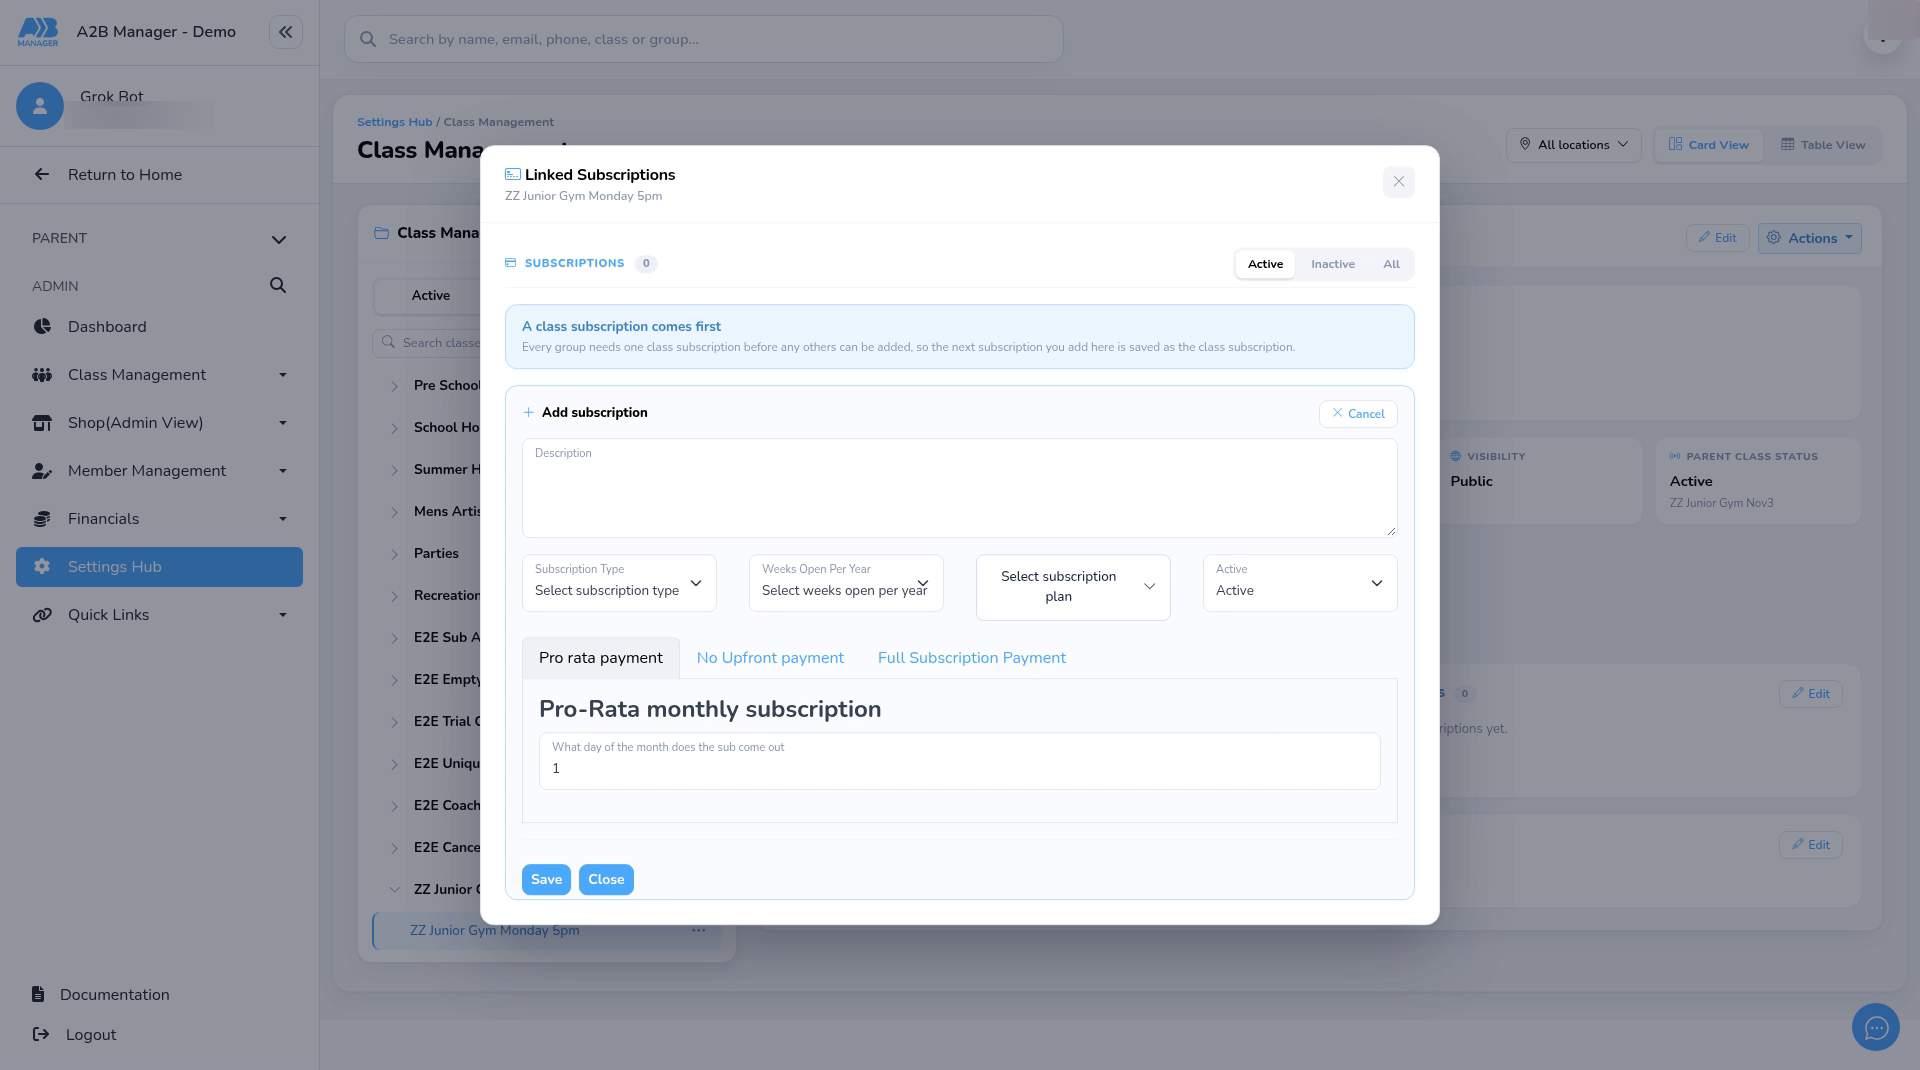
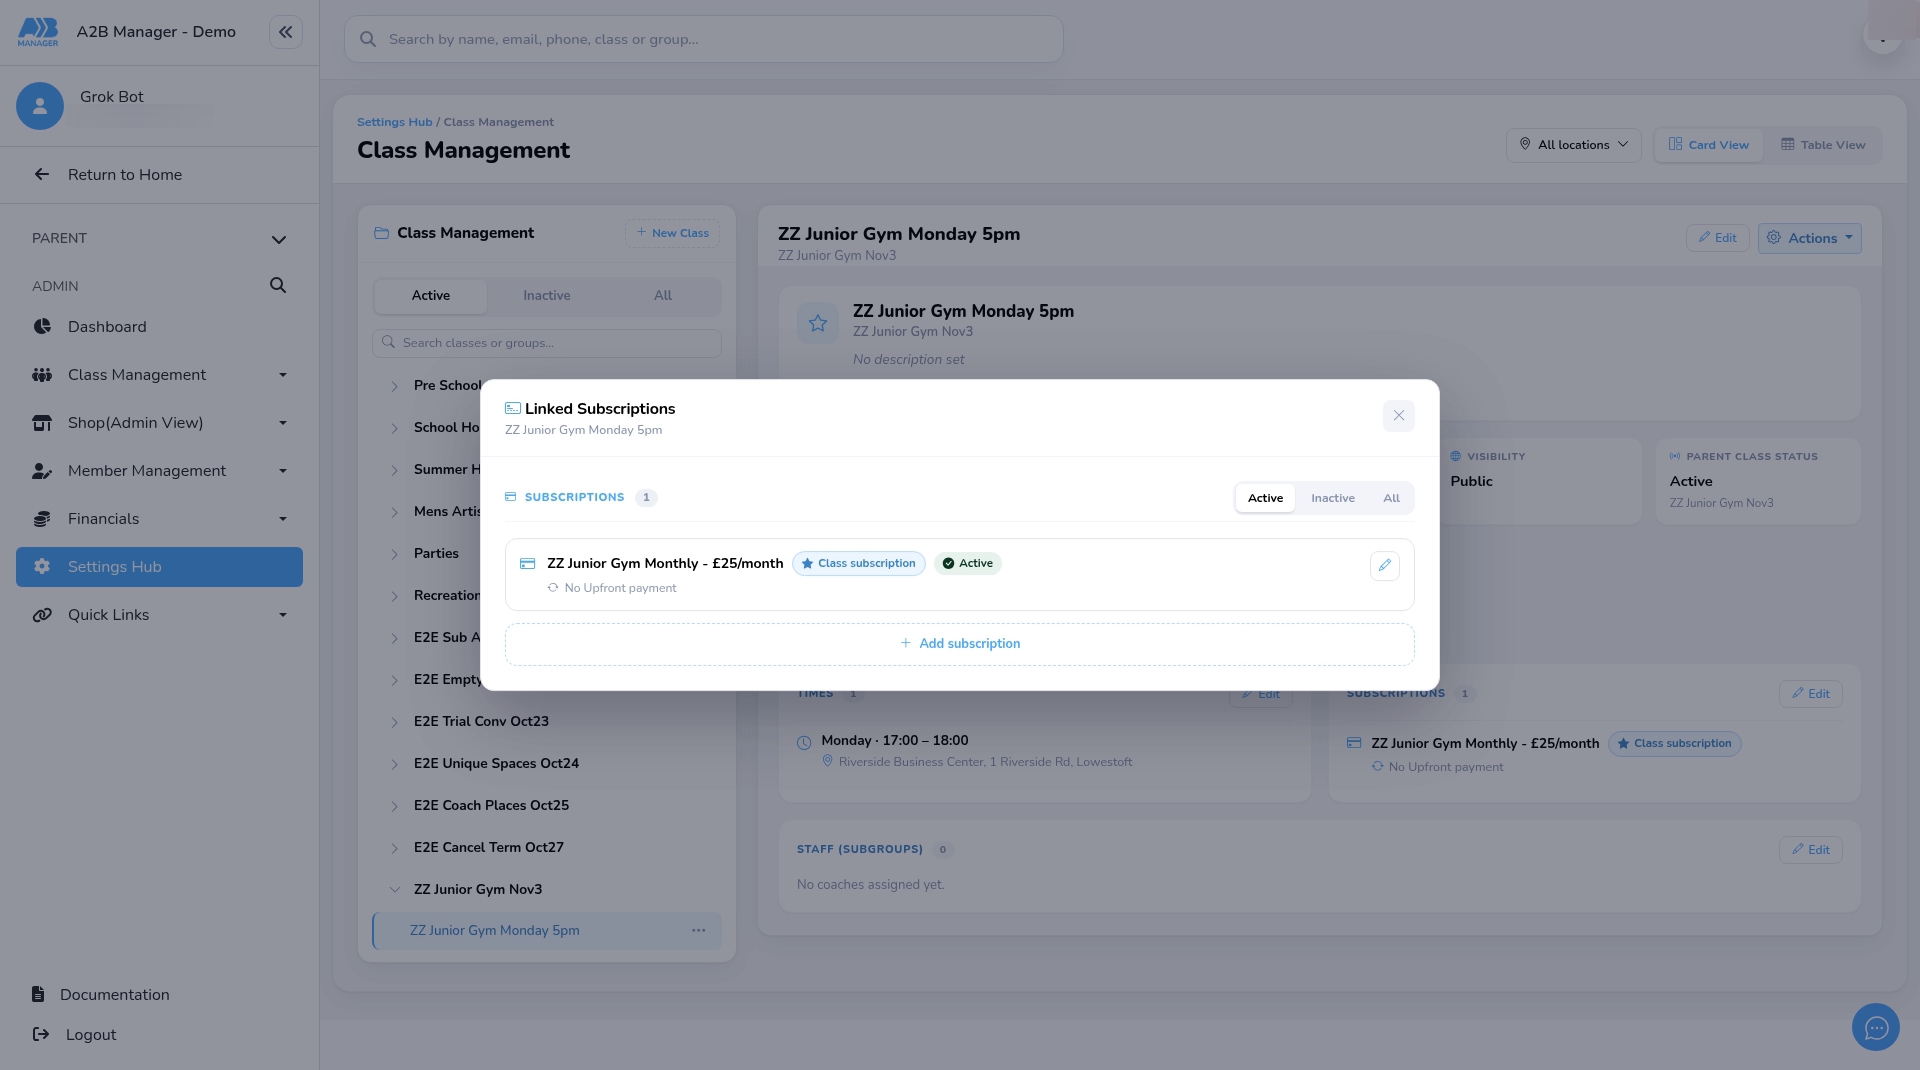
- On the Subscriptions card, click Edit. The Linked Subscriptions box opens.
- Click + Add subscription. The banner explains: A class subscription comes first. The first subscription you add to a group is saved as its class subscription.
Step 9: Choose the product and save (2:27) #
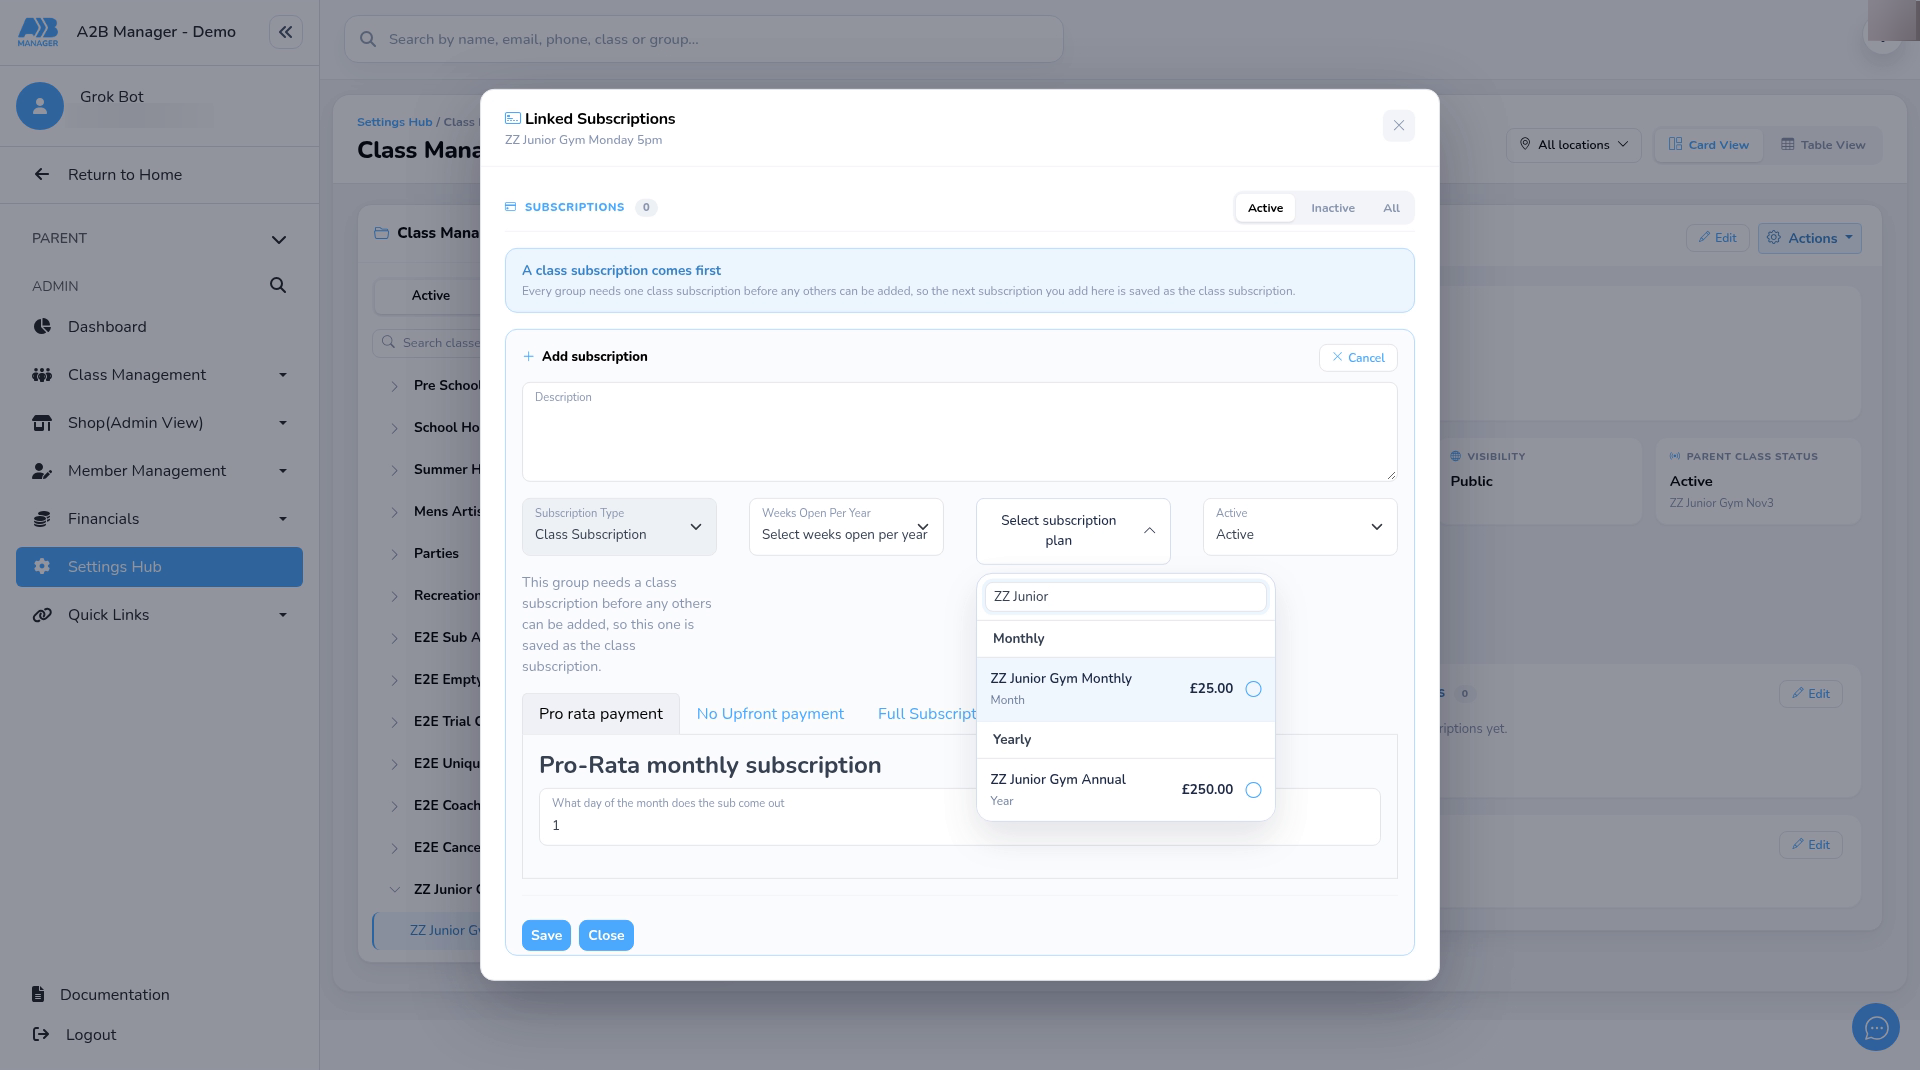
- Open Select subscription plan and pick your new product. New products show here straight away. You can search for them.
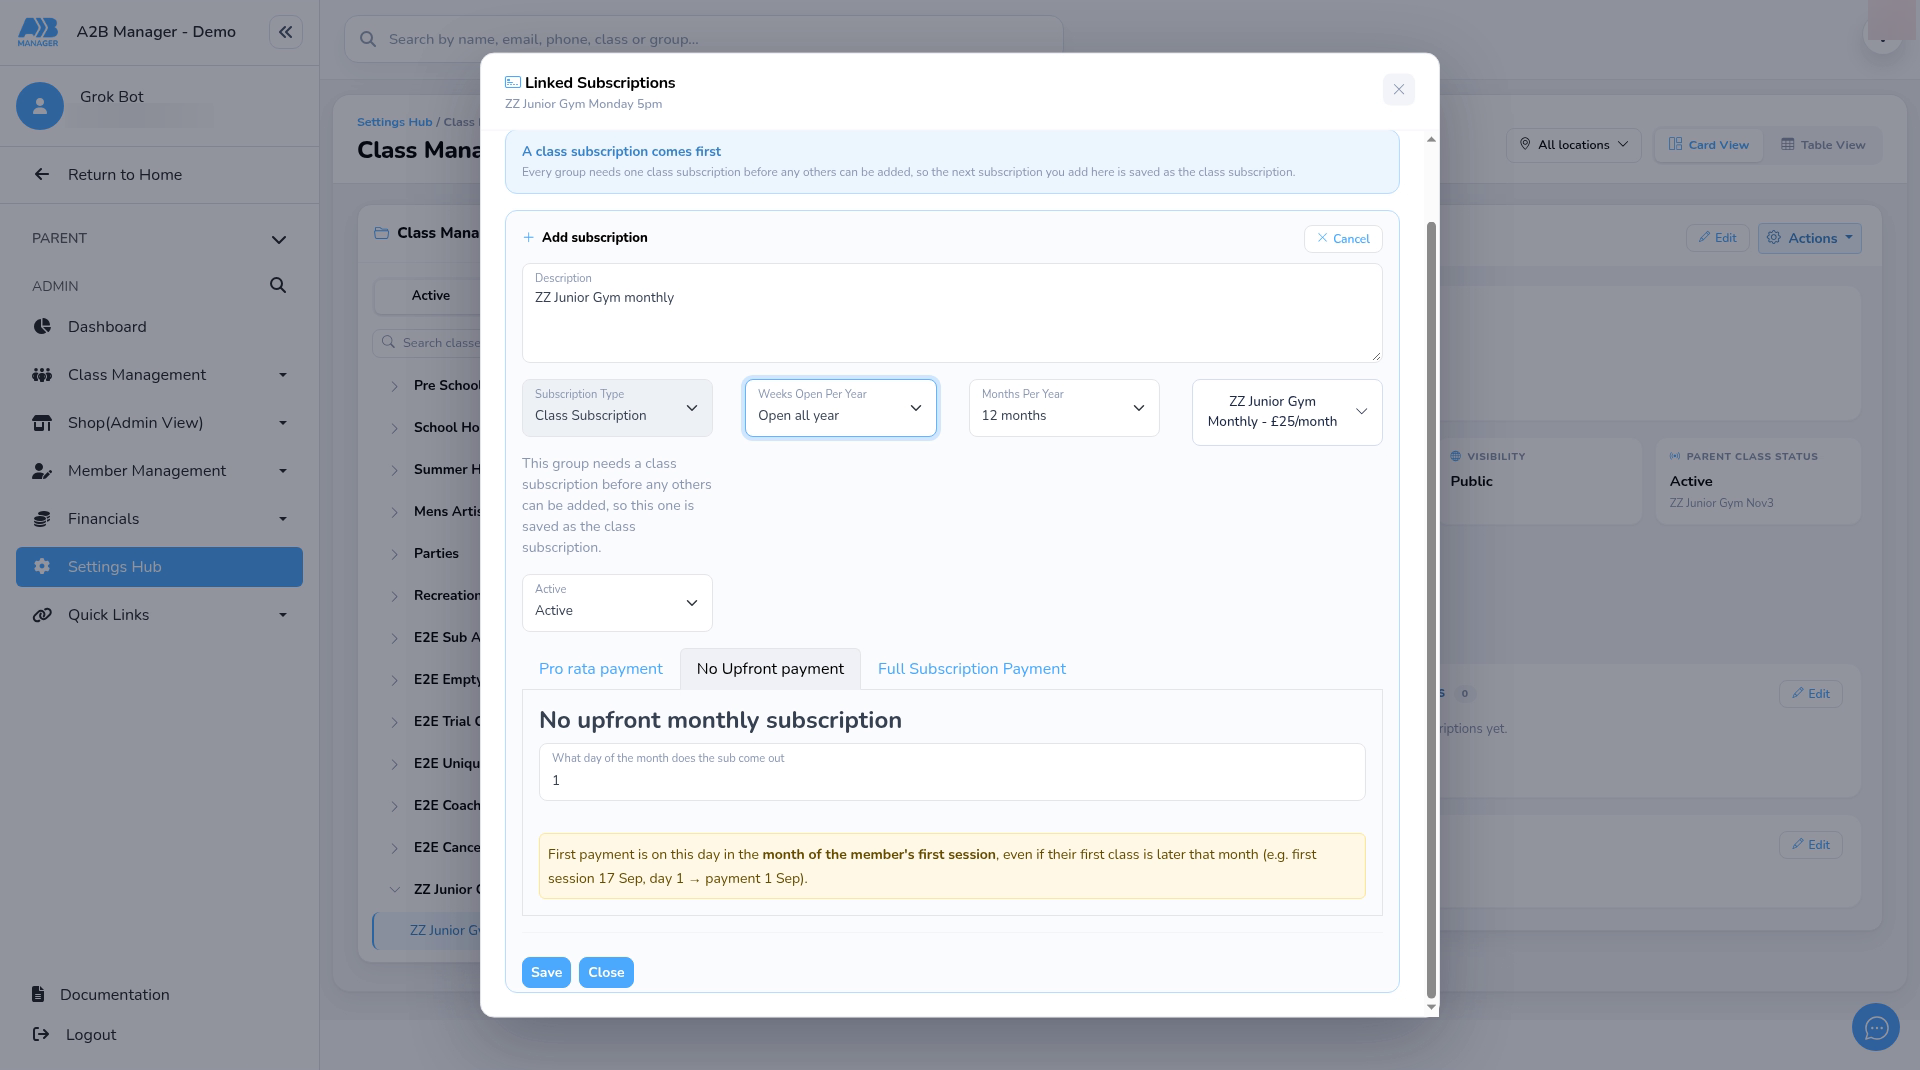
- Choose how the first payment works. In this example it’s No Upfront payment.
- Type a Description that parents will recognise, and choose Weeks Open Per Year. Both are required.
- Click Save. The product now shows in the group’s list as the Class subscription.
Put members on the subscription #
Step 10: Add the subscription to a member yourself (3:25) #
- Open the member’s profile. Under Subscriptions, click Add subscription.
- Search for the product, tick it, and click Apply.
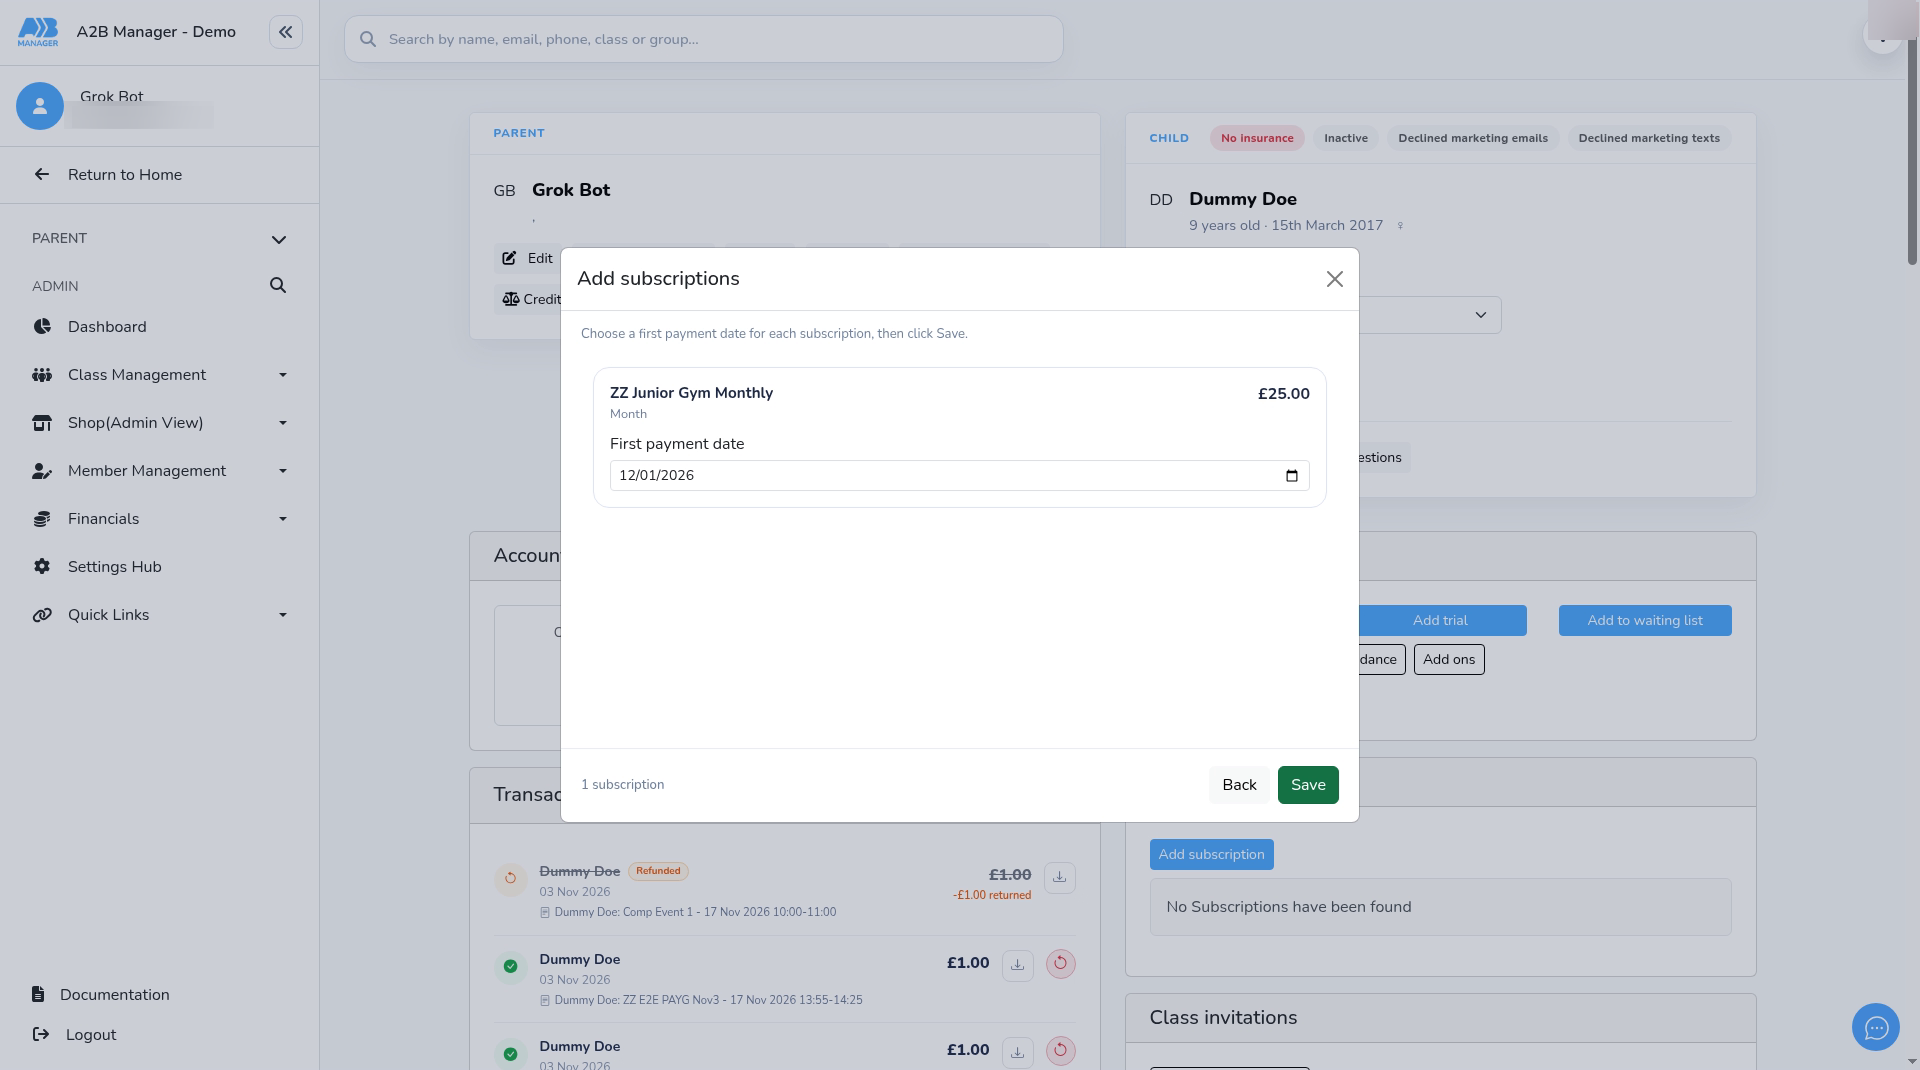
- Choose a First payment date. It must be after today.
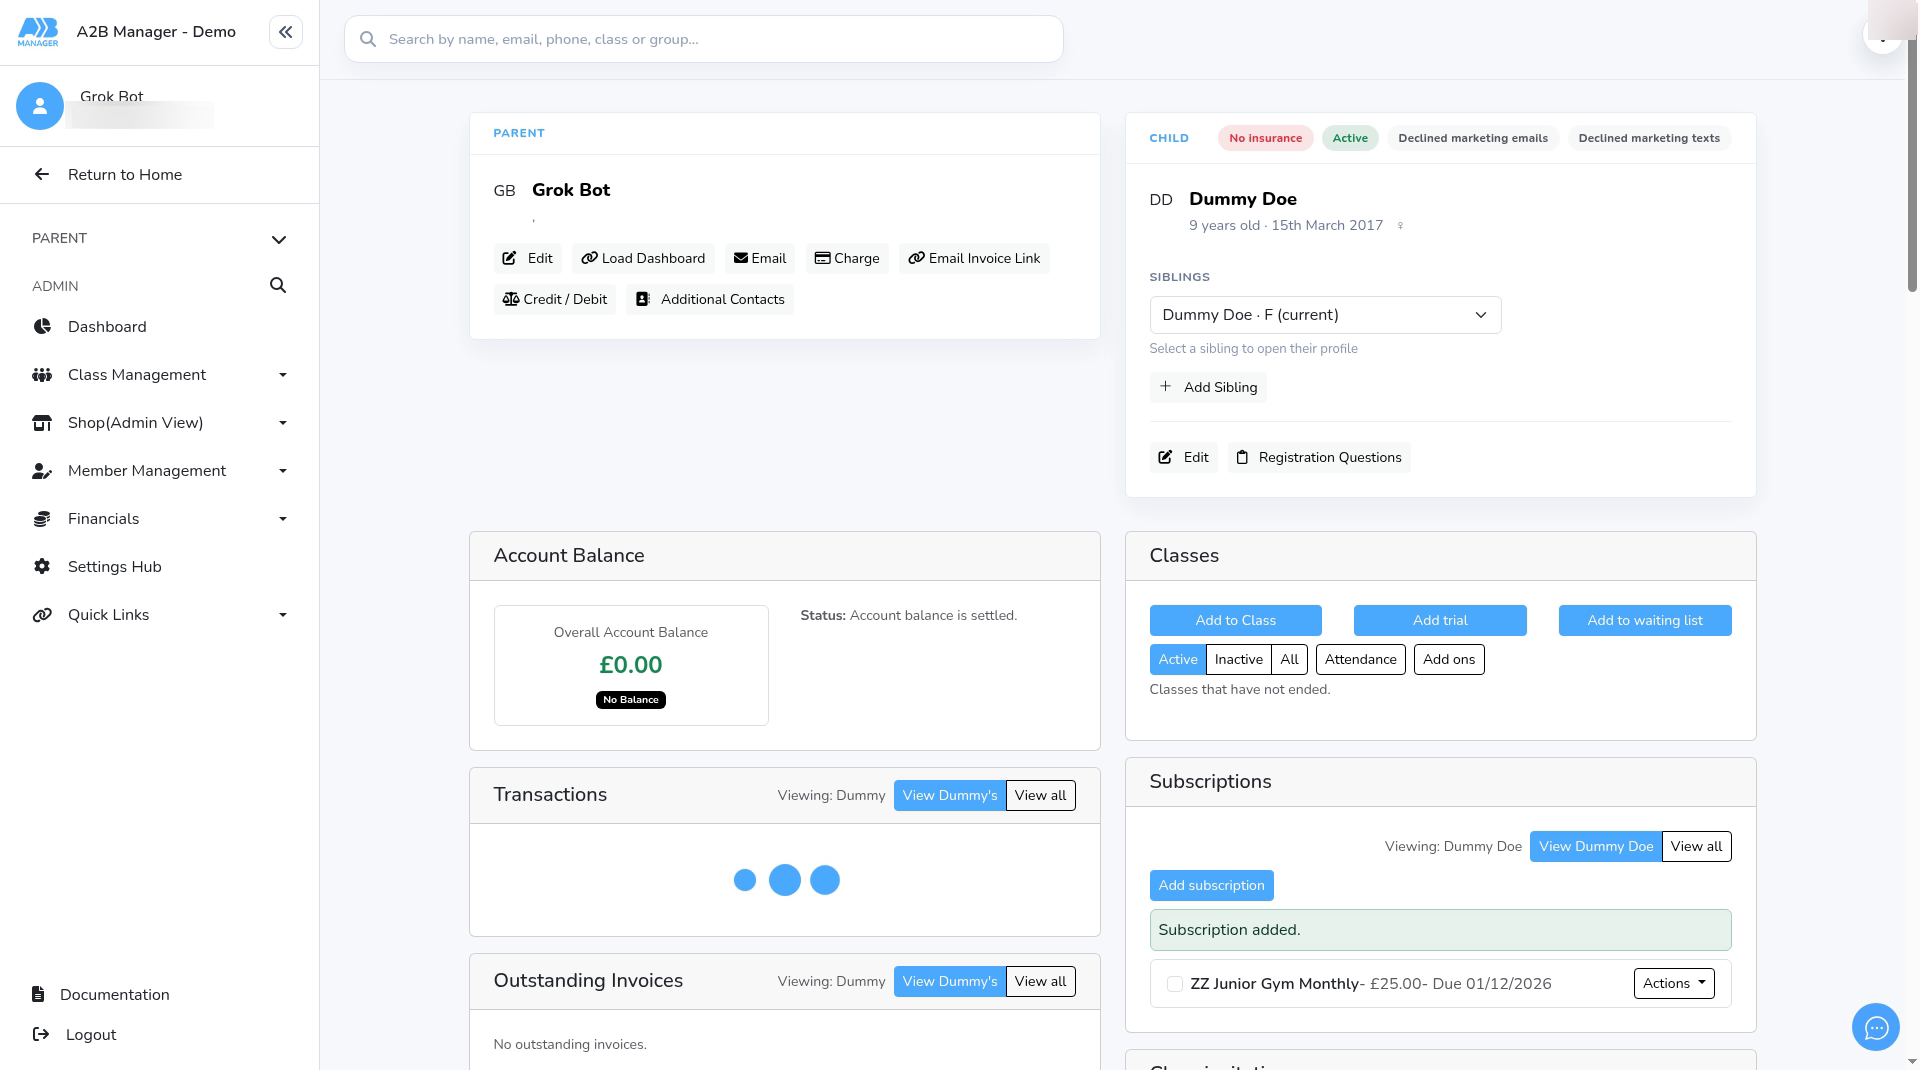
- Click Save. You’ll see Subscription added. and the subscription shows on the profile with its due date. For more on this, see How to Add and Delete a Subscription in the Member’s Profile.
Step 11: See who’s subscribed (4:21) #
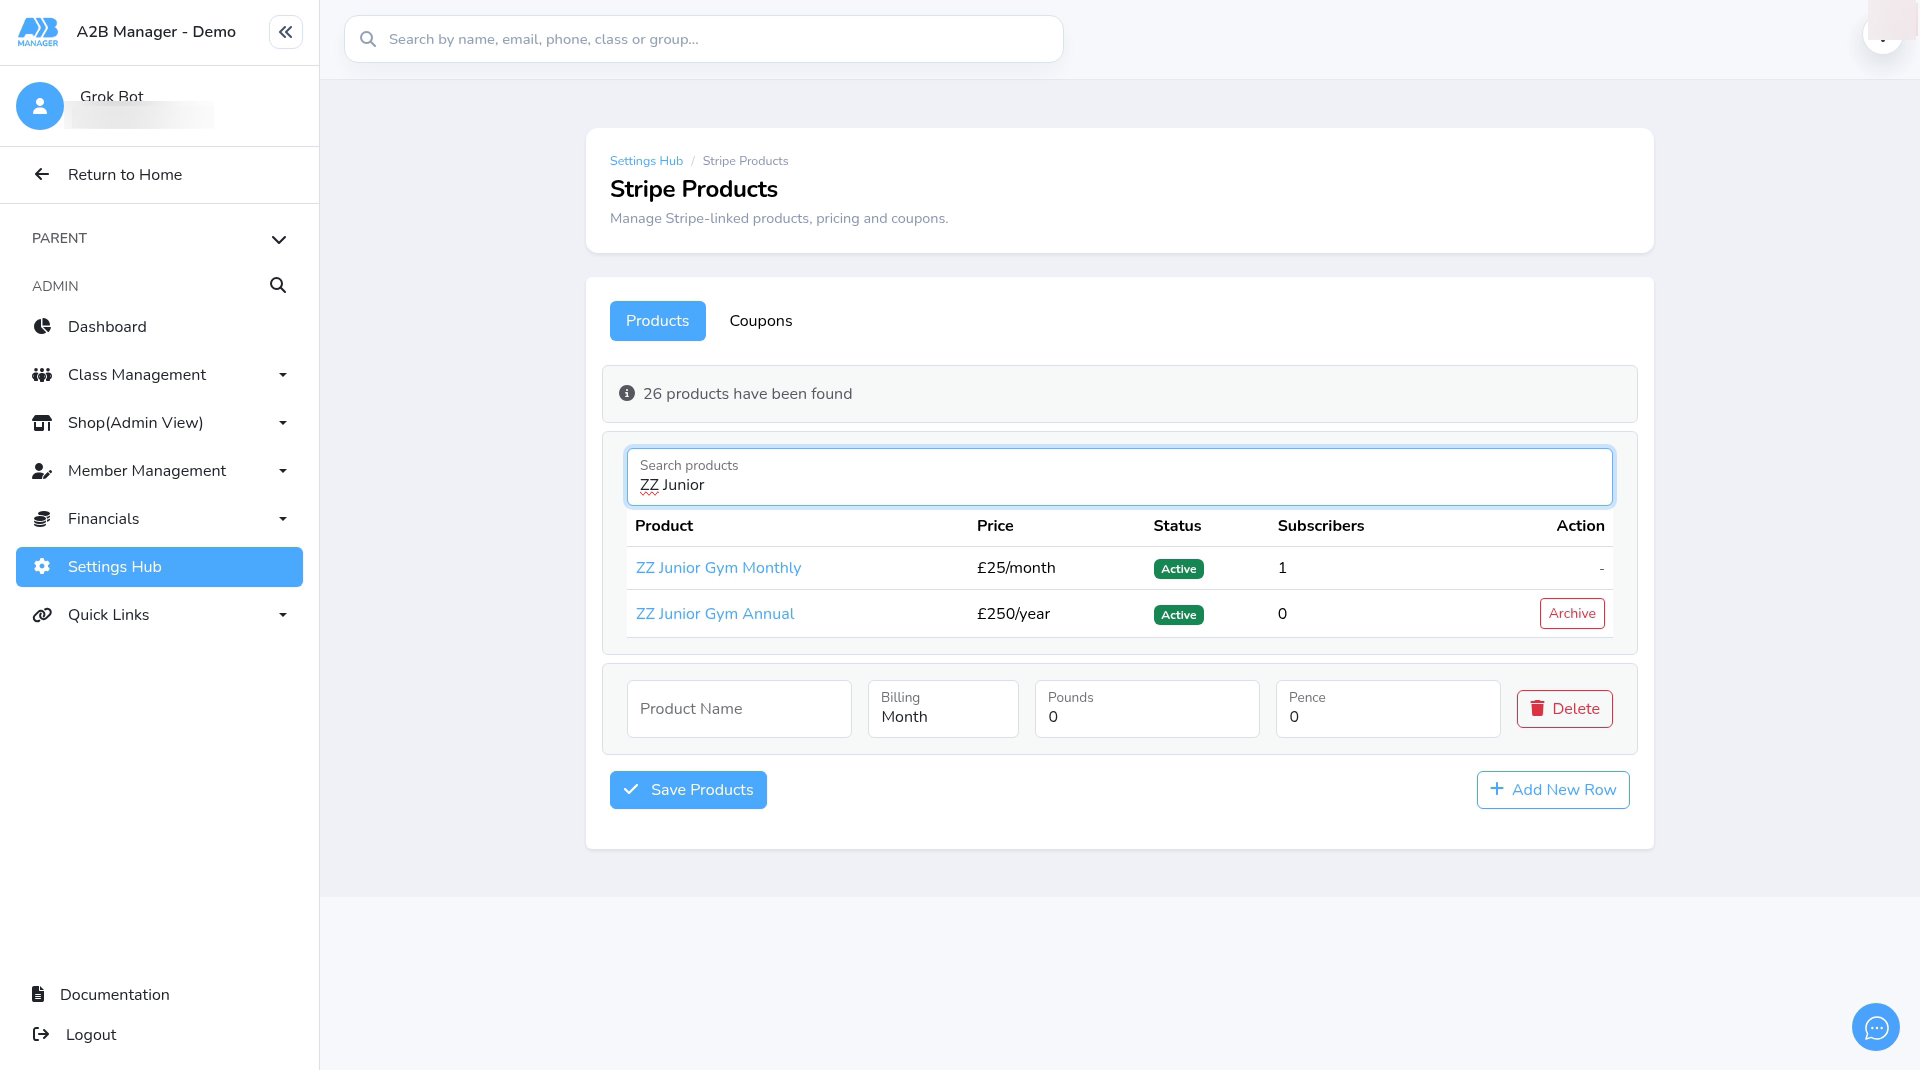
- Go back to Stripe Products, click Load Products and search for the product.
- The Subscribers column now shows 1. To manage members’ subscriptions, see Managing Member Subscriptions.
Step 12: When members join the group #
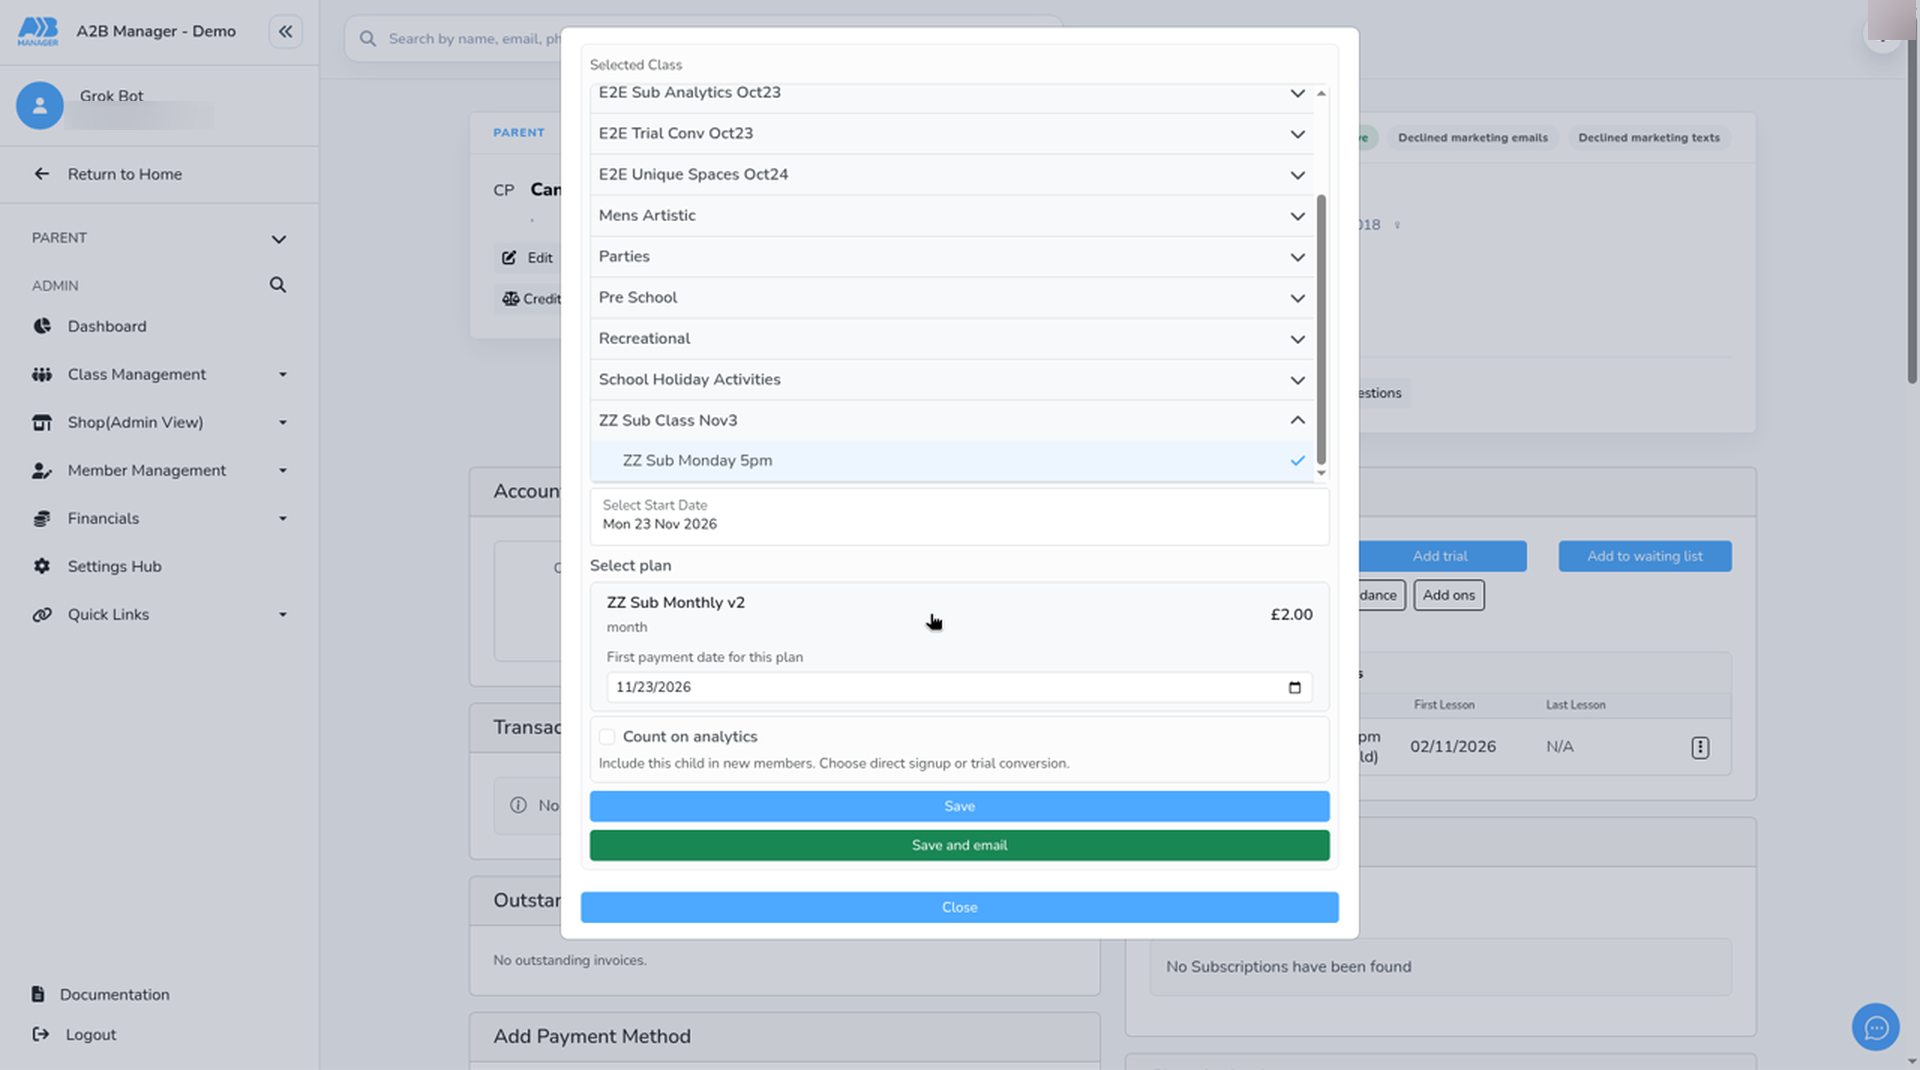
- When you add a member to the class group with Add to Class, choose a start date. Select plan then offers the group’s linked product, with a First payment date for this plan.
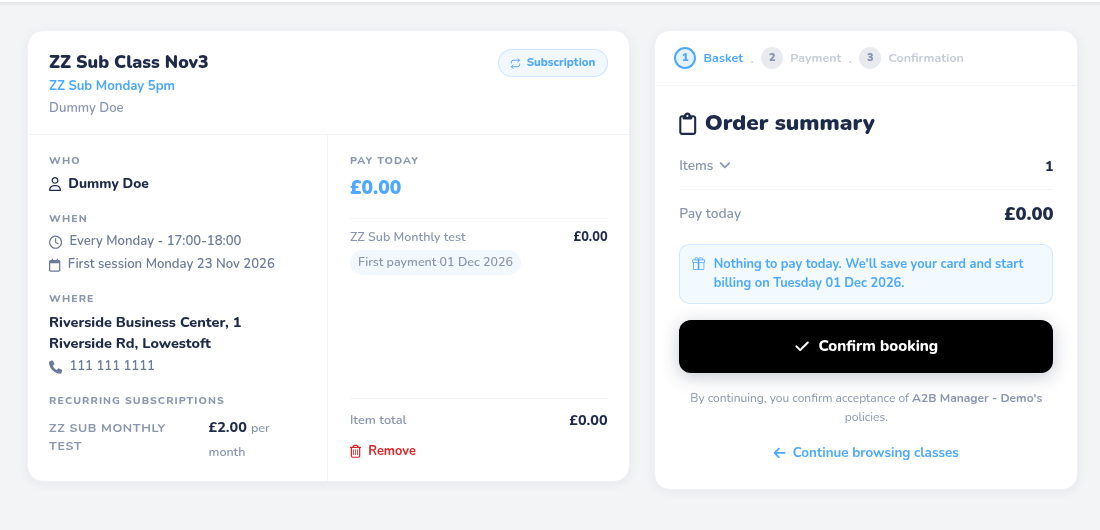
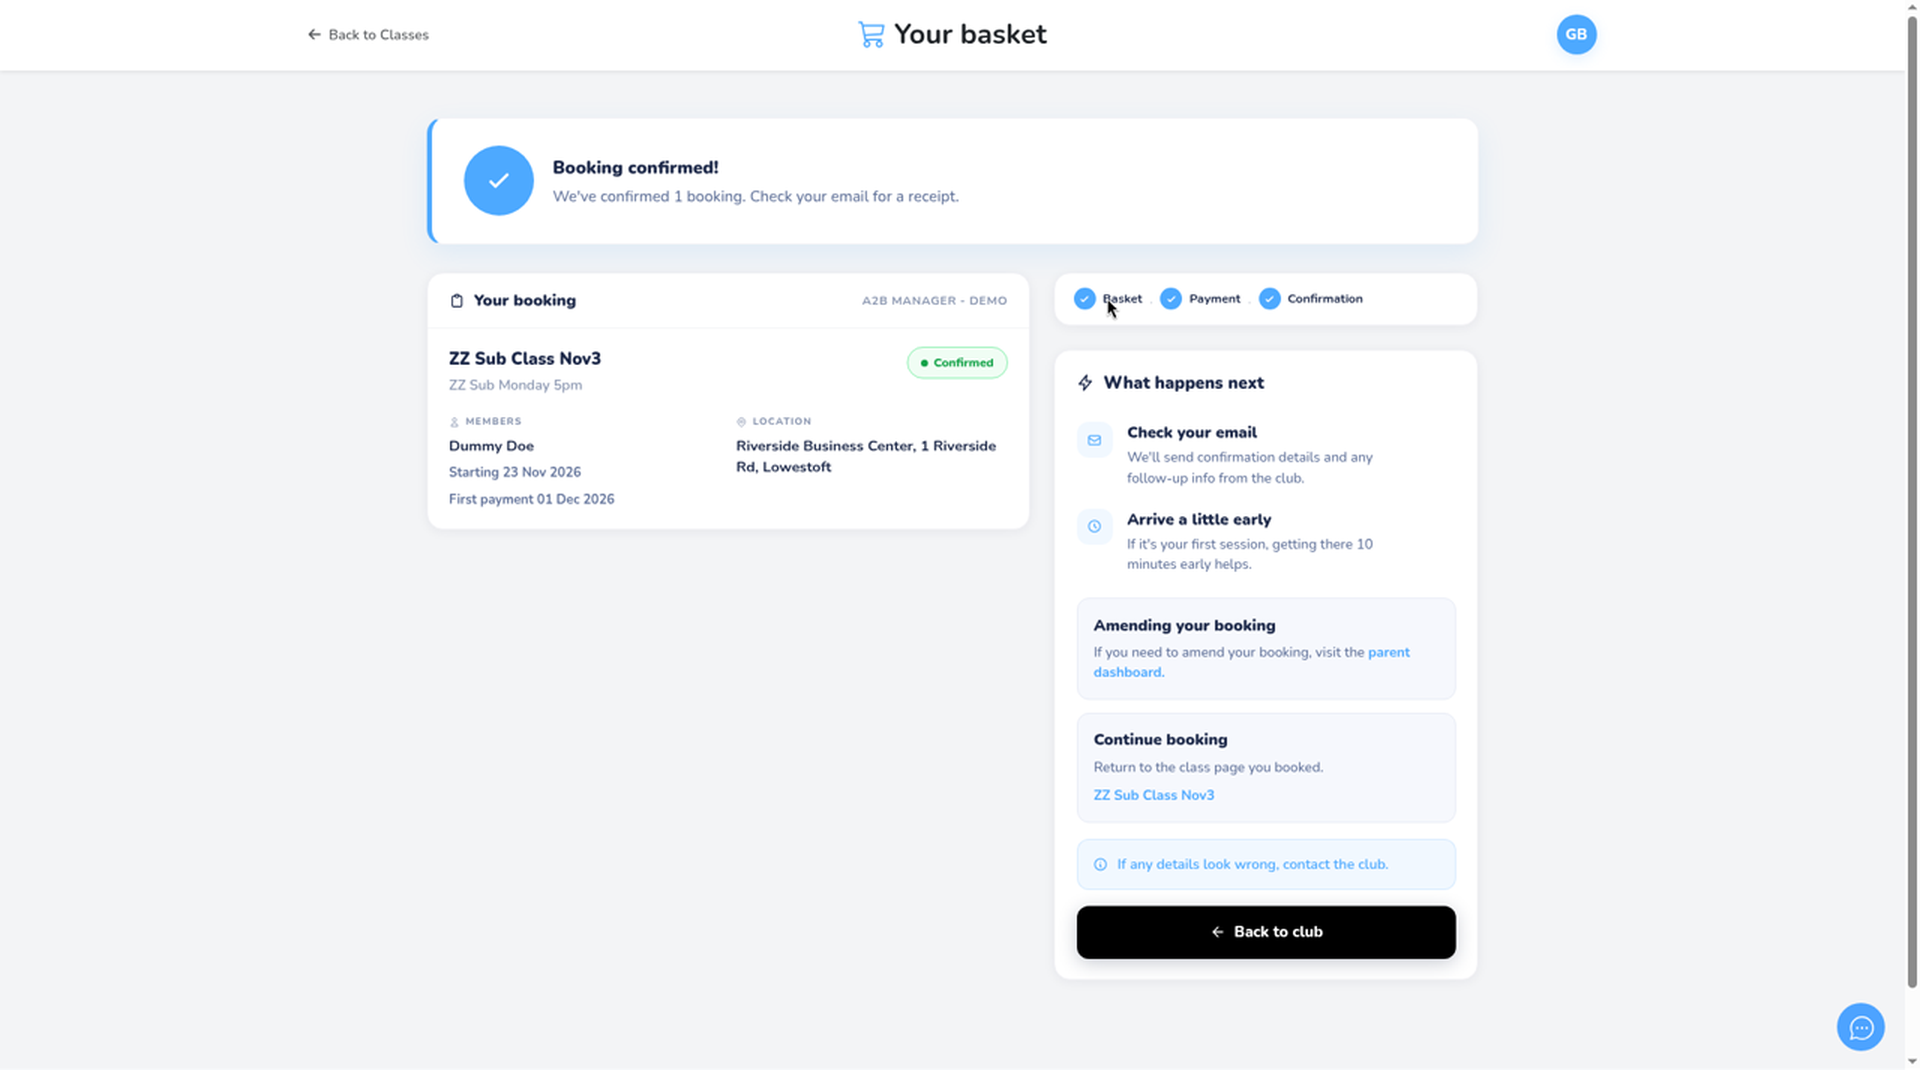
- When a parent books the group, their child is put on the linked subscription.
- With No Upfront payment, the basket shows Pay today £0.00. Billing starts on the first payment date shown.
Good to know #
- Always pick a plan in Select subscription plan before you save a linked subscription. If you leave it blank, Add to Class may not offer the group’s plan.
- Pence go from 0 to 99. After saving, always check the new product’s price in the list.
- Archive only appears on a product nobody is subscribed to. You can’t edit or delete a product on this page.
- Saving a product doesn’t charge anyone.
- Discounts are on the Coupons tab of Stripe Products.
Tip: Give products clear names with the price period, such as Junior Gym Monthly. You’ll see the name when you link it to a group and when you add it to a member.


